6: Prepare for Testing
We’ll cover the last few steps that will get you ready to test your mission.
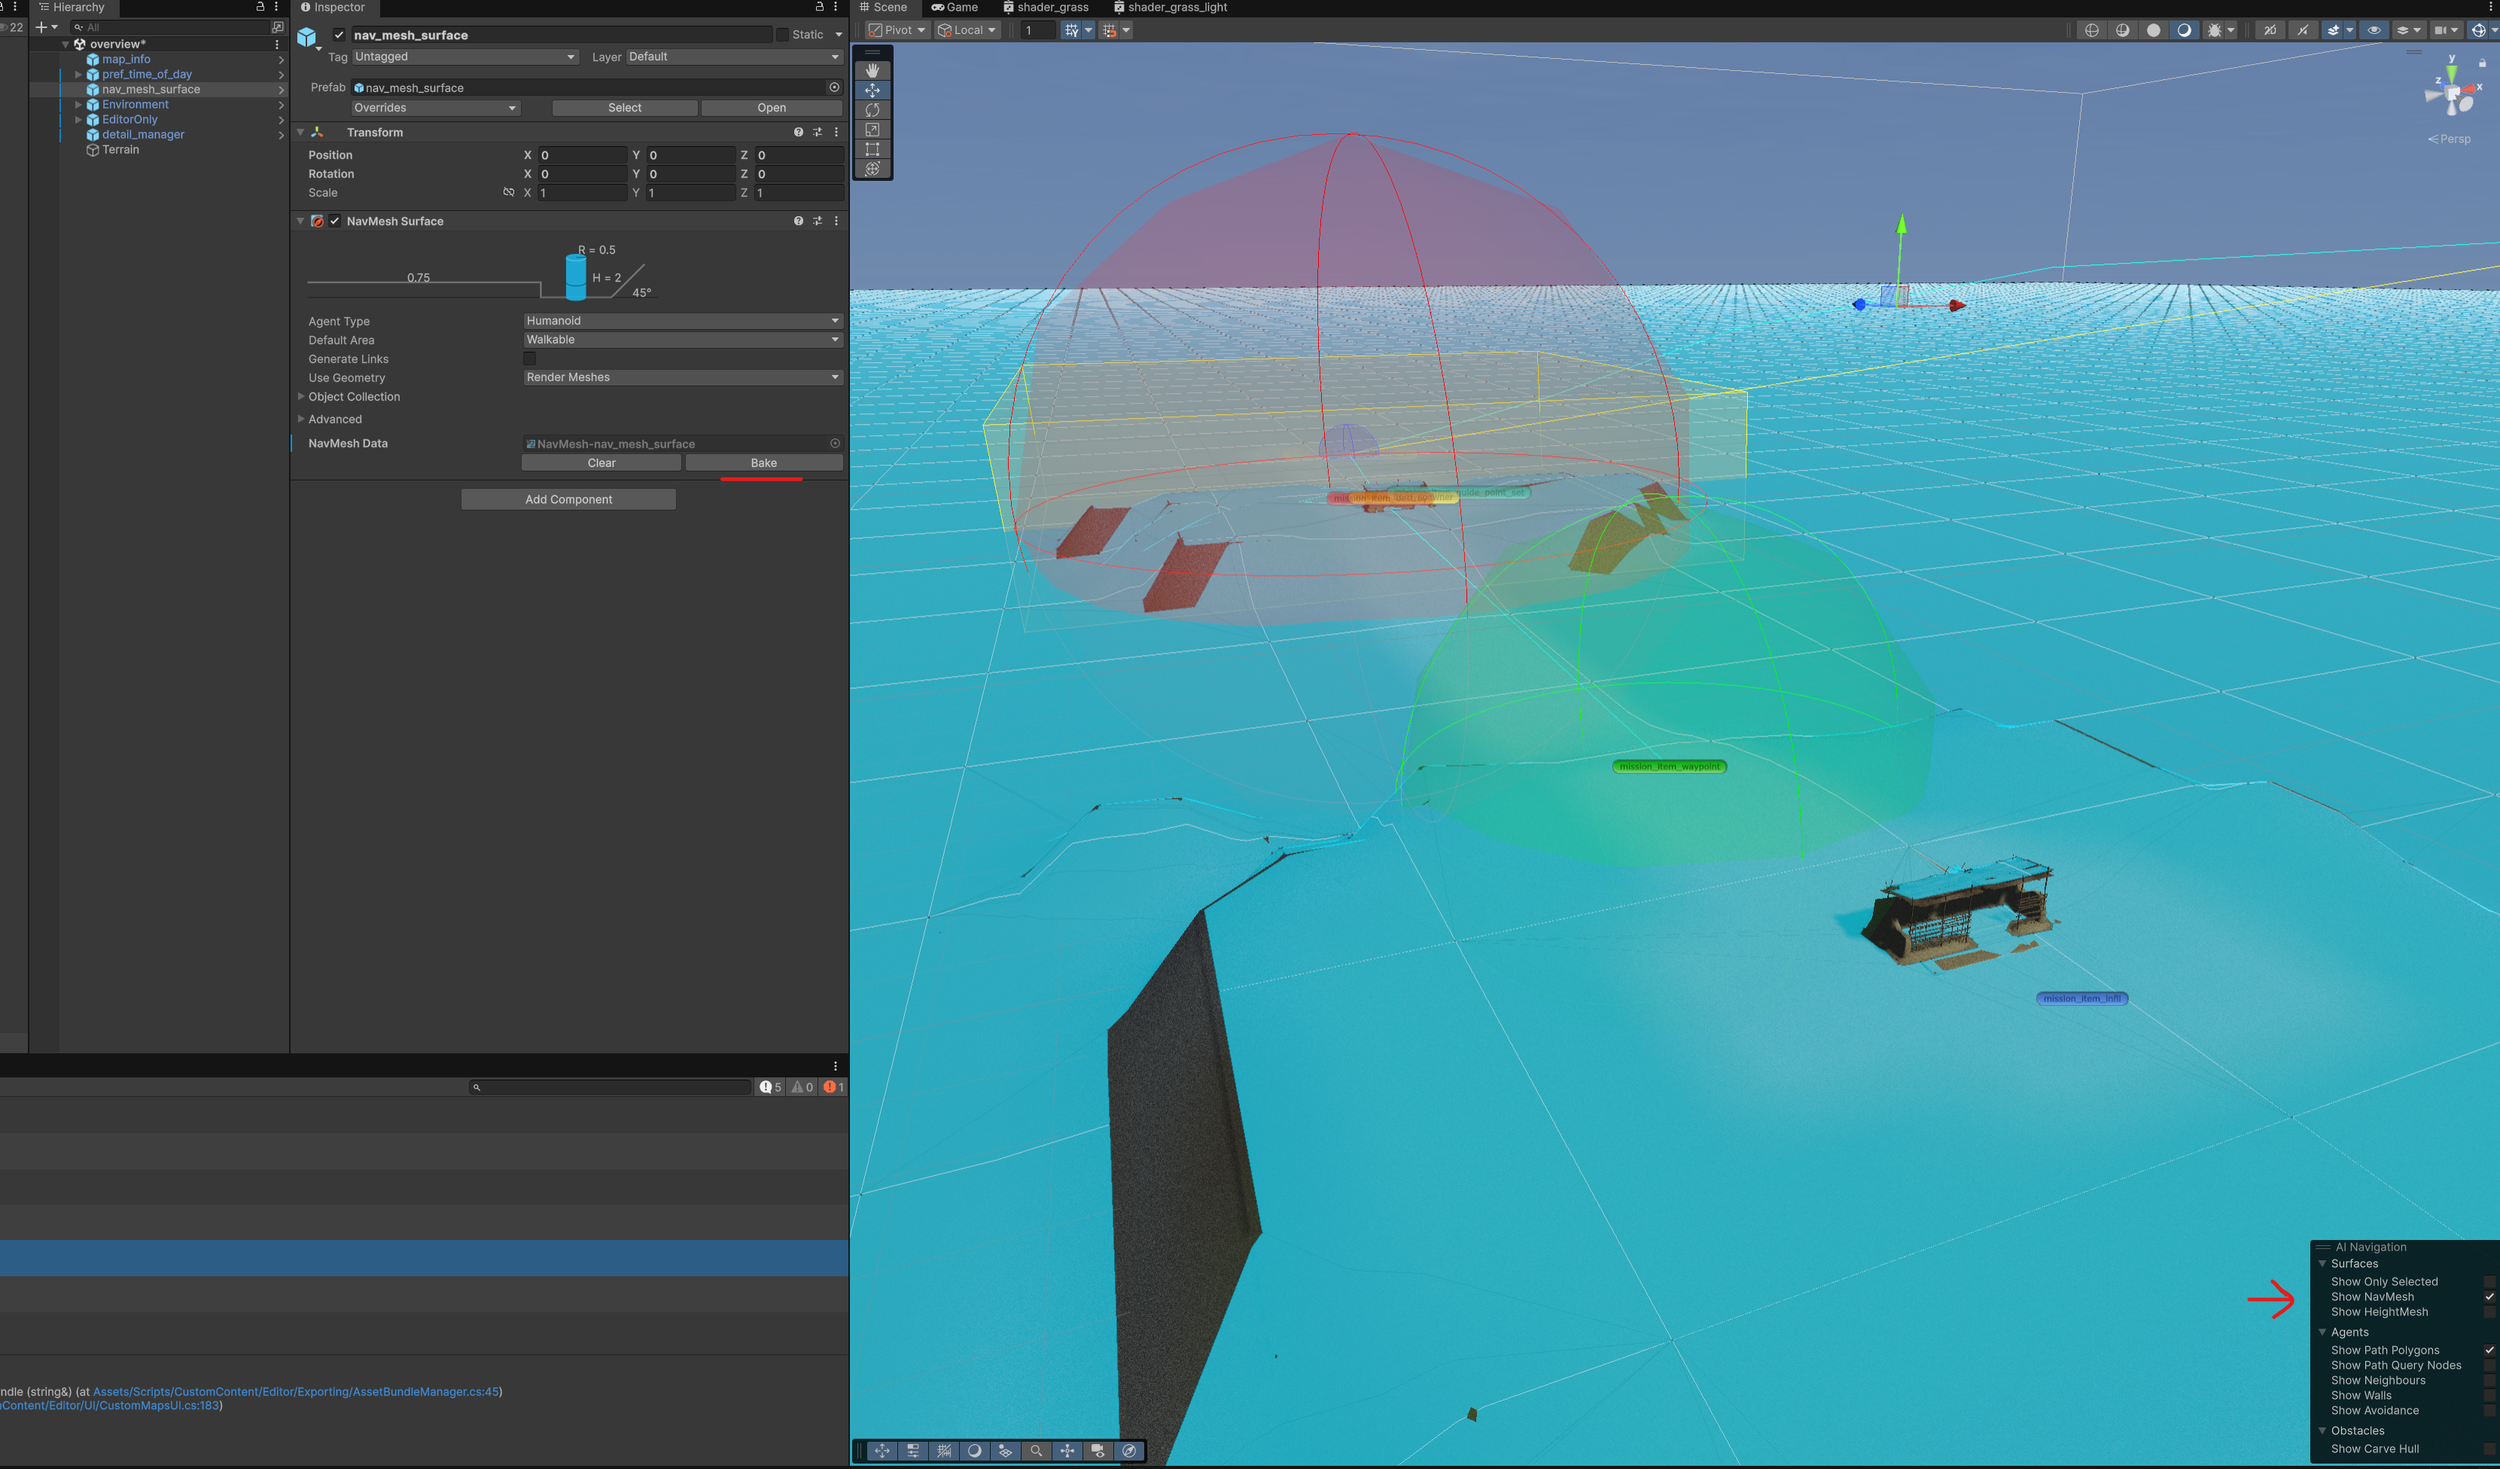
1: Select the “nav_mesh_surface” and click “Bake”.
This may take a few minutes on larger or more complex maps. You can view the results by making sure the “Show NavMesh” Toggle is on.
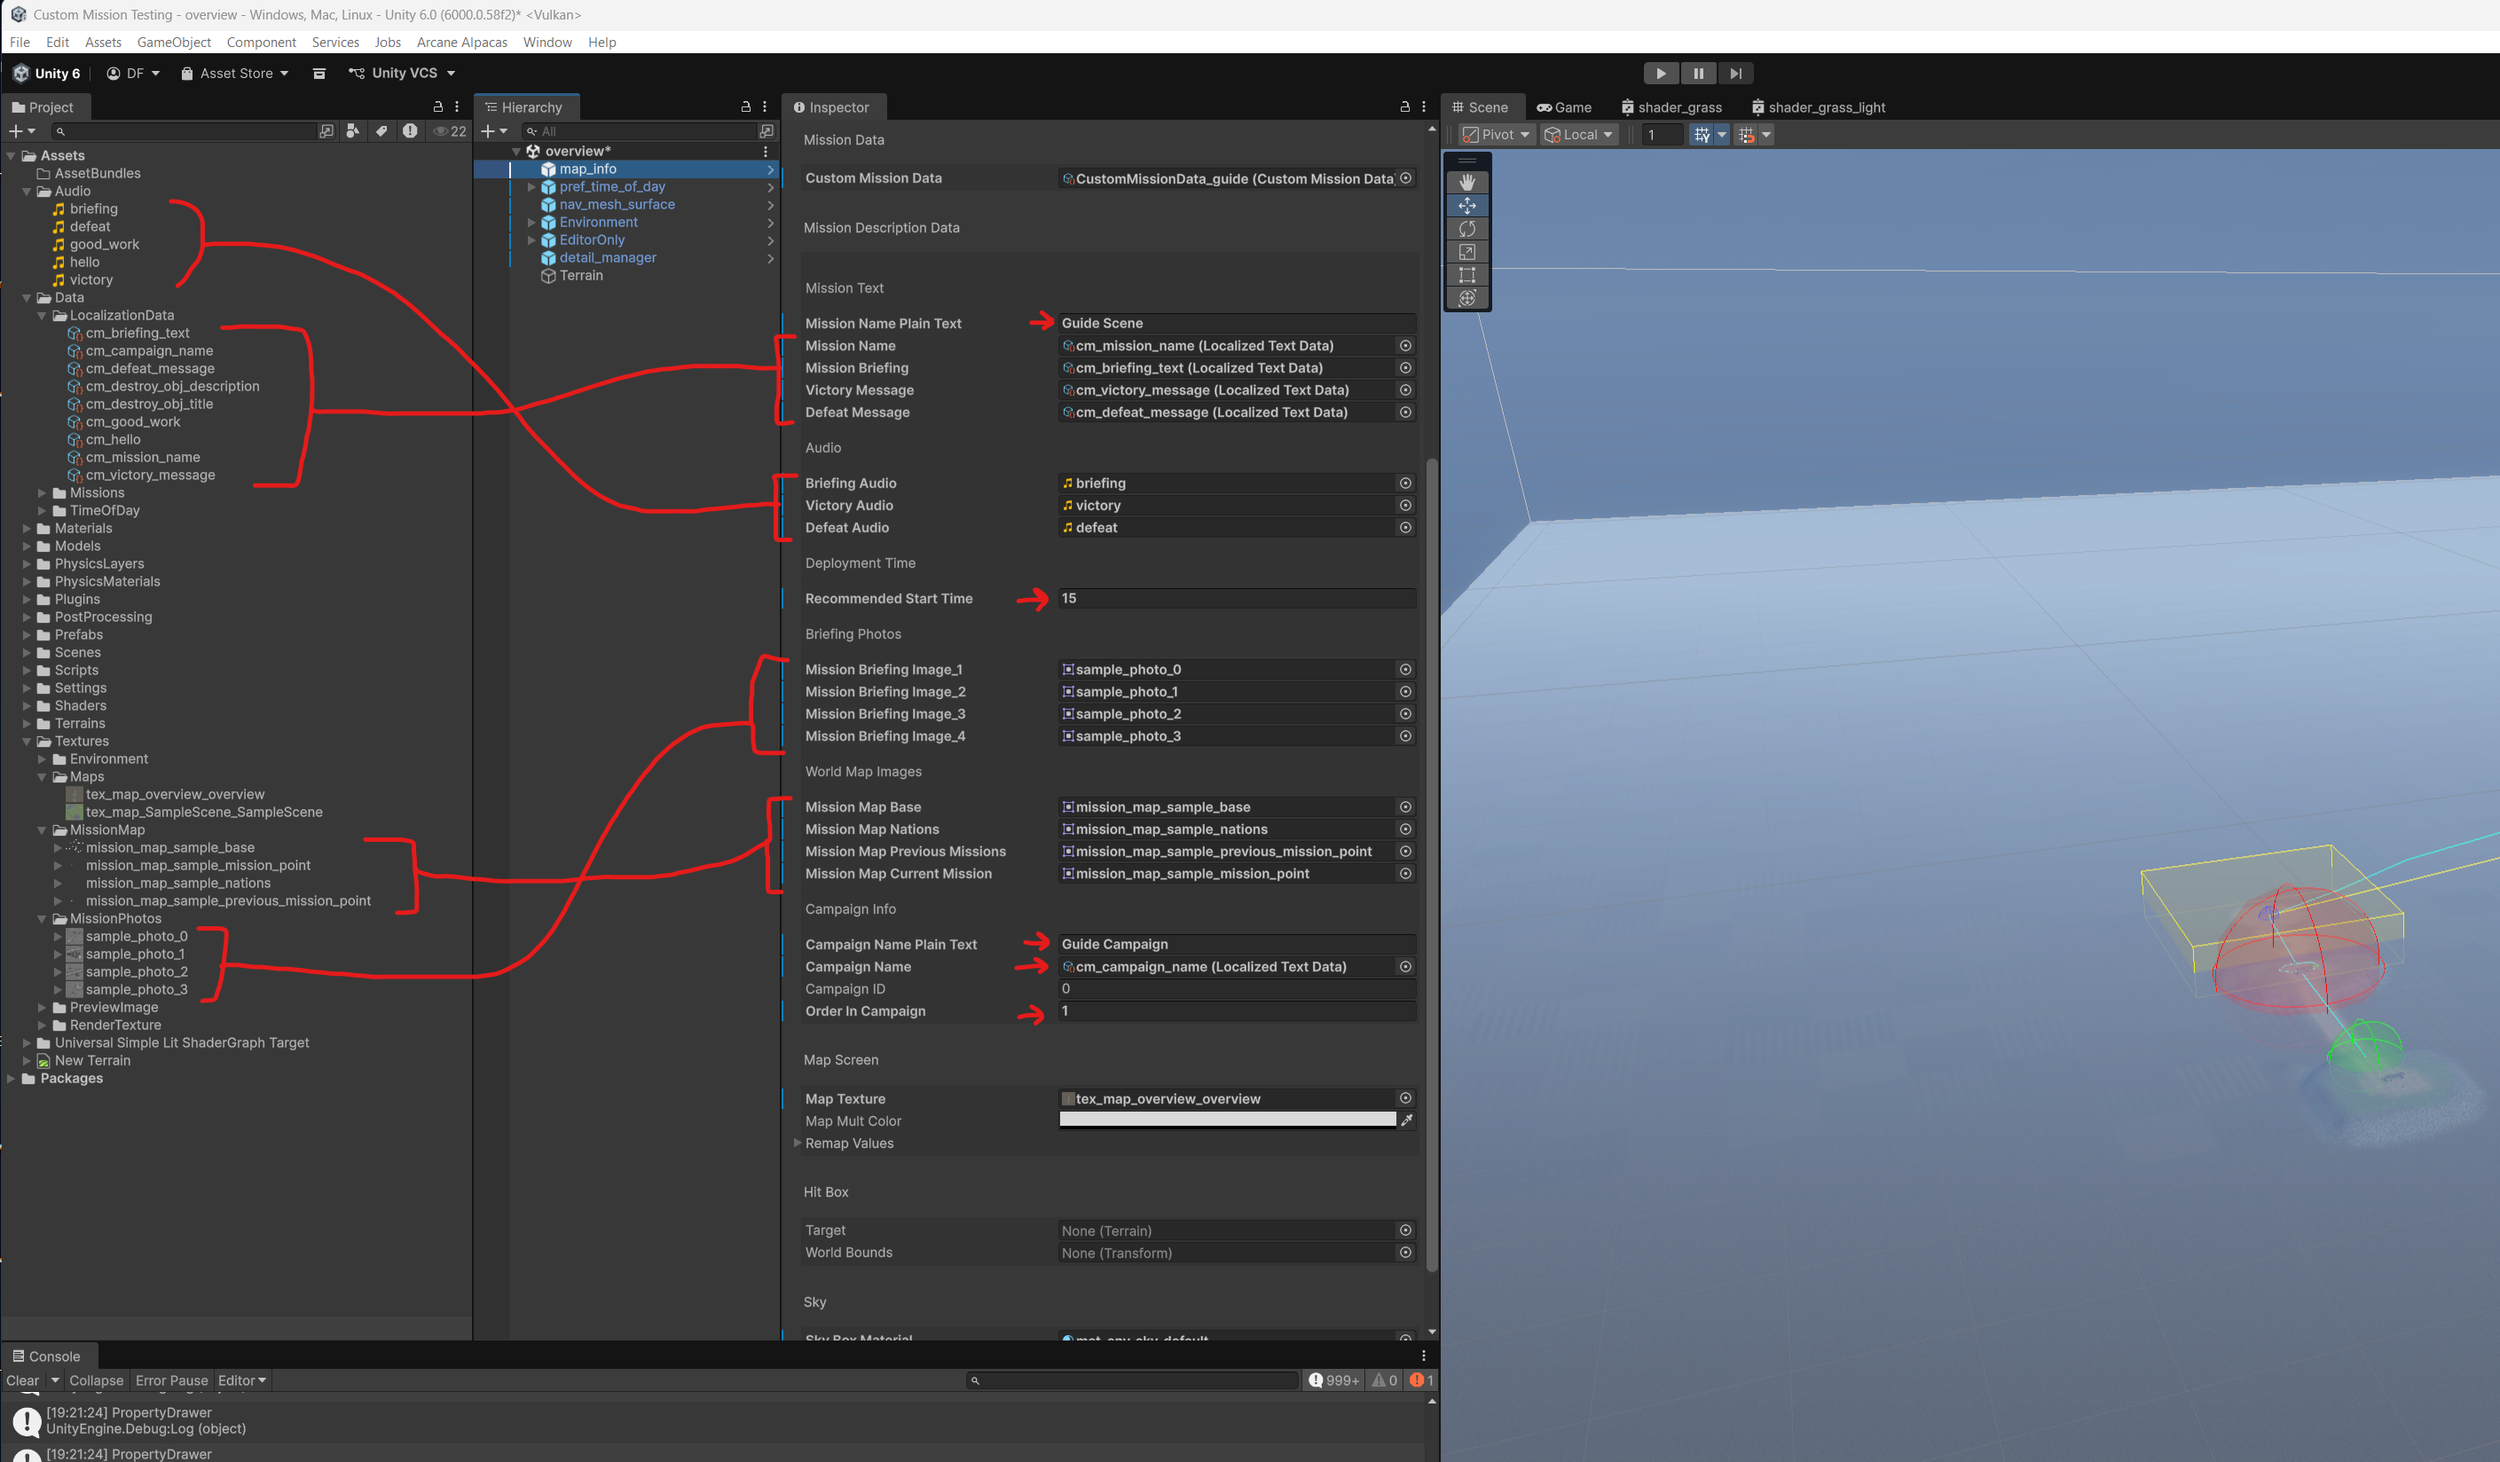
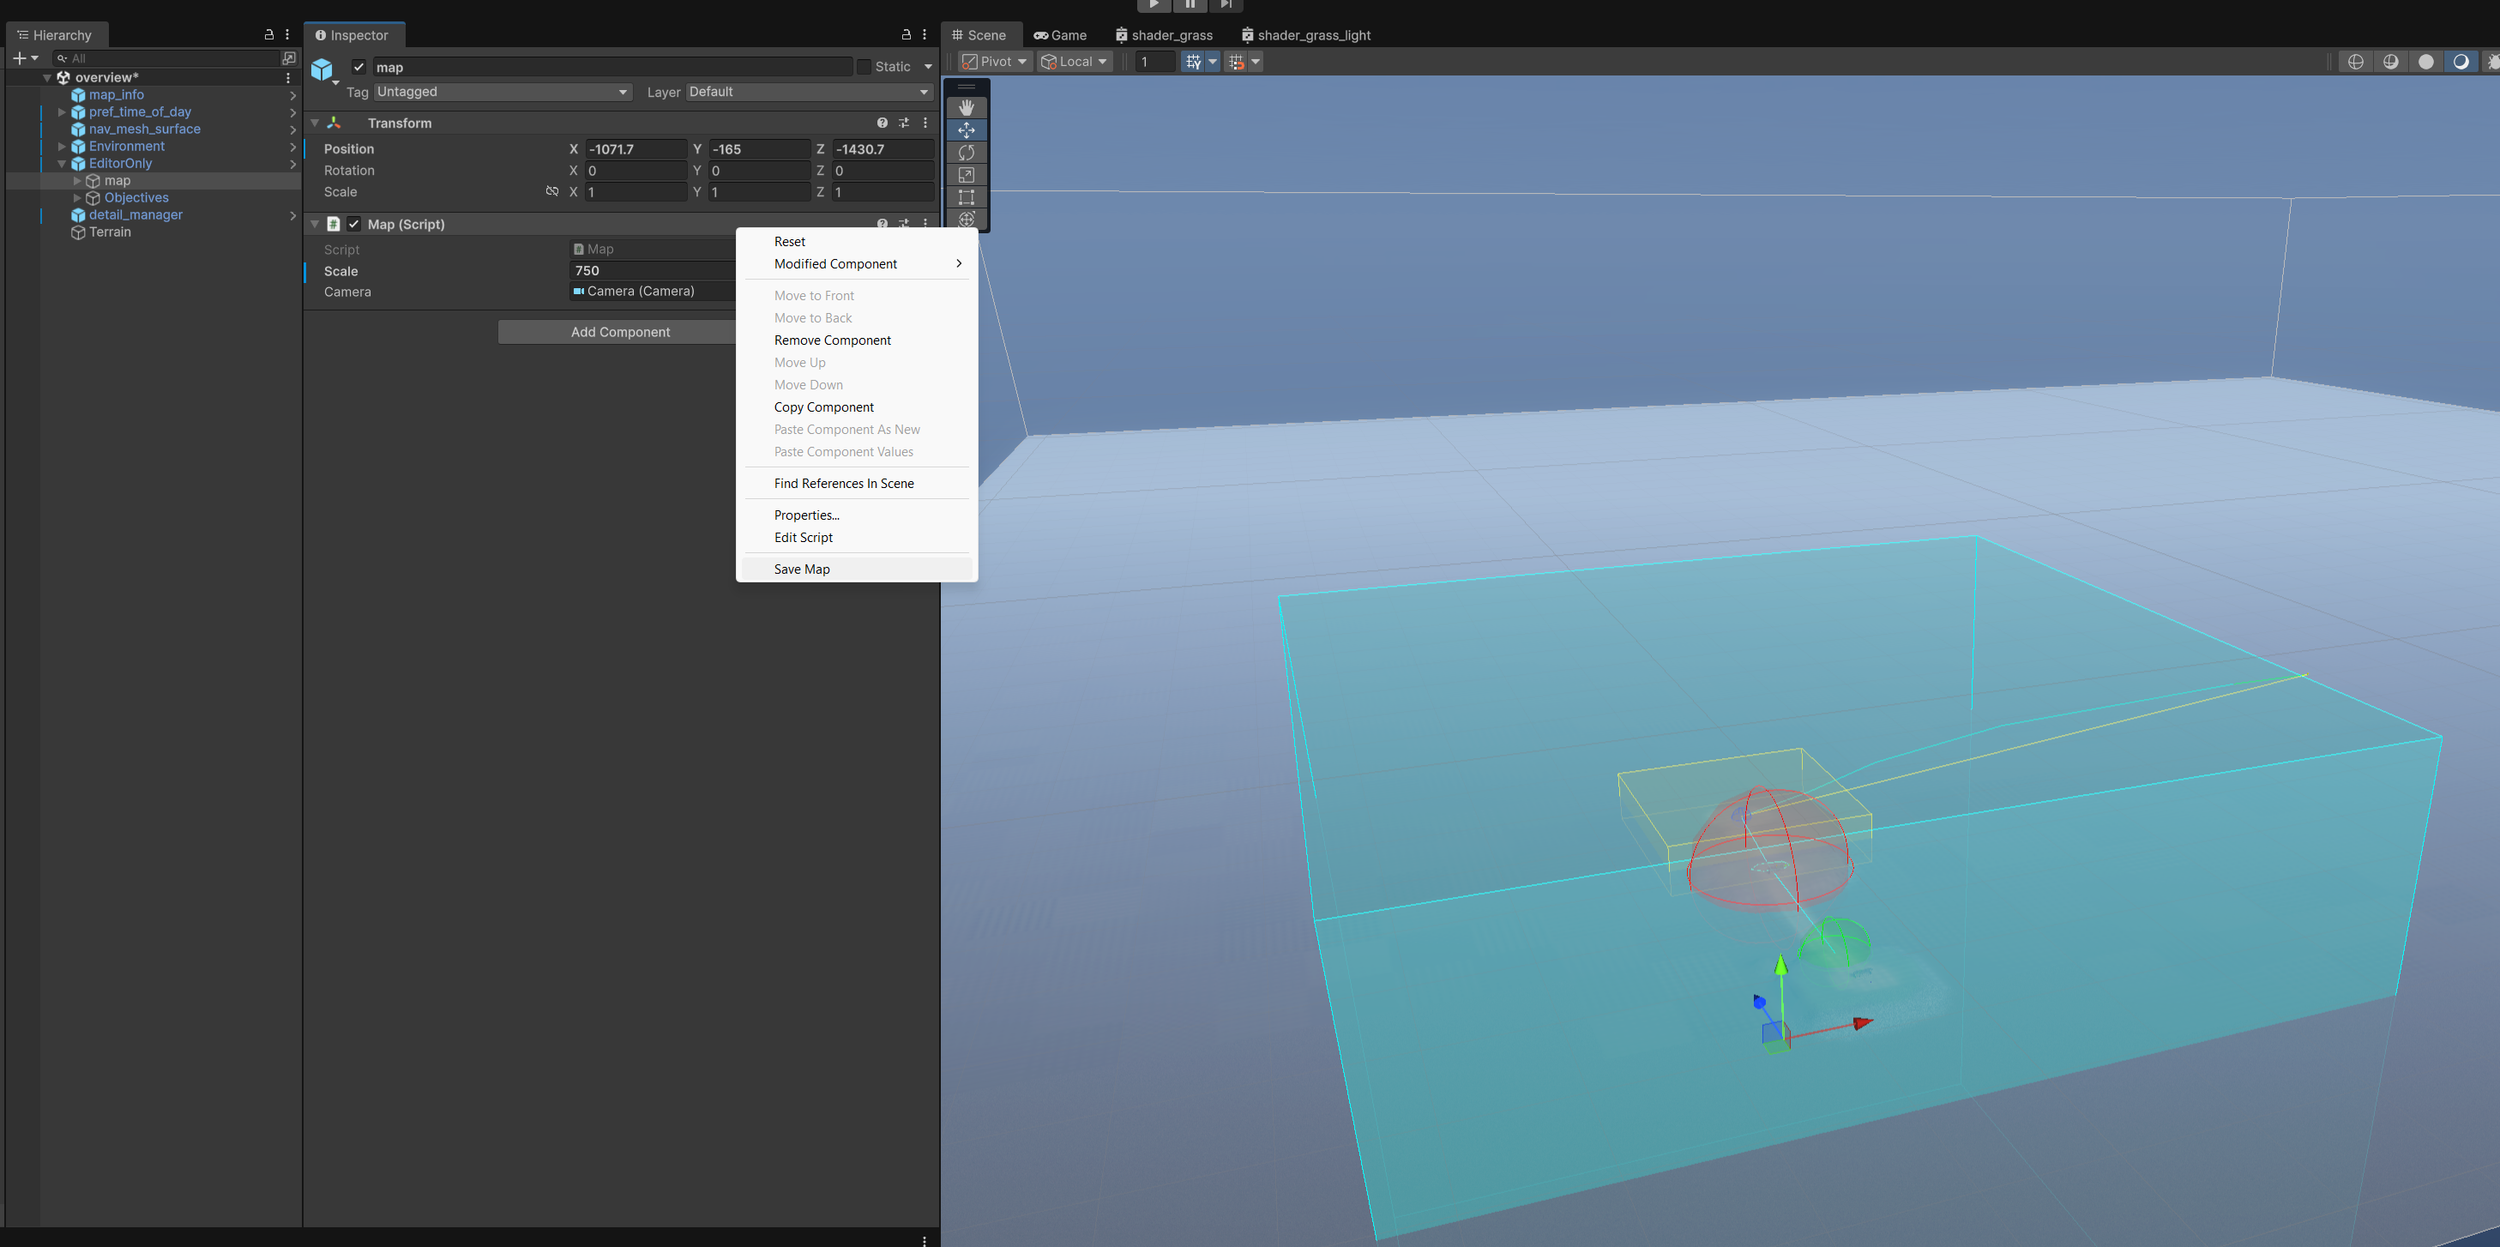
2: Position and bake the map image.
You can change the size of the map by changing the “Scale” value. Below you can see it set to 750m.
Right click the Map and then click “Save Map”. This will also assign it to the “map_info” object for you.
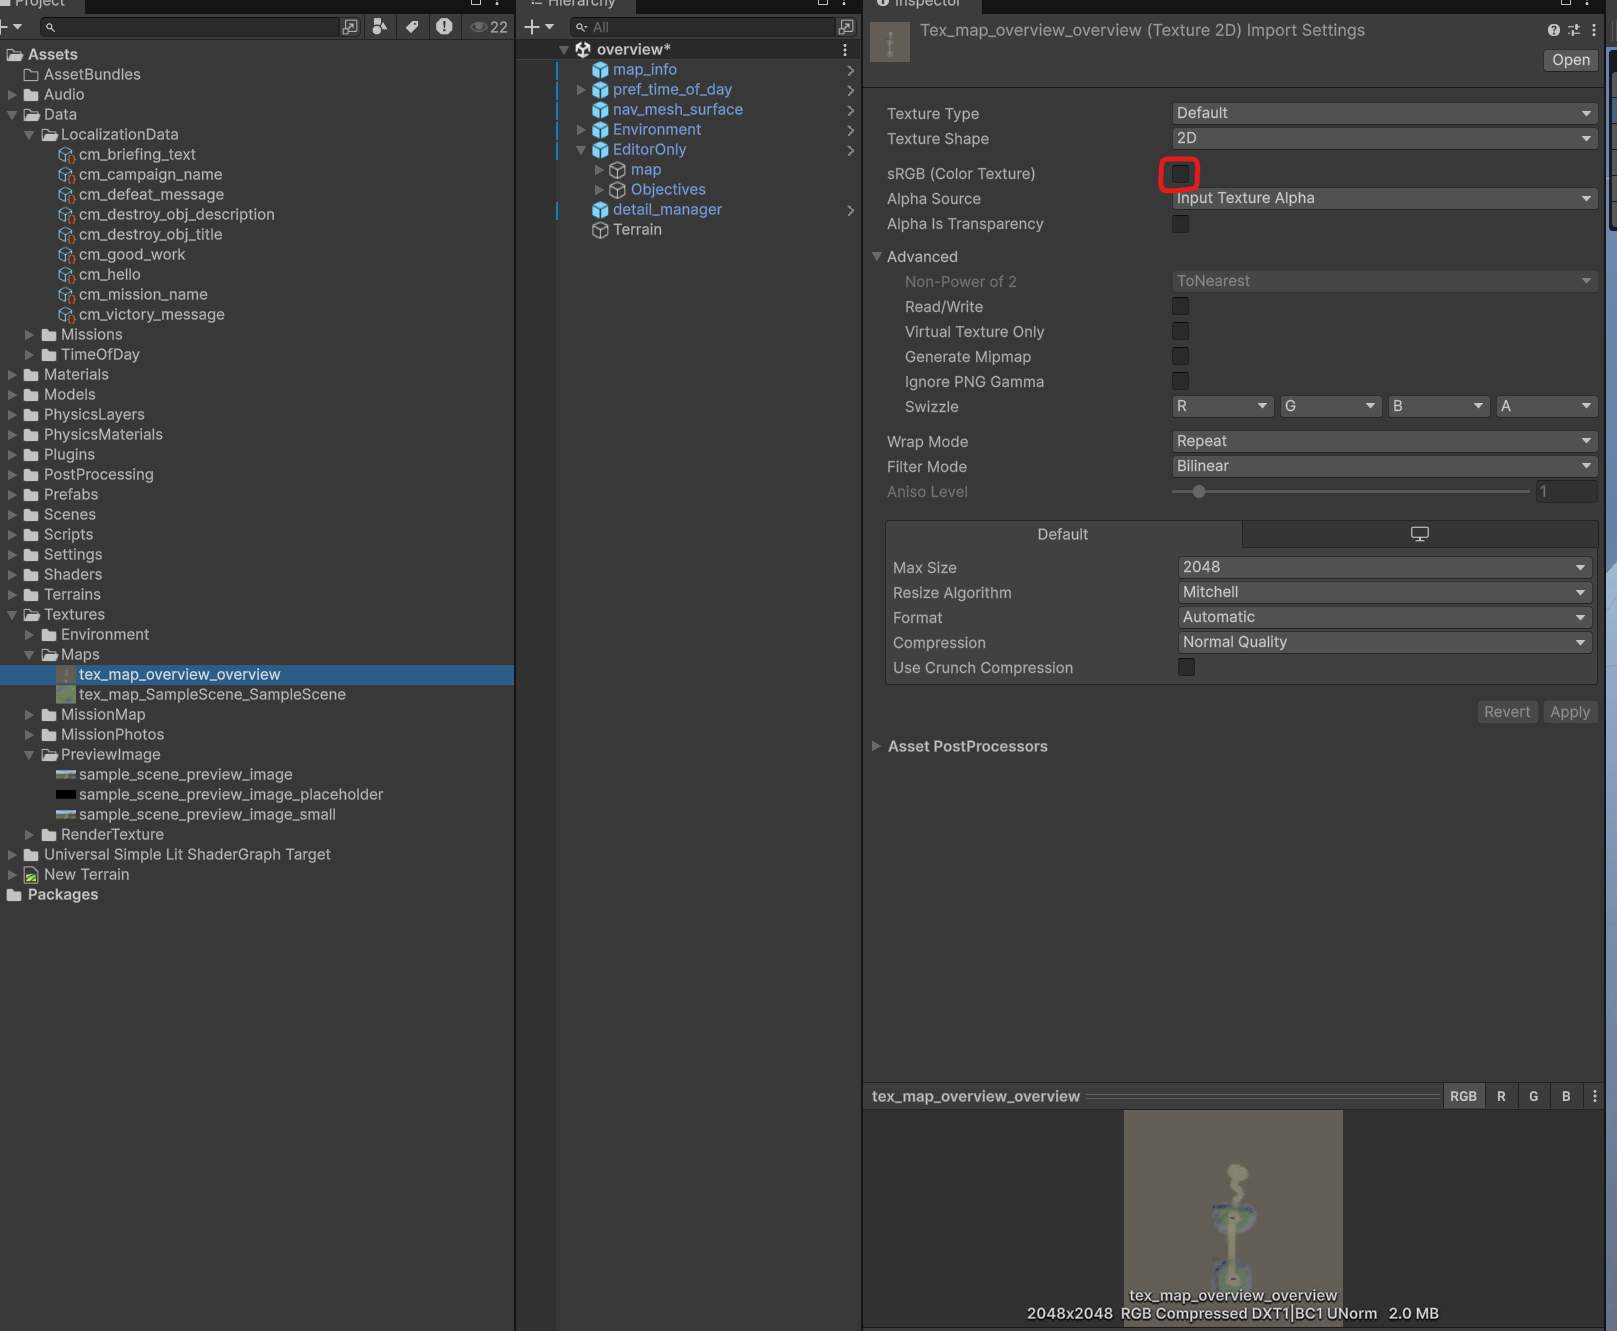
If the map is too dark you can select the map image and disable “sRGB (Color Texture)”
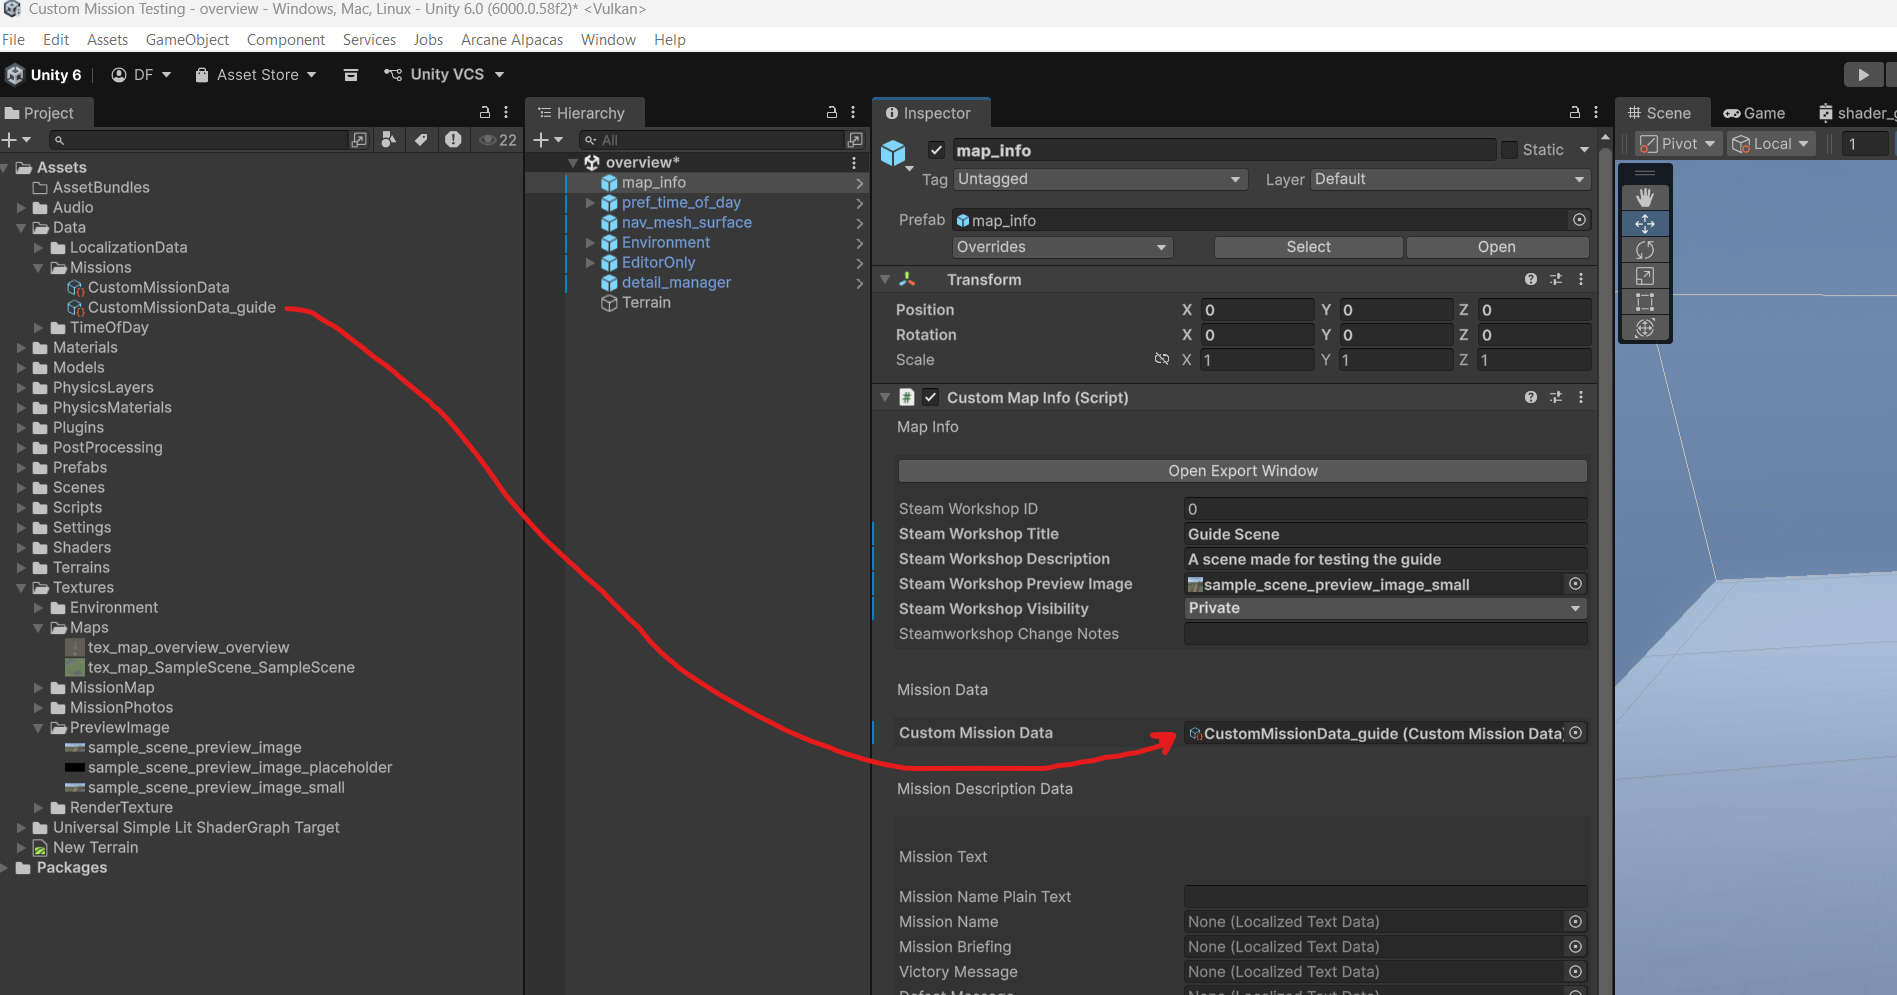
4: Assign the mission Data. We’ll go over how to create these assets later in the Guide.
For now we’ll use the assets from the sample mission.
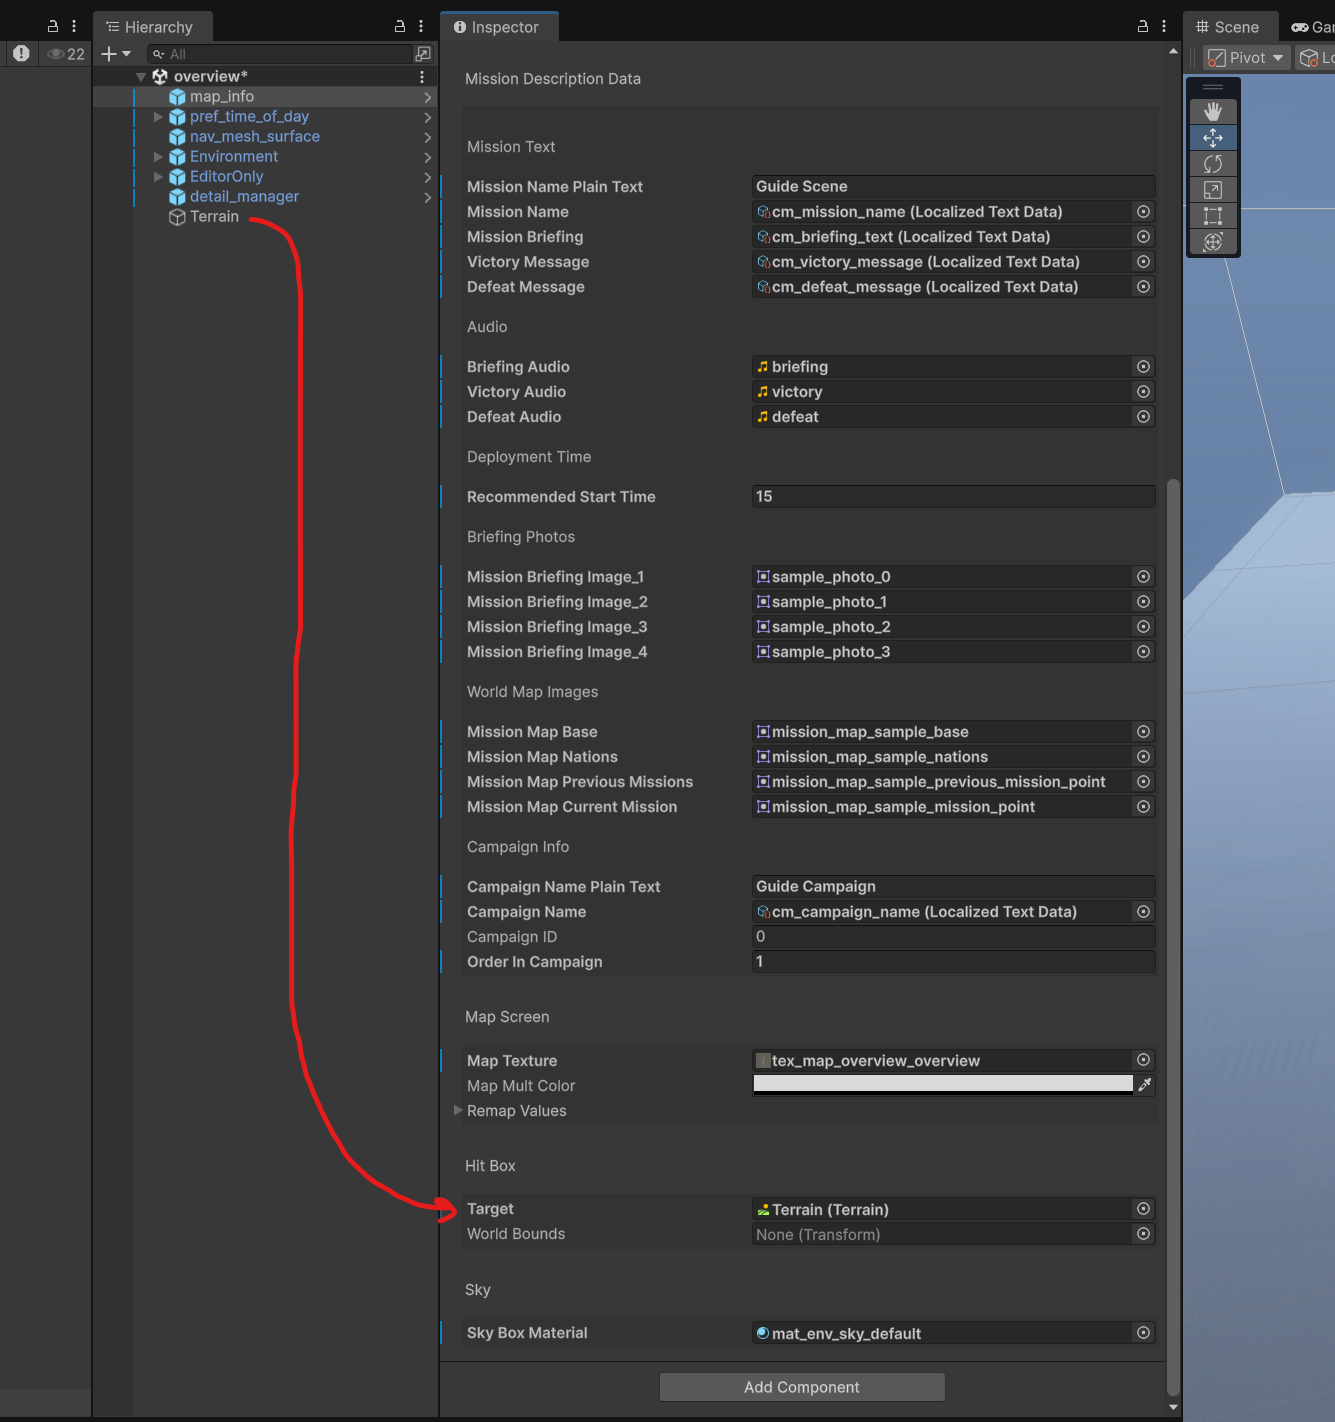
5: Finally, assign the terrain to the Hit Box Target.
You are now ready to start testing locally!
3: Set up the Mission Data Object and assign it to the “map_info” object.
You can duplicate the sample mission to make this easier. The short cut is “ctr + D”.