5: Build A Mission
Now we’ll cover the basics of building a mission. Missions are made up of a few different objects; mission items, objectives, and triggers. All are hooked up in a visual way in the scene to make it a bit easier.
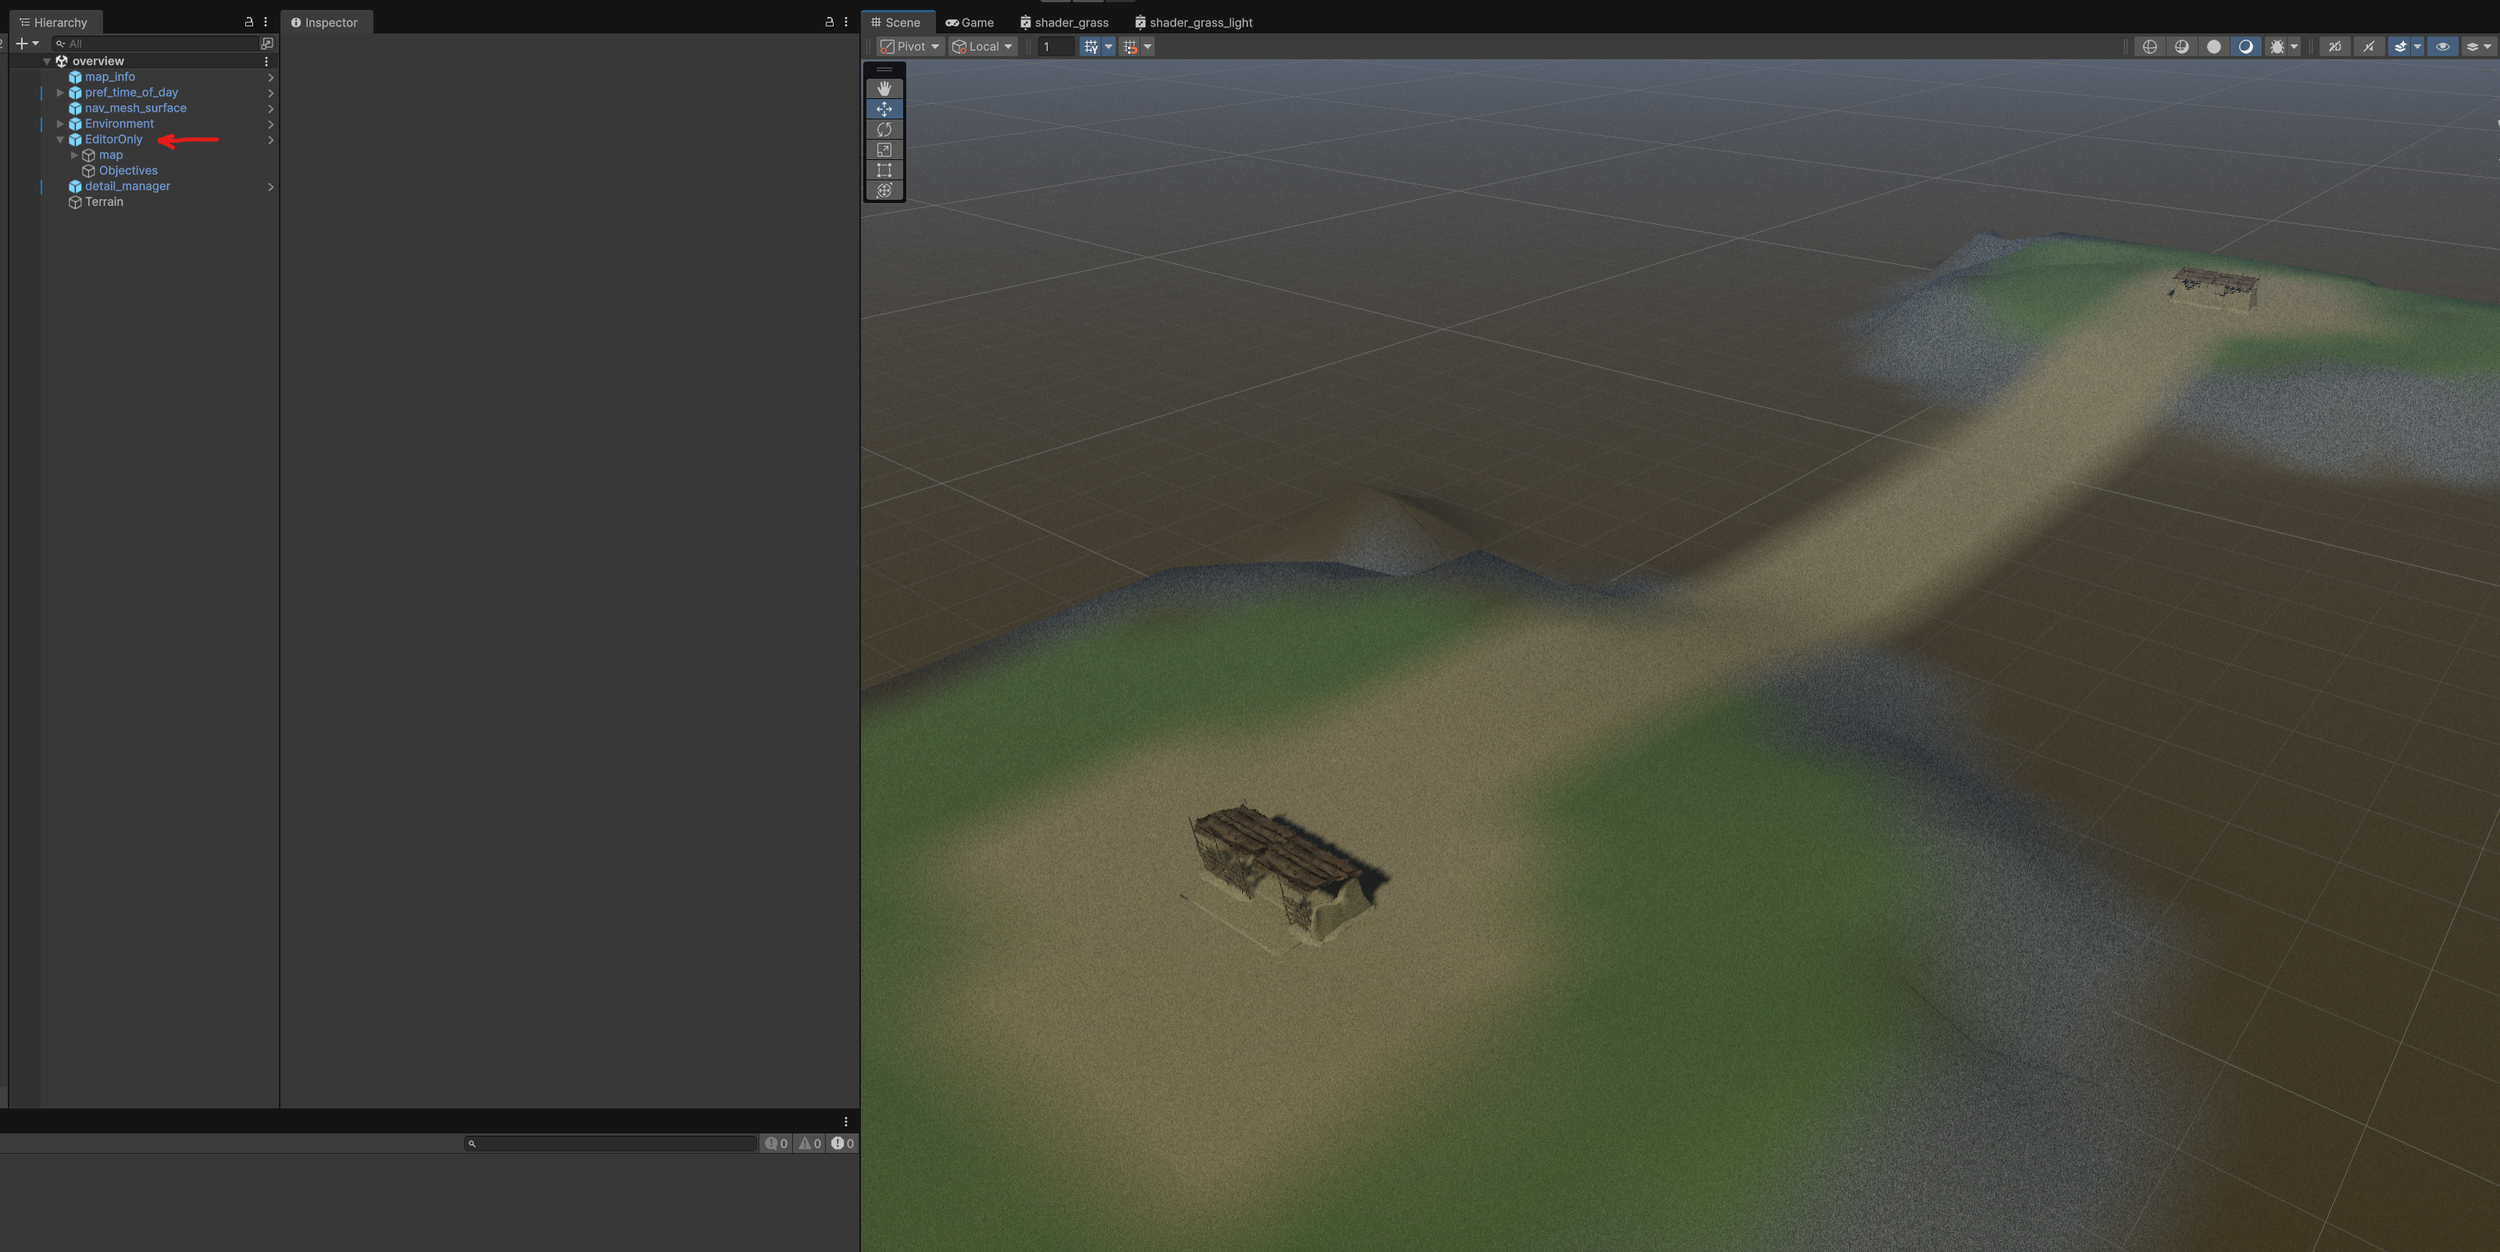
1: First open the scene you want to work on and expand the “EditorOnly” object that we placed earlier.
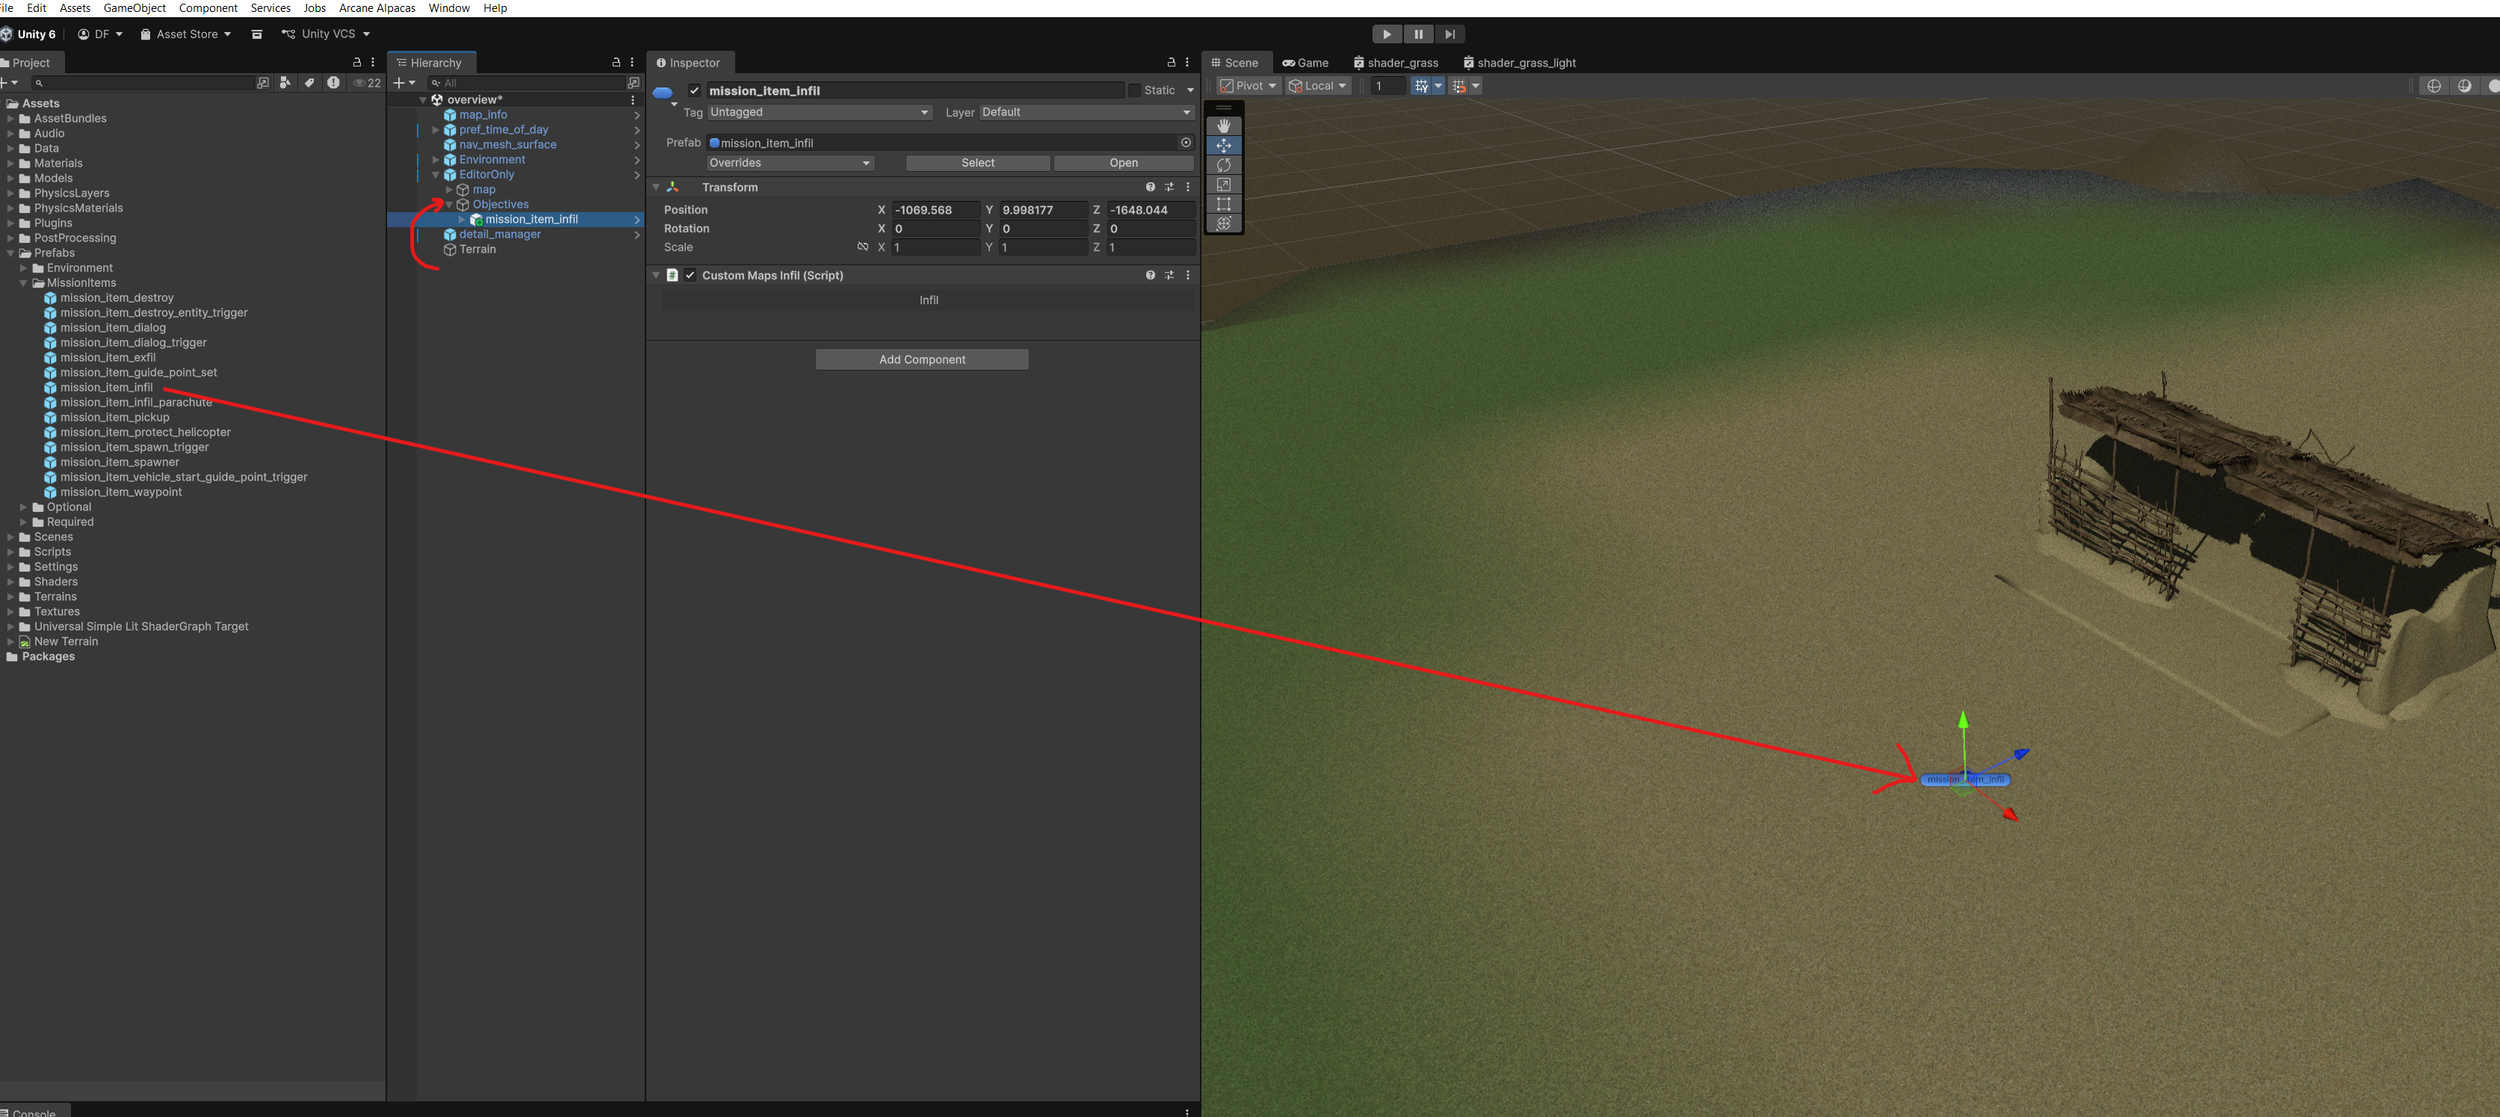
2: We’ll start by placing a player’s infil point. There are 3 ways for a player to start a mission; infil on the ground, infil by parachute, or infil on a helicopter. We’ll use the ground infil for now.
Find the “mission_item_infil” object in the “Assets\Prefabs\MissionItems” folder. Drag it into the scene view to place it. Once you have placed it, drag it in the hierarchy to be under the “Objectives” object in “EditorOnly”.
* You can check out the sample mission for the helicopter infil setup.
3: Next we’ll place an enemy spawn point. Same as the infil point, find “mission_item_spawner” and drag it into the scene. Again parent it to the “Objectives” object.
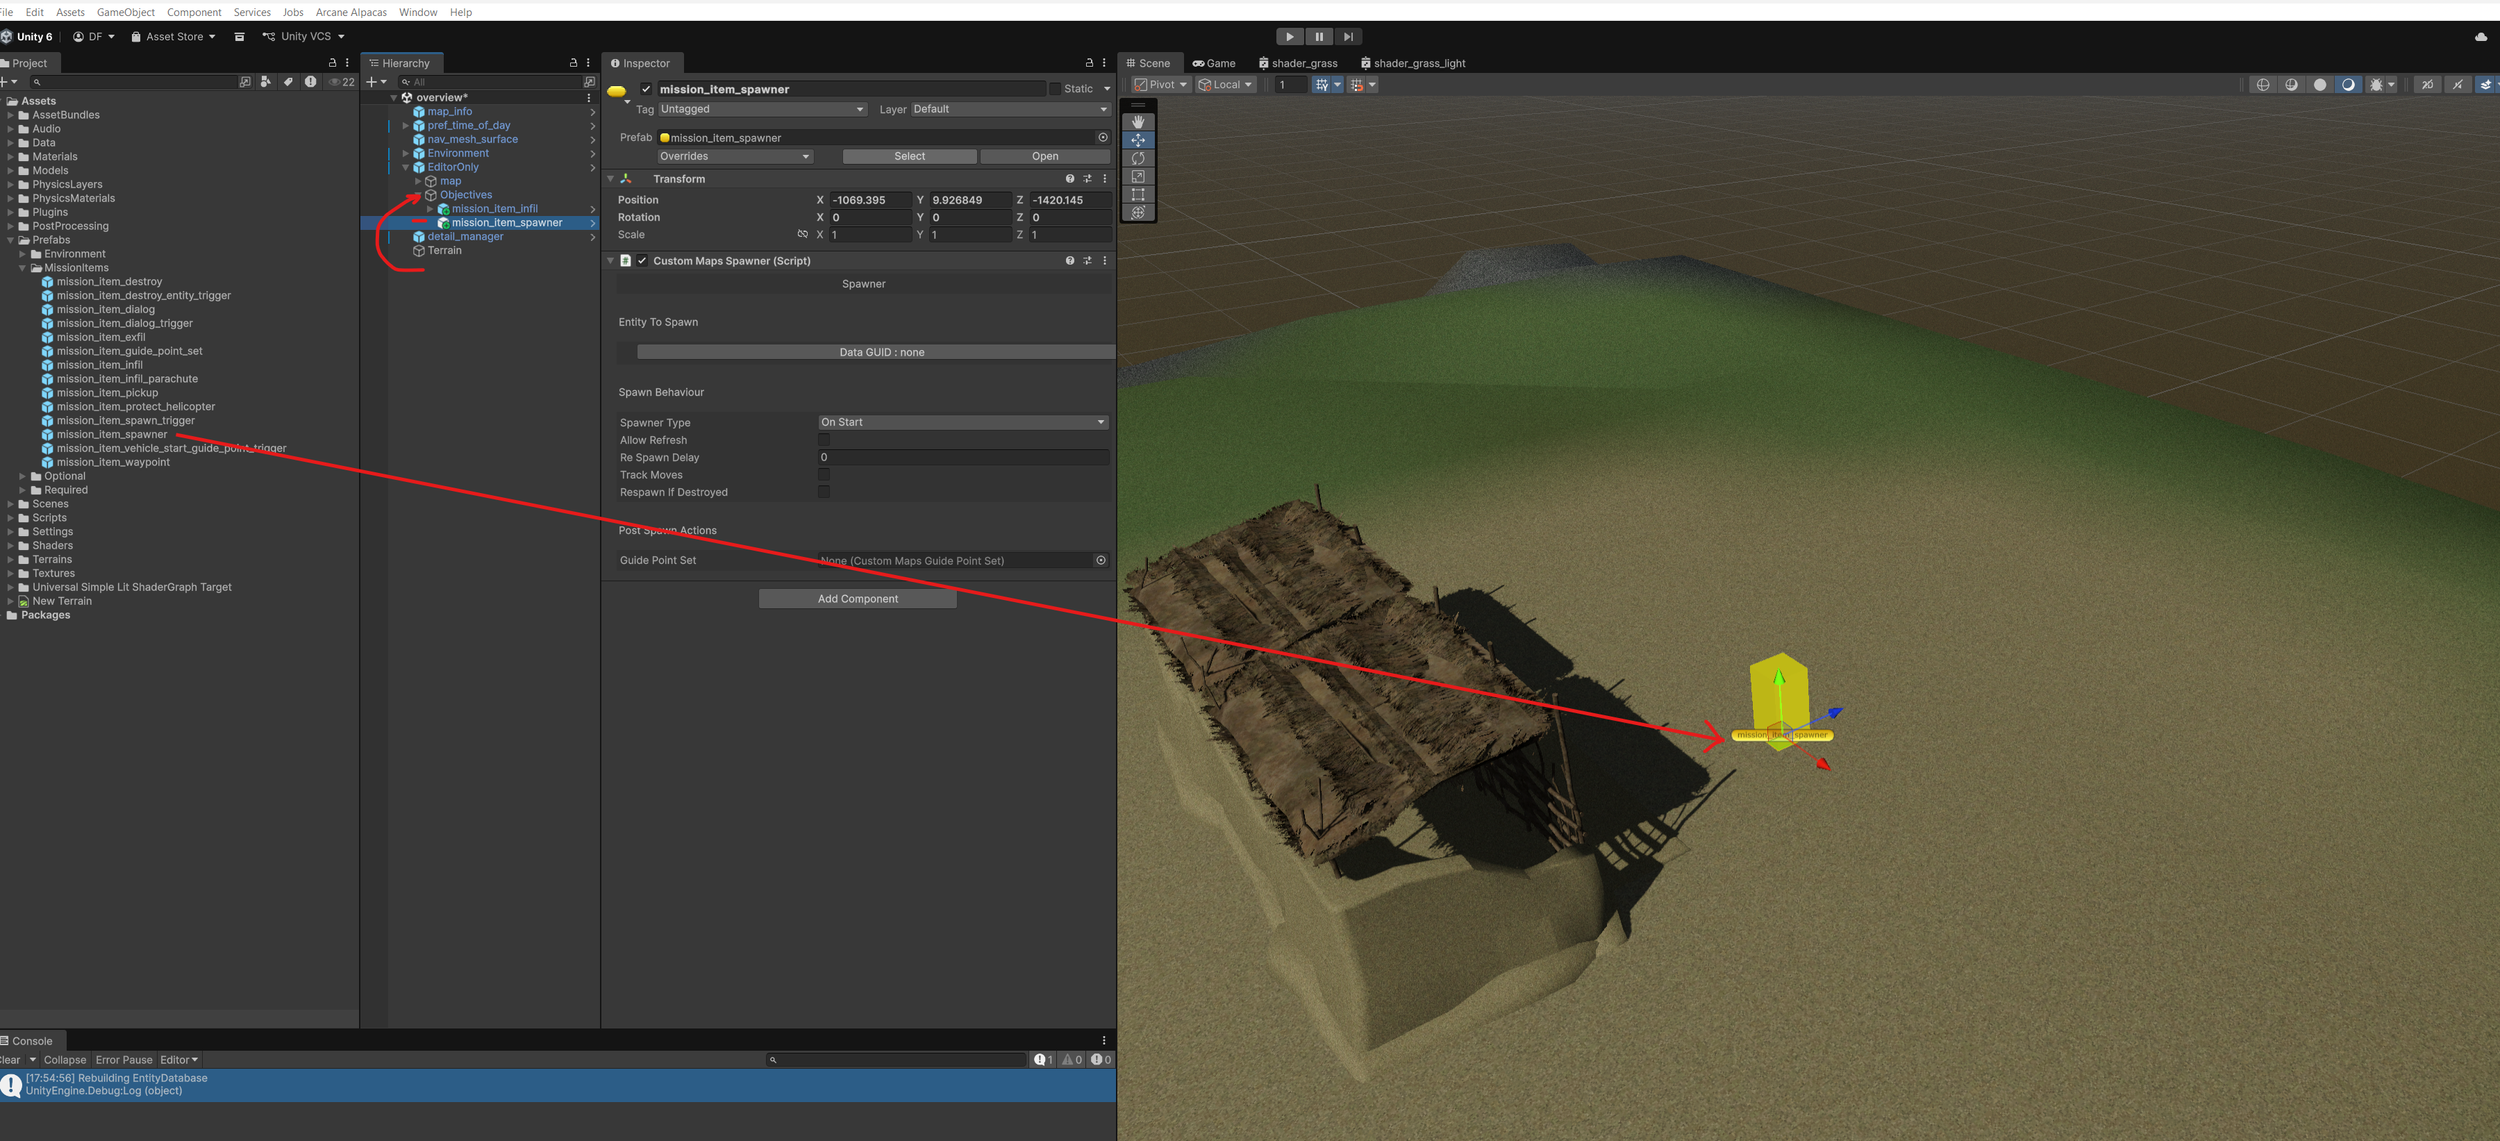
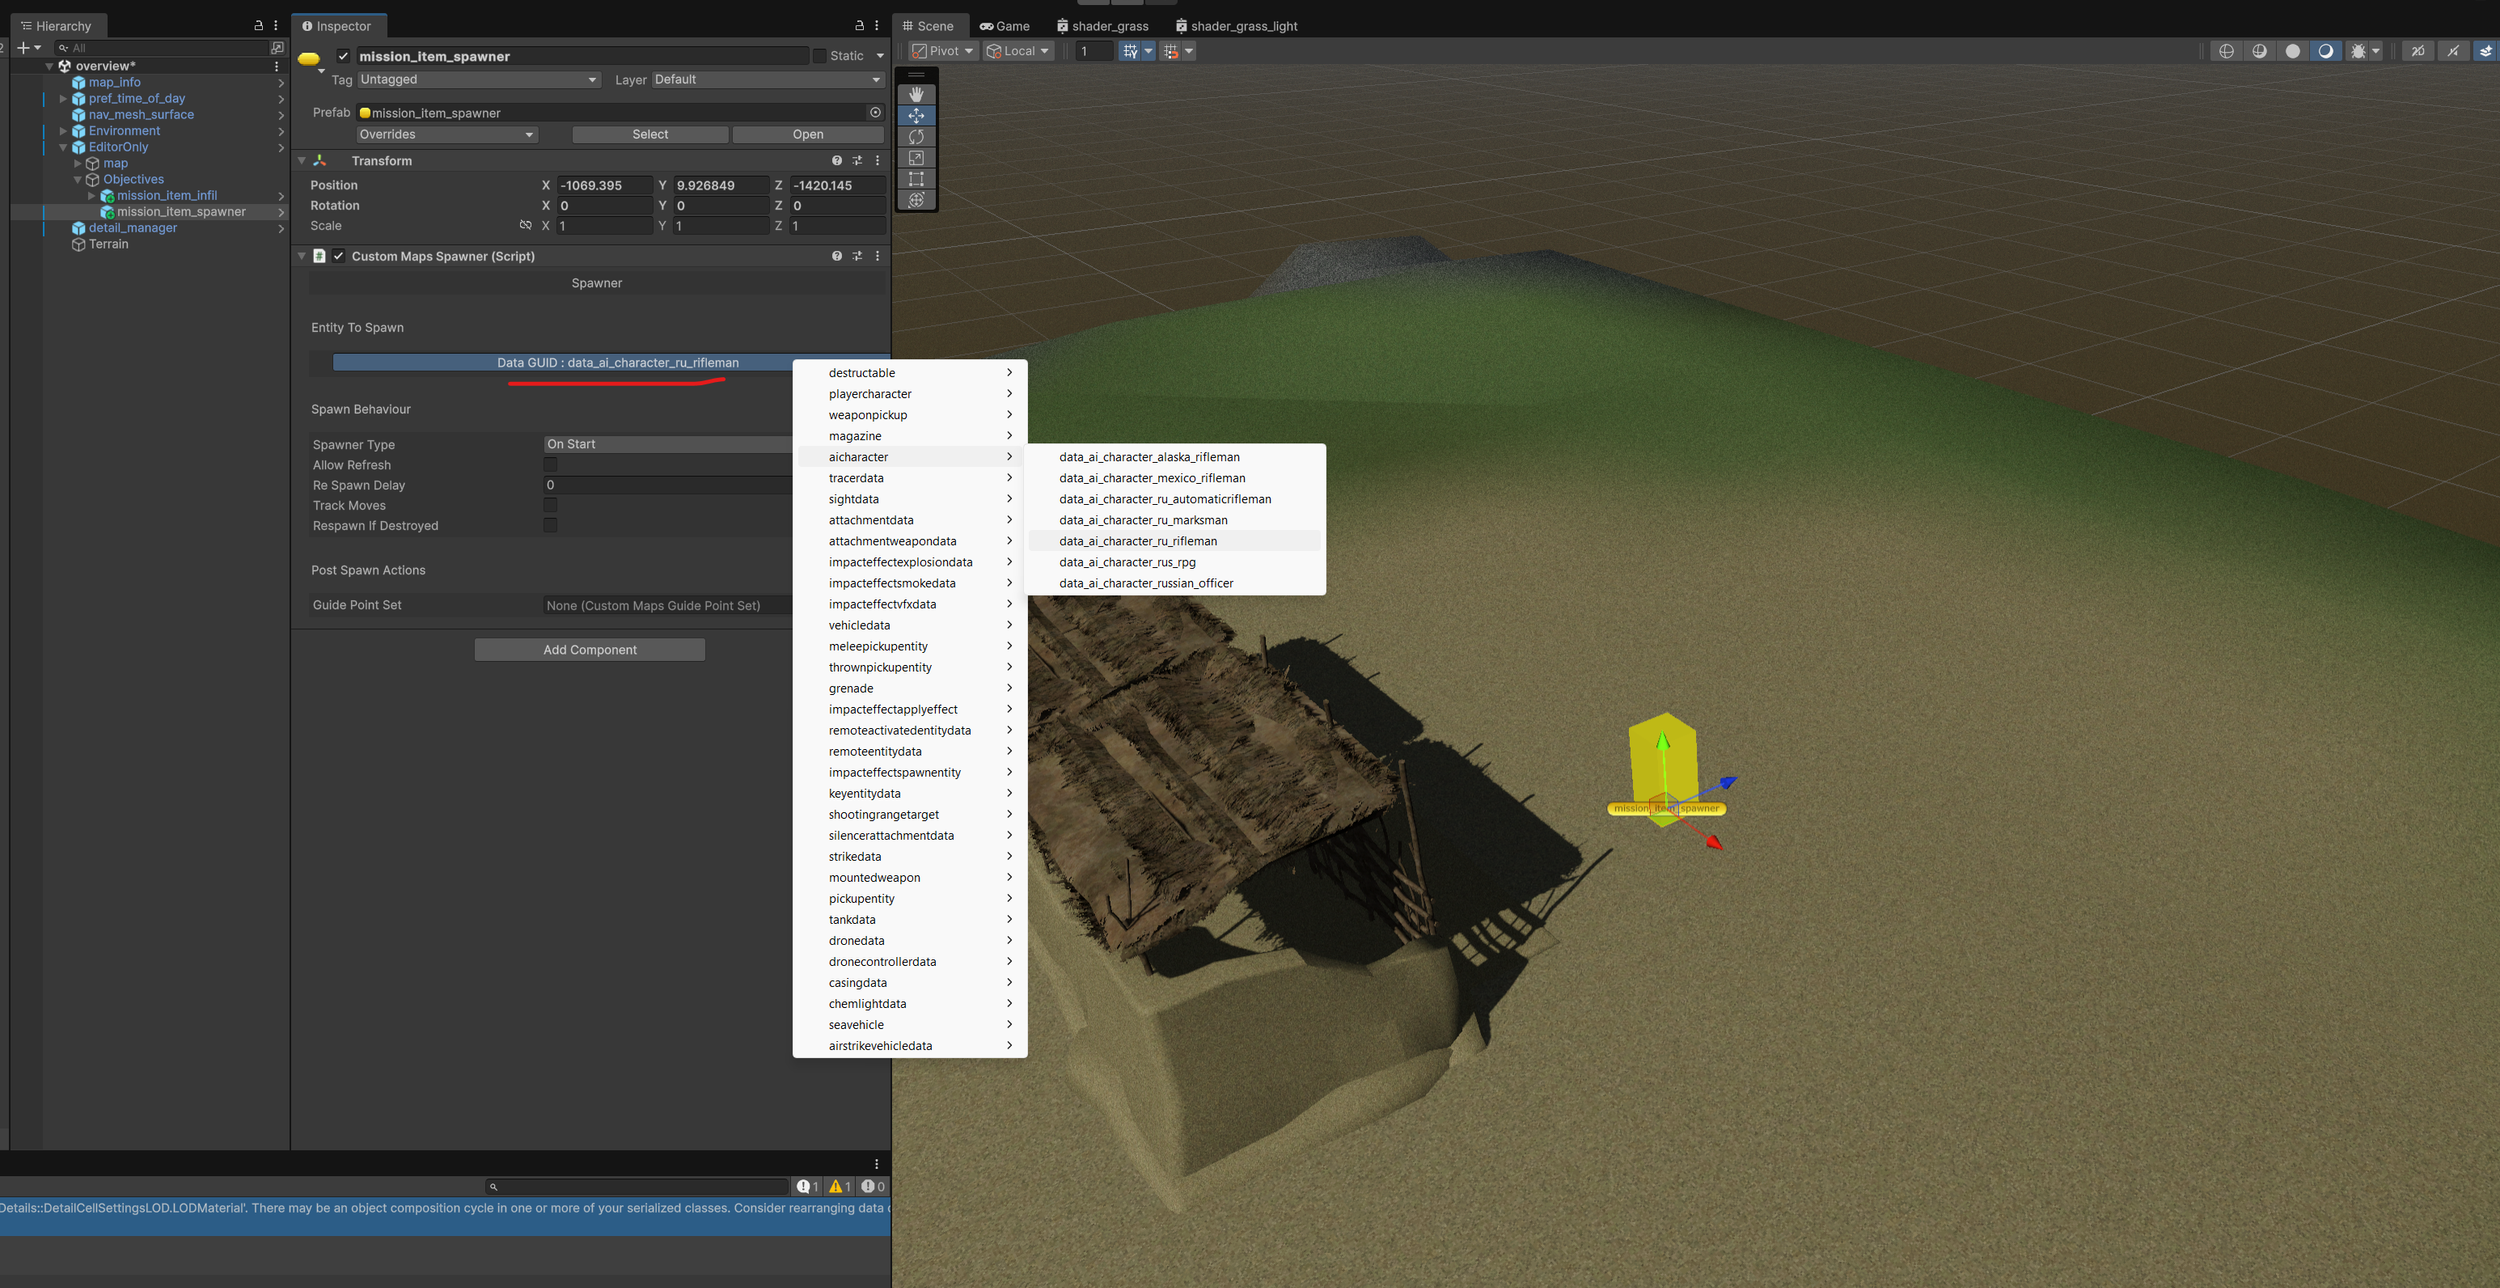
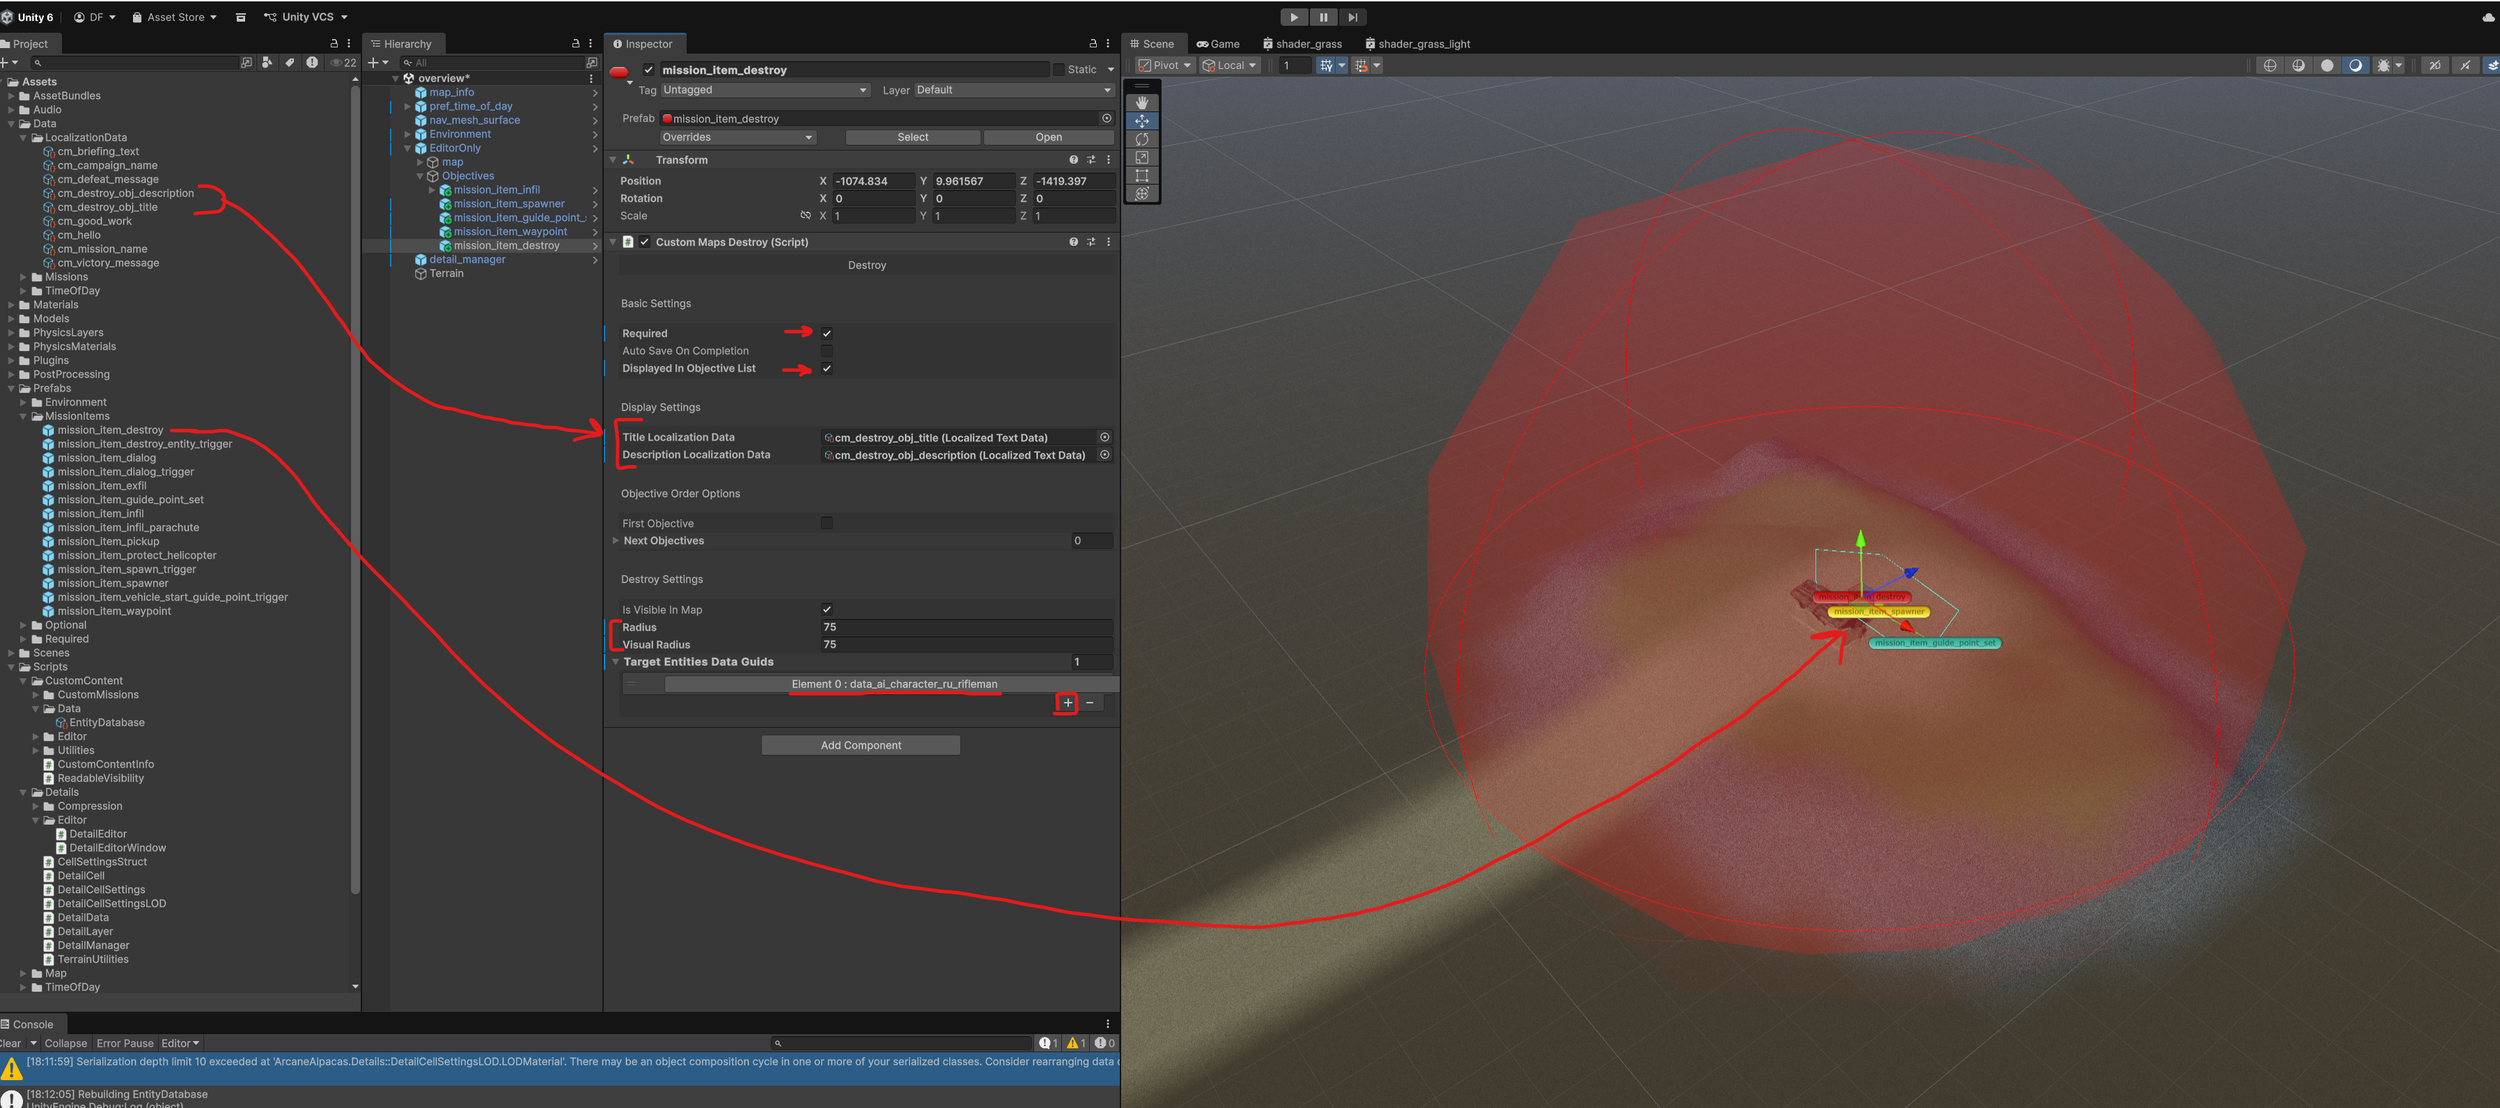
4: Let’s select an enemy to spawn there now. With the spawner selected, click the button under “Entity To Spawn”. Find the “AI Characters” and select “data_ai_character_ru_rifleman”.
All entities in the game can be spawned from a spawner. This includes a few development objects. So just be careful with what you are choosing to spawn.
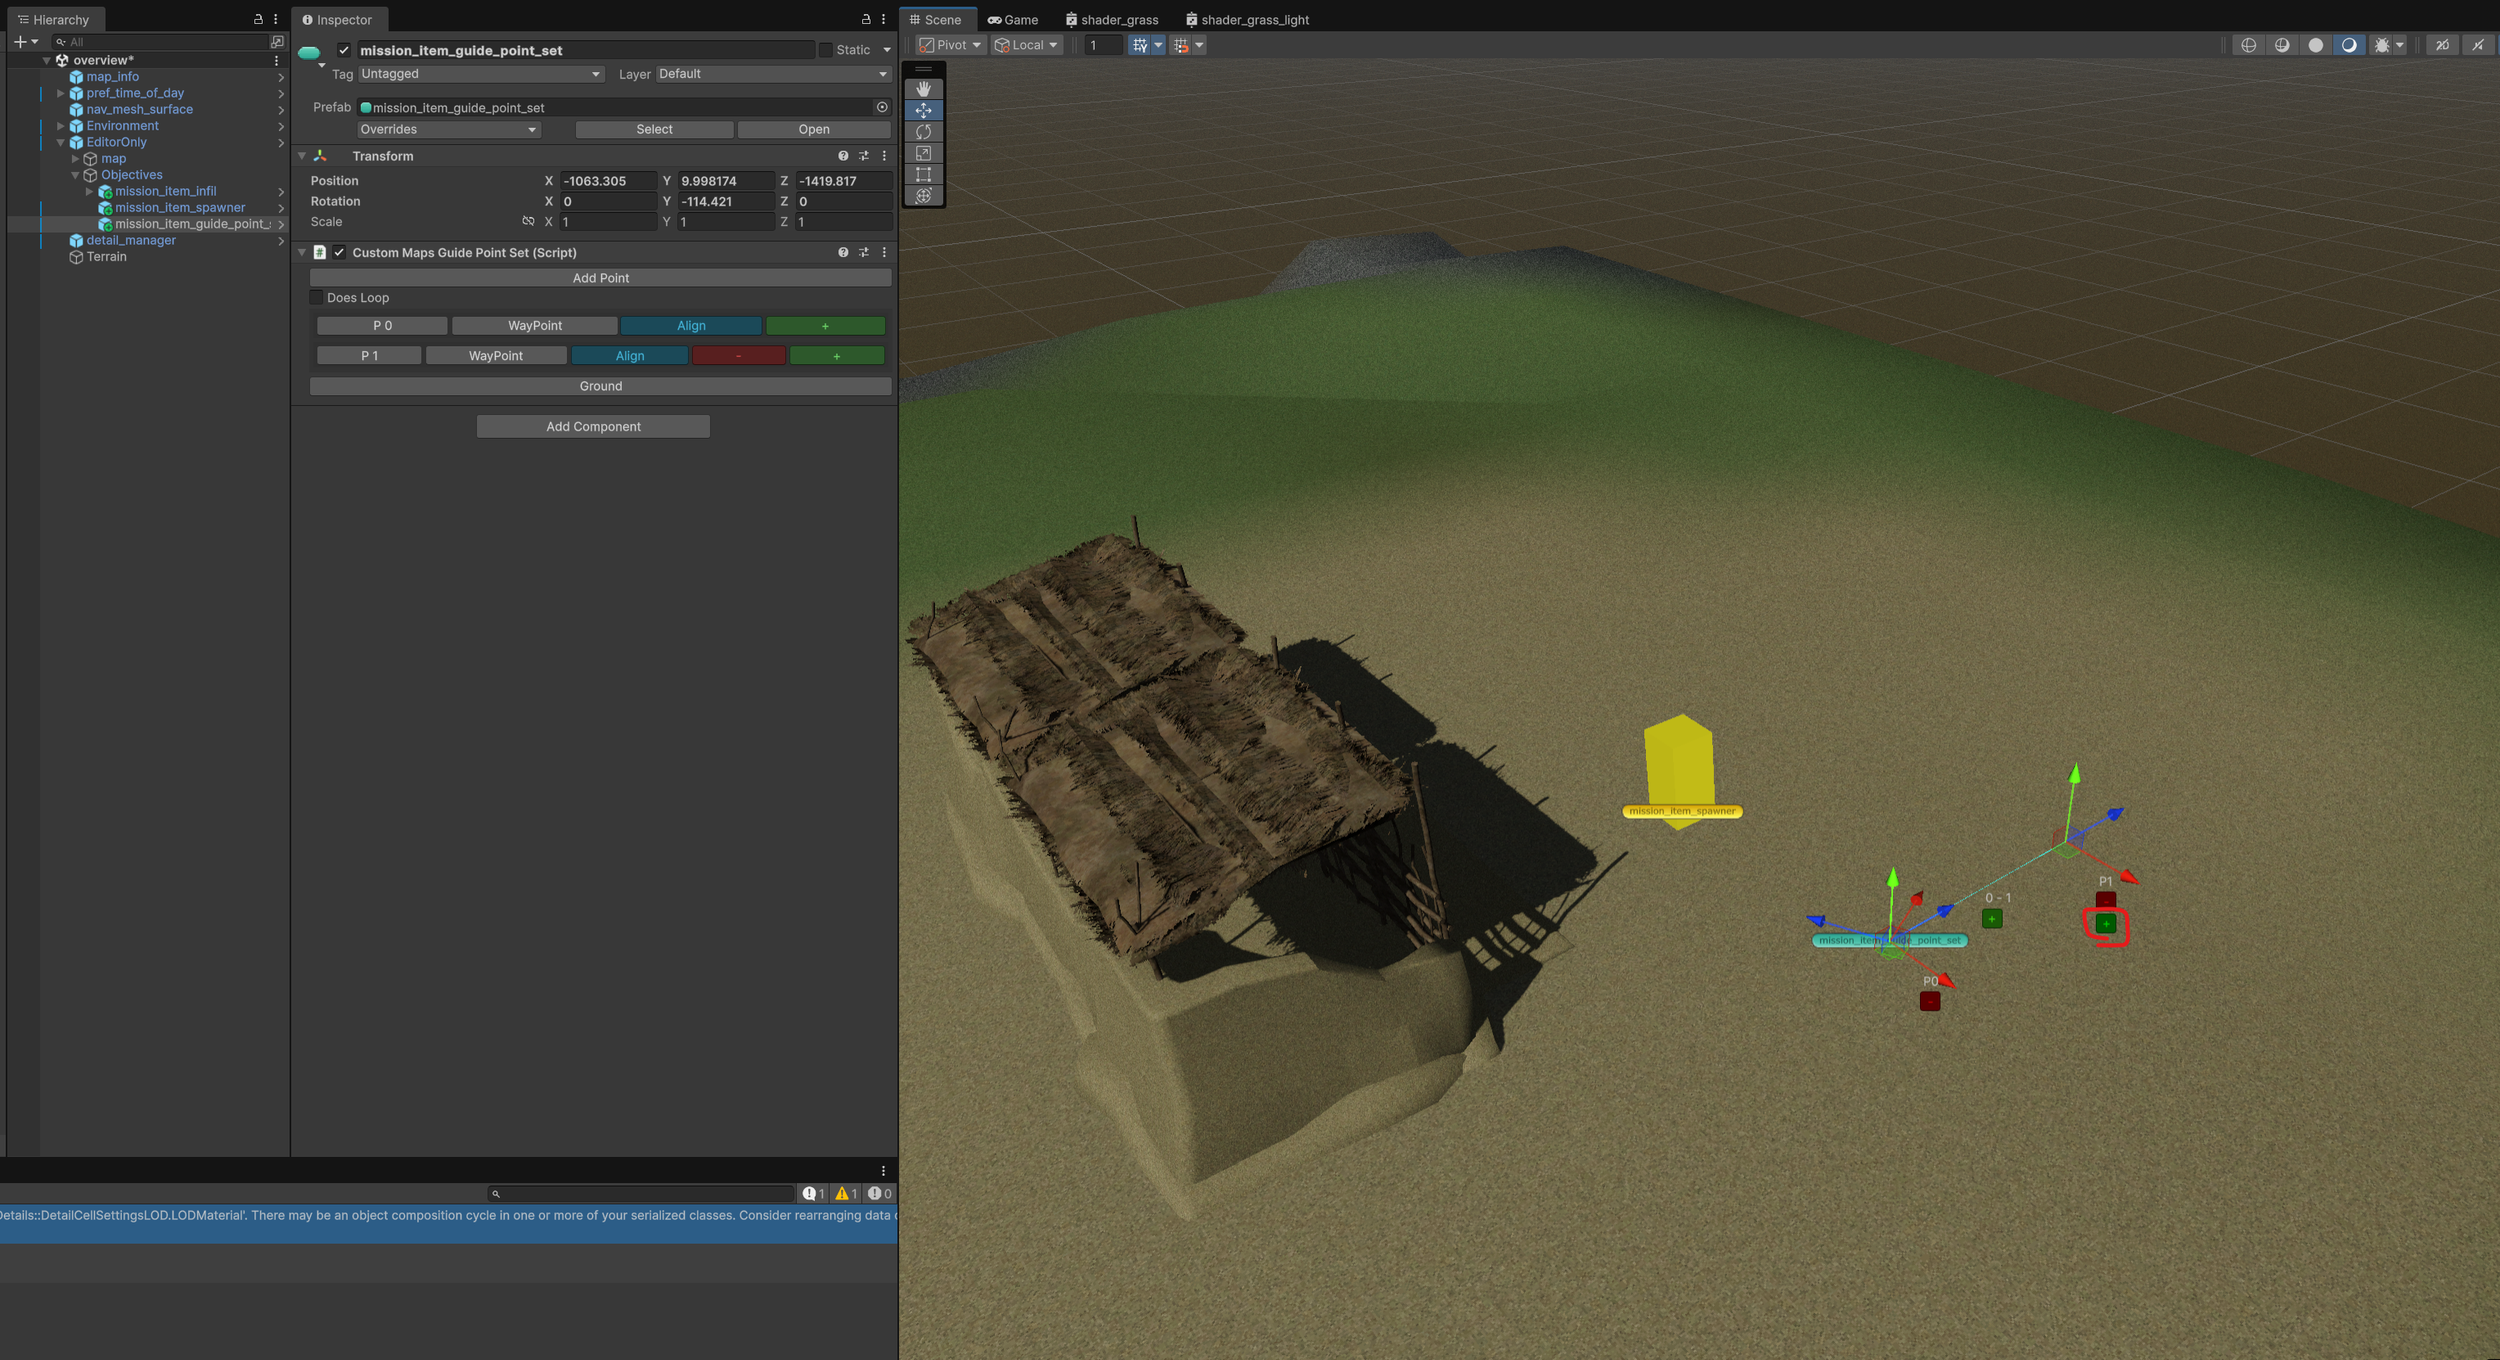
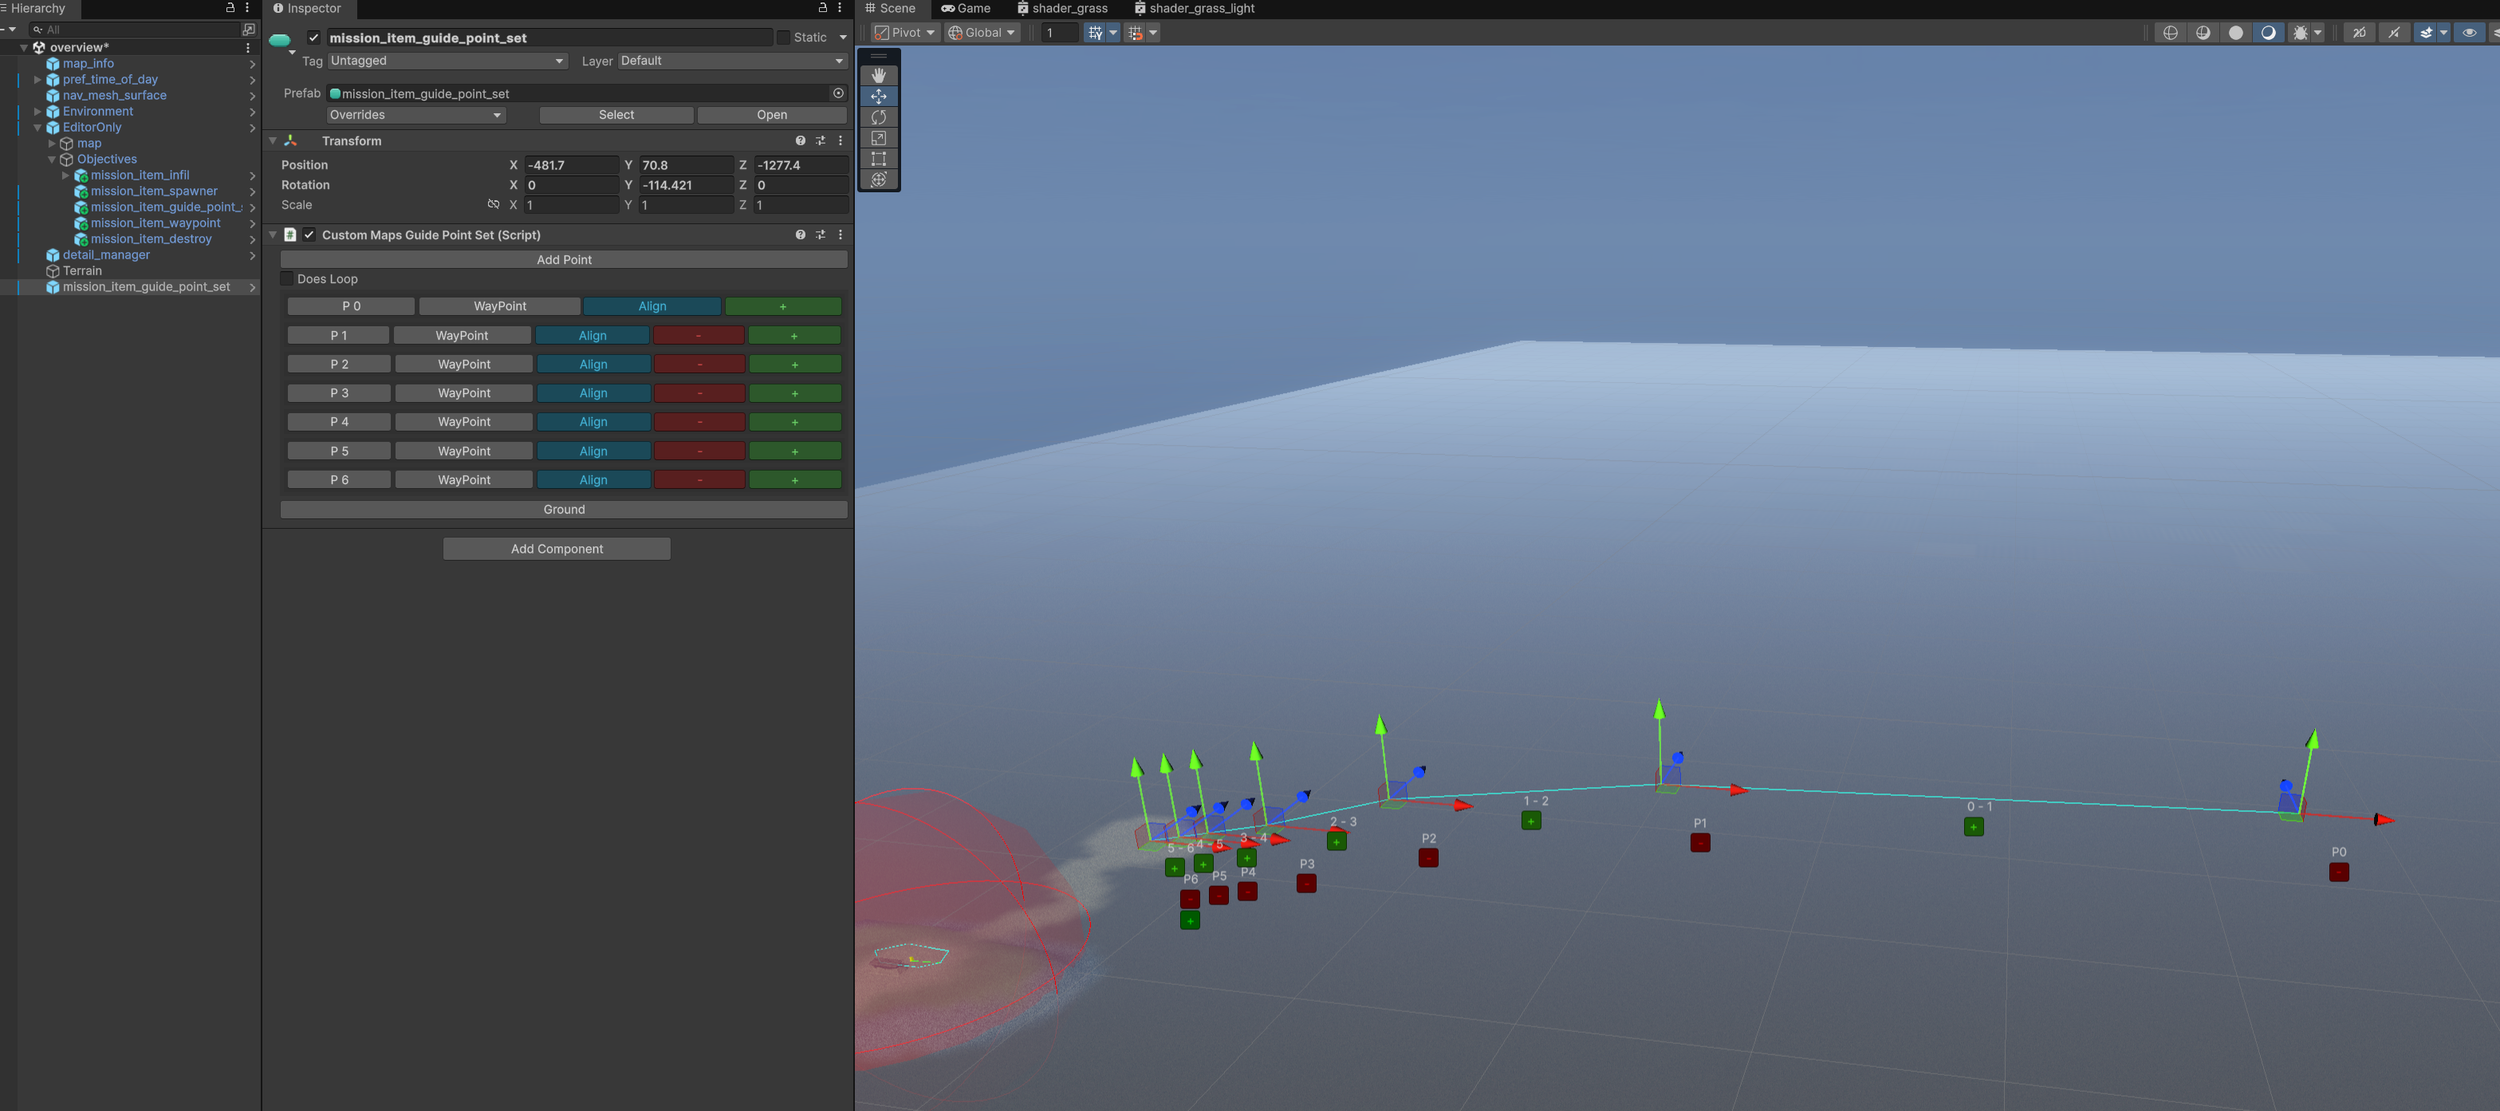
5: Now we’ll set up a patrol path for the character. Drag a “mission_item_guide_point_set” into the scene near the enemy spawner.

Guide points are used for characters and vehicles and have a few settings. We’ll go over the character portion now and the vehicle portion later.
Click the green “+” button now to create a second point. Then position the point wherever you would like.
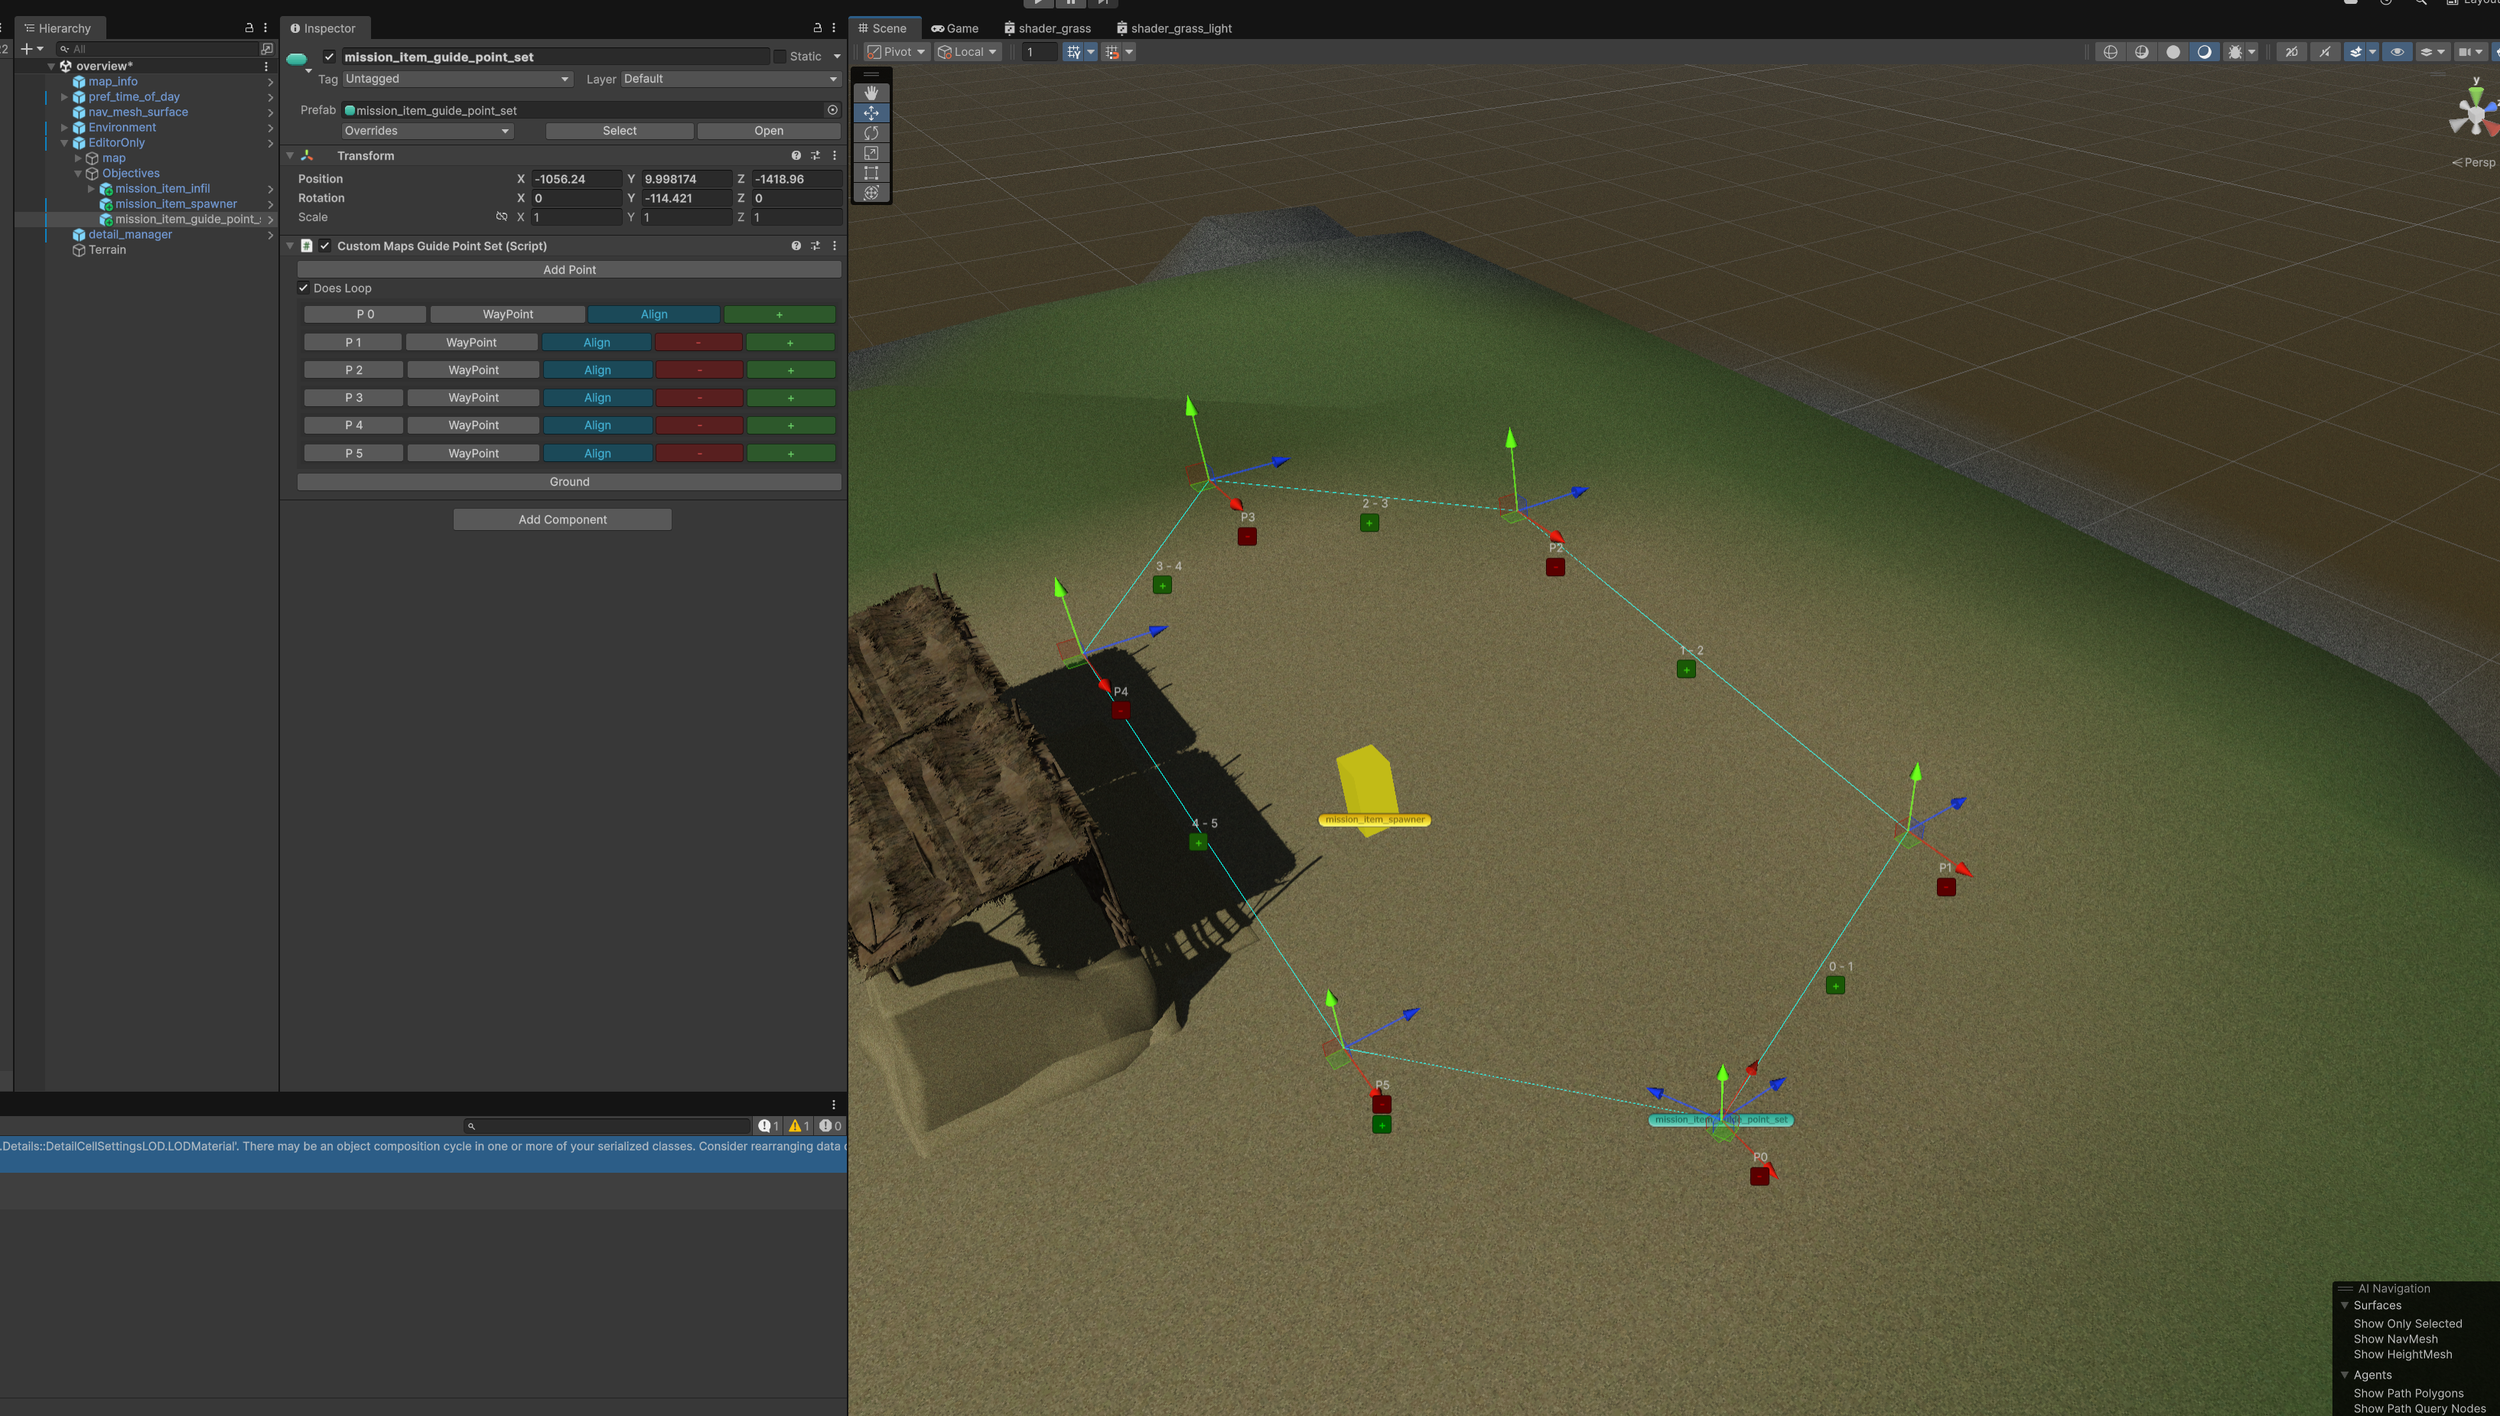
Repeat this process a few times until you have a nice path.
Then click “Does Loop”. This will cause the AI character to continue the path forever.
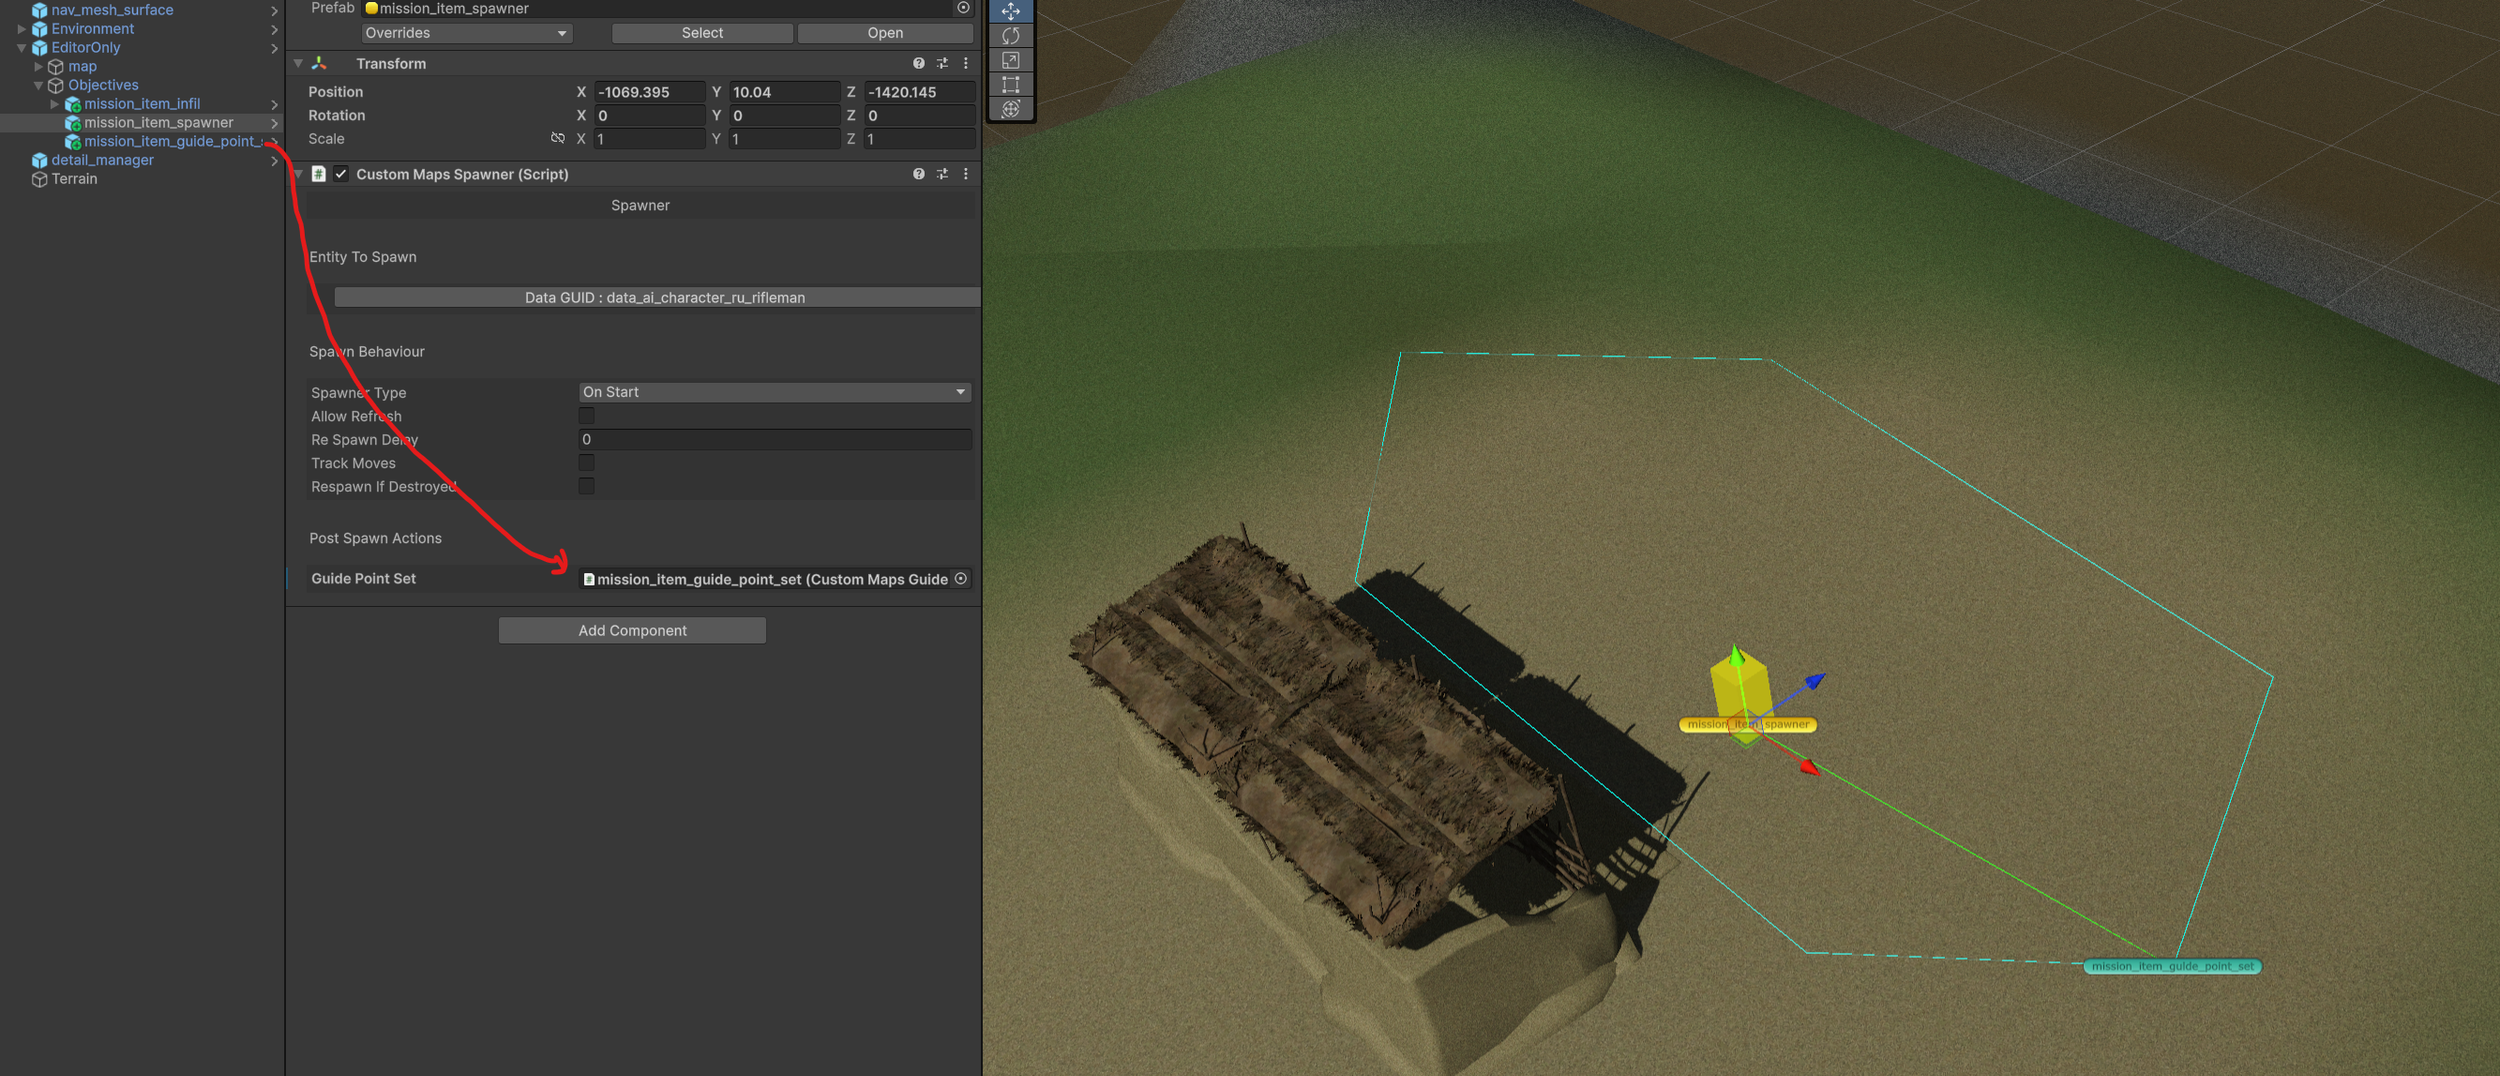
Last, we need to tell the character to use the guide set. Select the character spawner and assign the guide point set into the proper slot. Once you have done that you will also see a line connecting the spawn point and the start of the guide points.
6: We’ll place the first Objective now. A Simple WayPoint. Same as before, drag a “mission_item_waypoint” into the scene and parent it to the “Objectives” object.
We’ll also change a few settings on the waypoint:
Change the Radius to make it a little bigger.
Set “First Objective” to true.

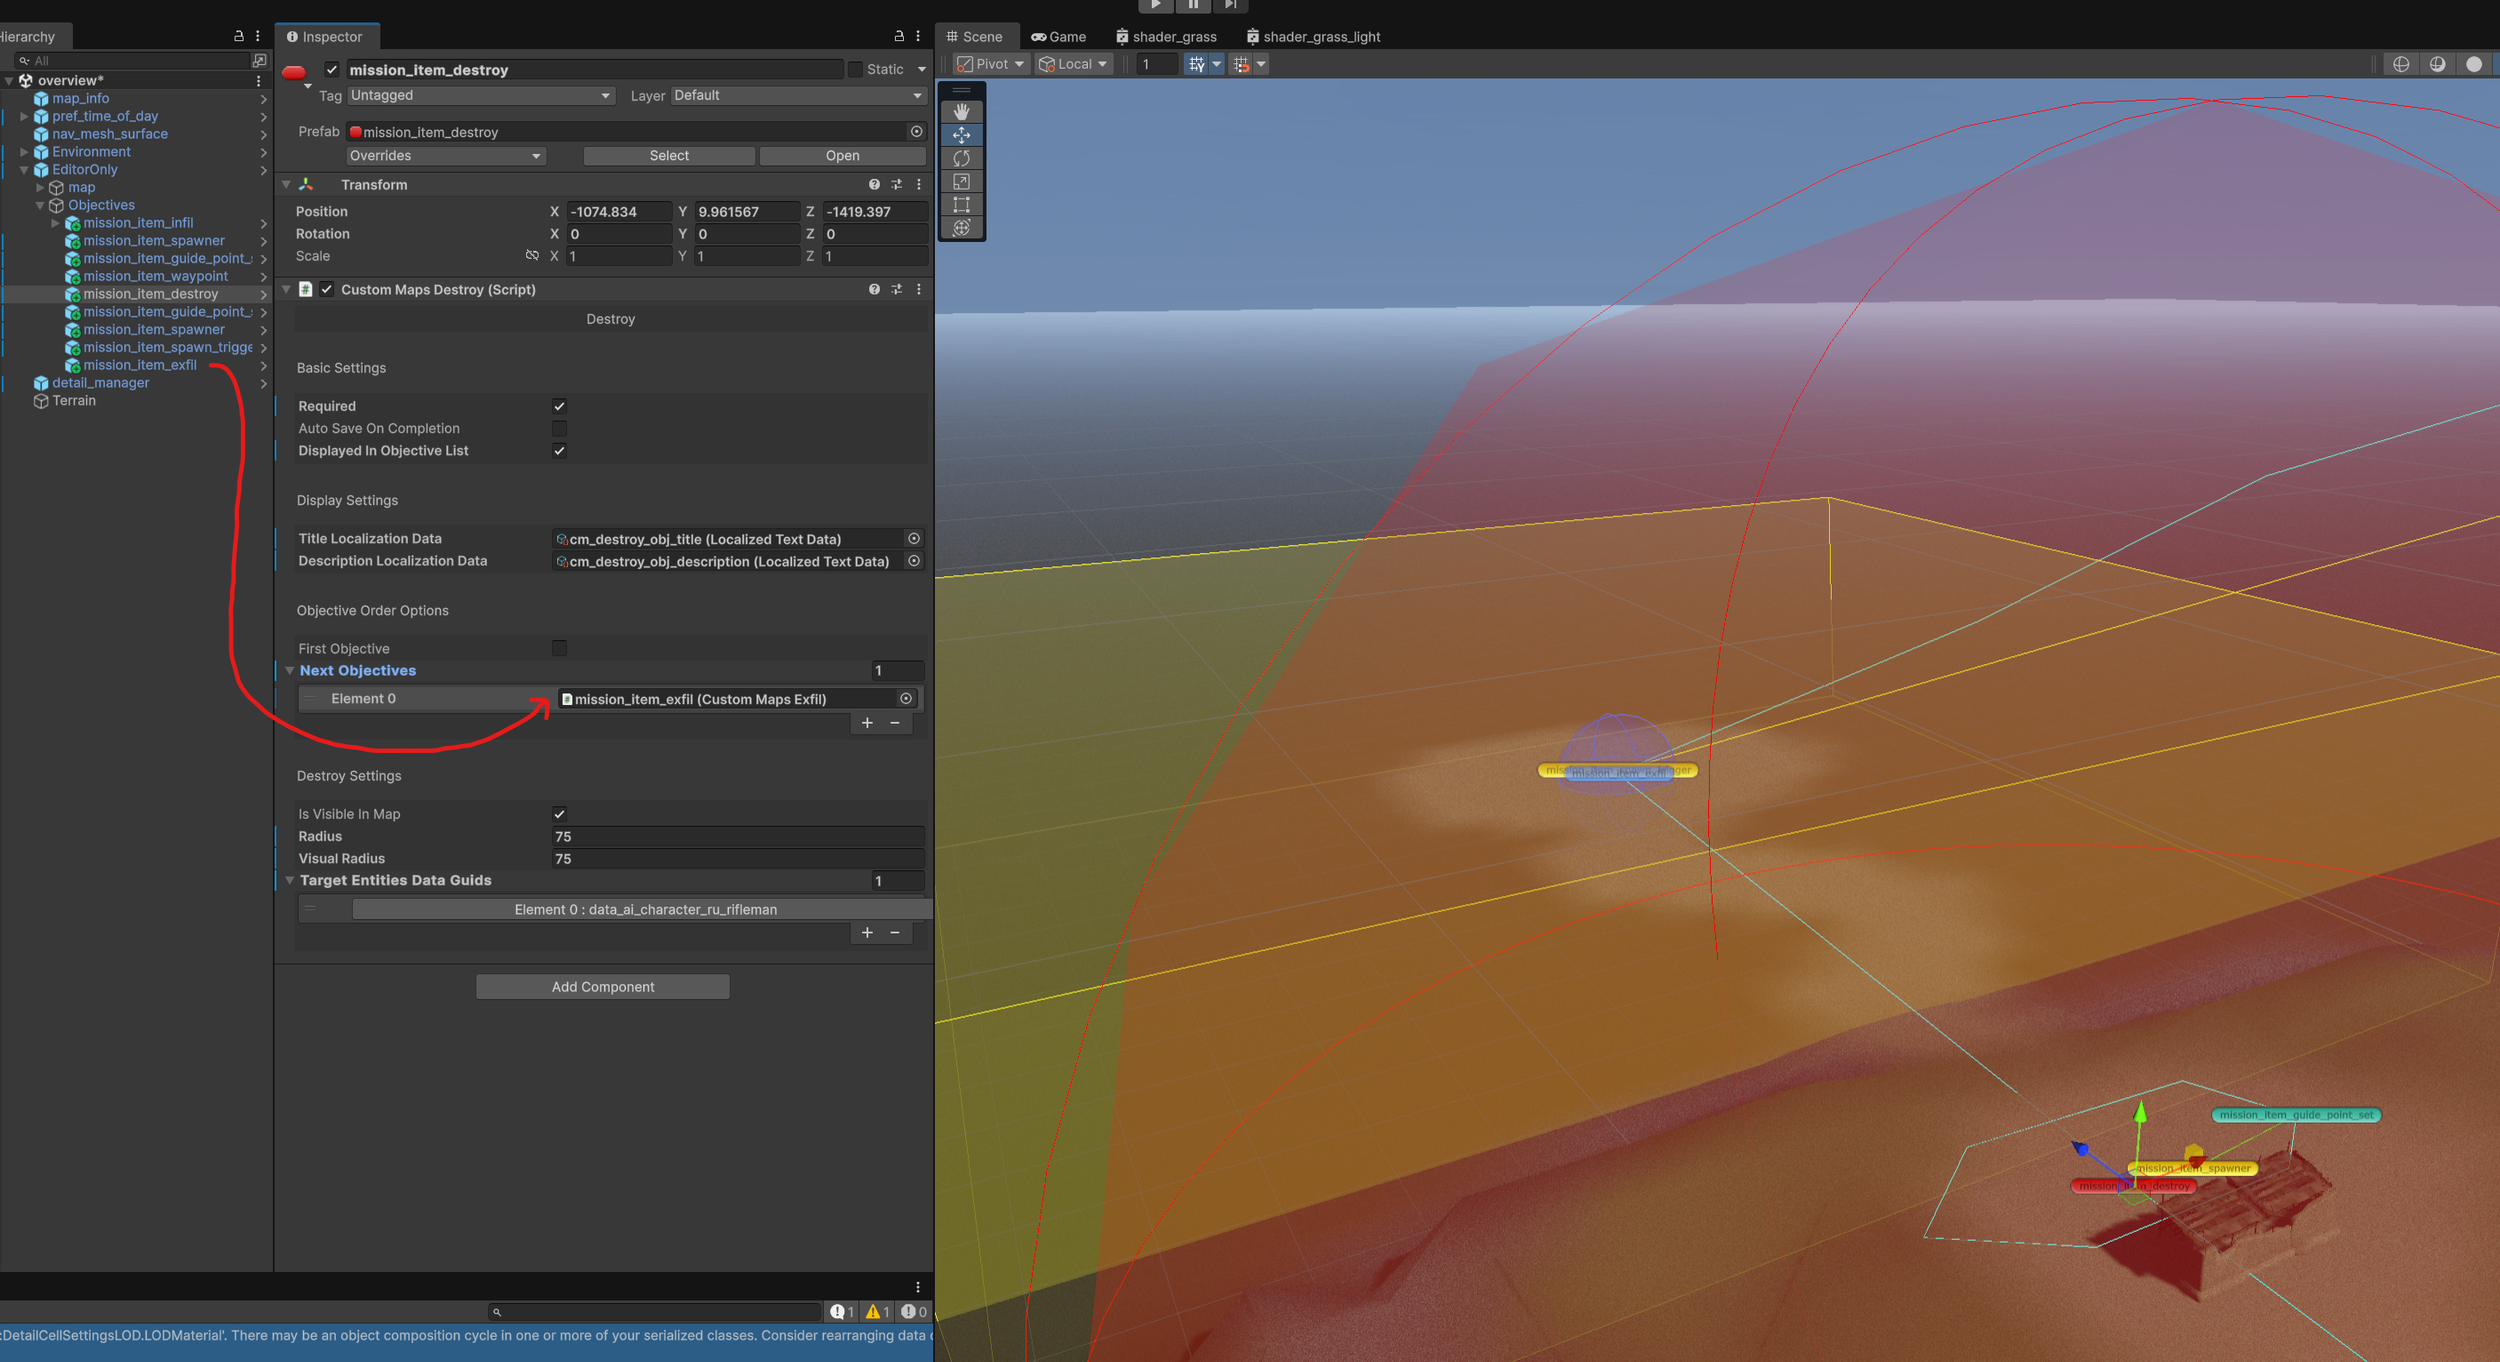
7: The next part of the mission will require the player to kill all of the enemies at a point. So add a Destroy Objective near the enemy spawn we placed earlier.
In the settings Change:
Required - True
Display in Objective list - True
Assign the proper localization files to the Title and Description.
Radius - 75
Visual Radius - 75
Add the “data_ai_character_ru_rifleman” to the target list
This is a lot of settings and a more detailed description of the all of the mission items can be found later in the guide.
8: Next set up the exfil point. We’ll have a helicopter fly in and pick up the player.
Start by placing a new guide point set at the exfil location. Create new points and build out a path for the helicopter to fly along.
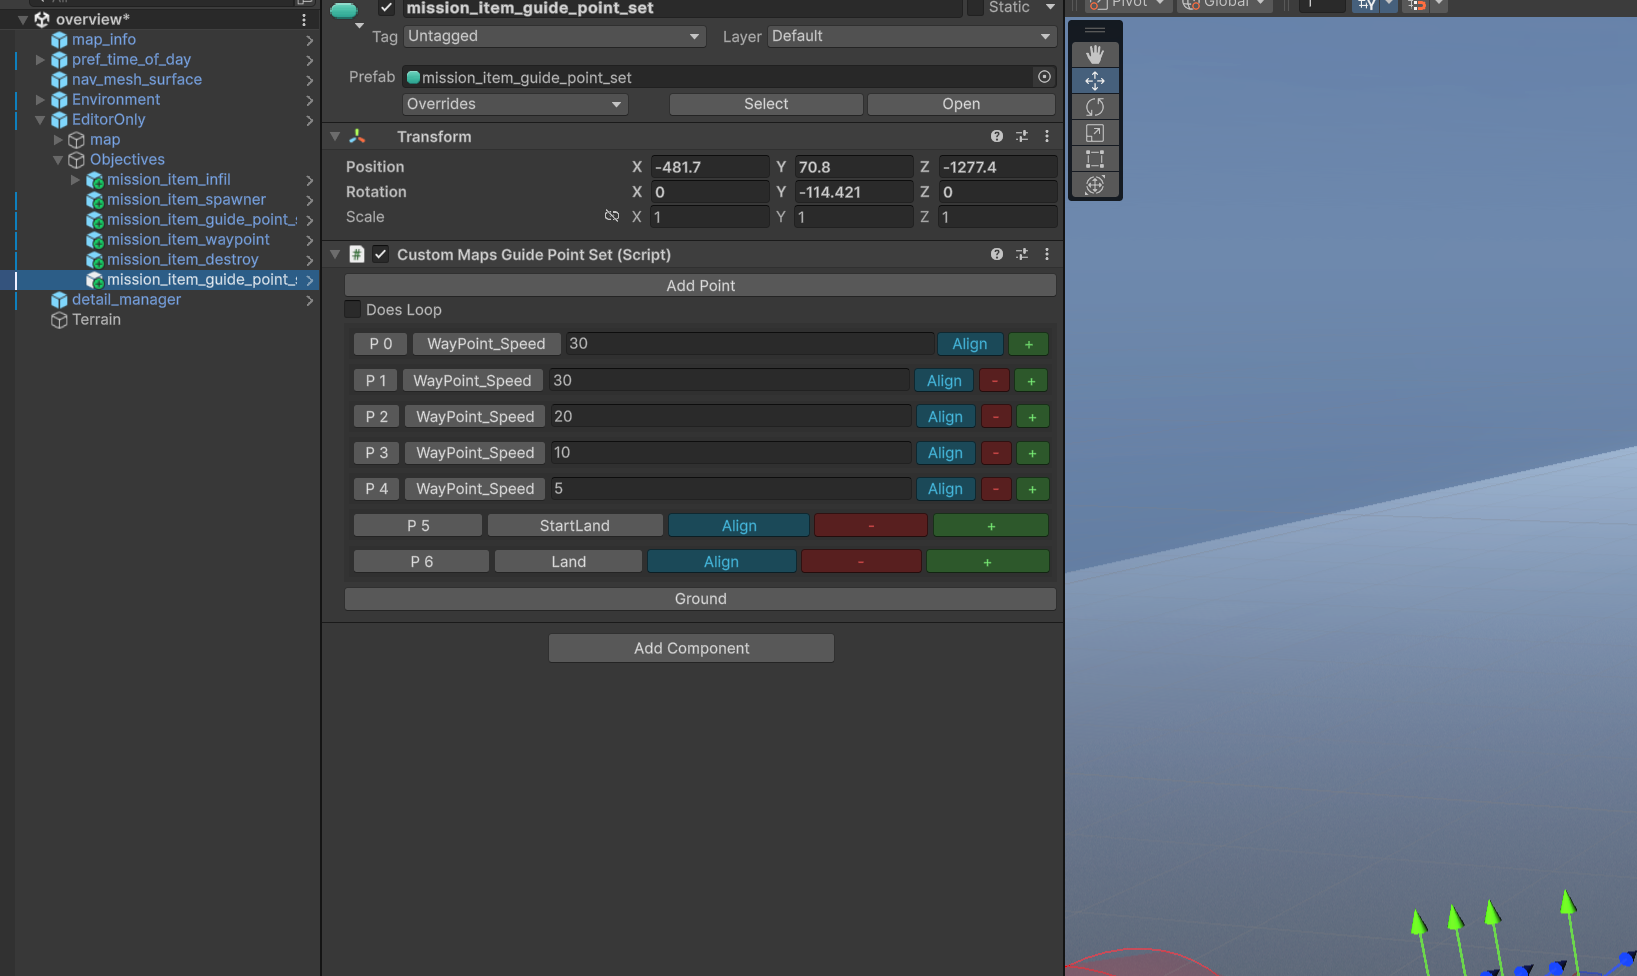
Now change all of the types from Waypoint to be as seen here.
The last point set to “Land”.
Second to last set to “Start Land”.
The rest set to “Waypoint_Speed” and set the speed starting around 30 and decreasing as it gets closer to the landing point.
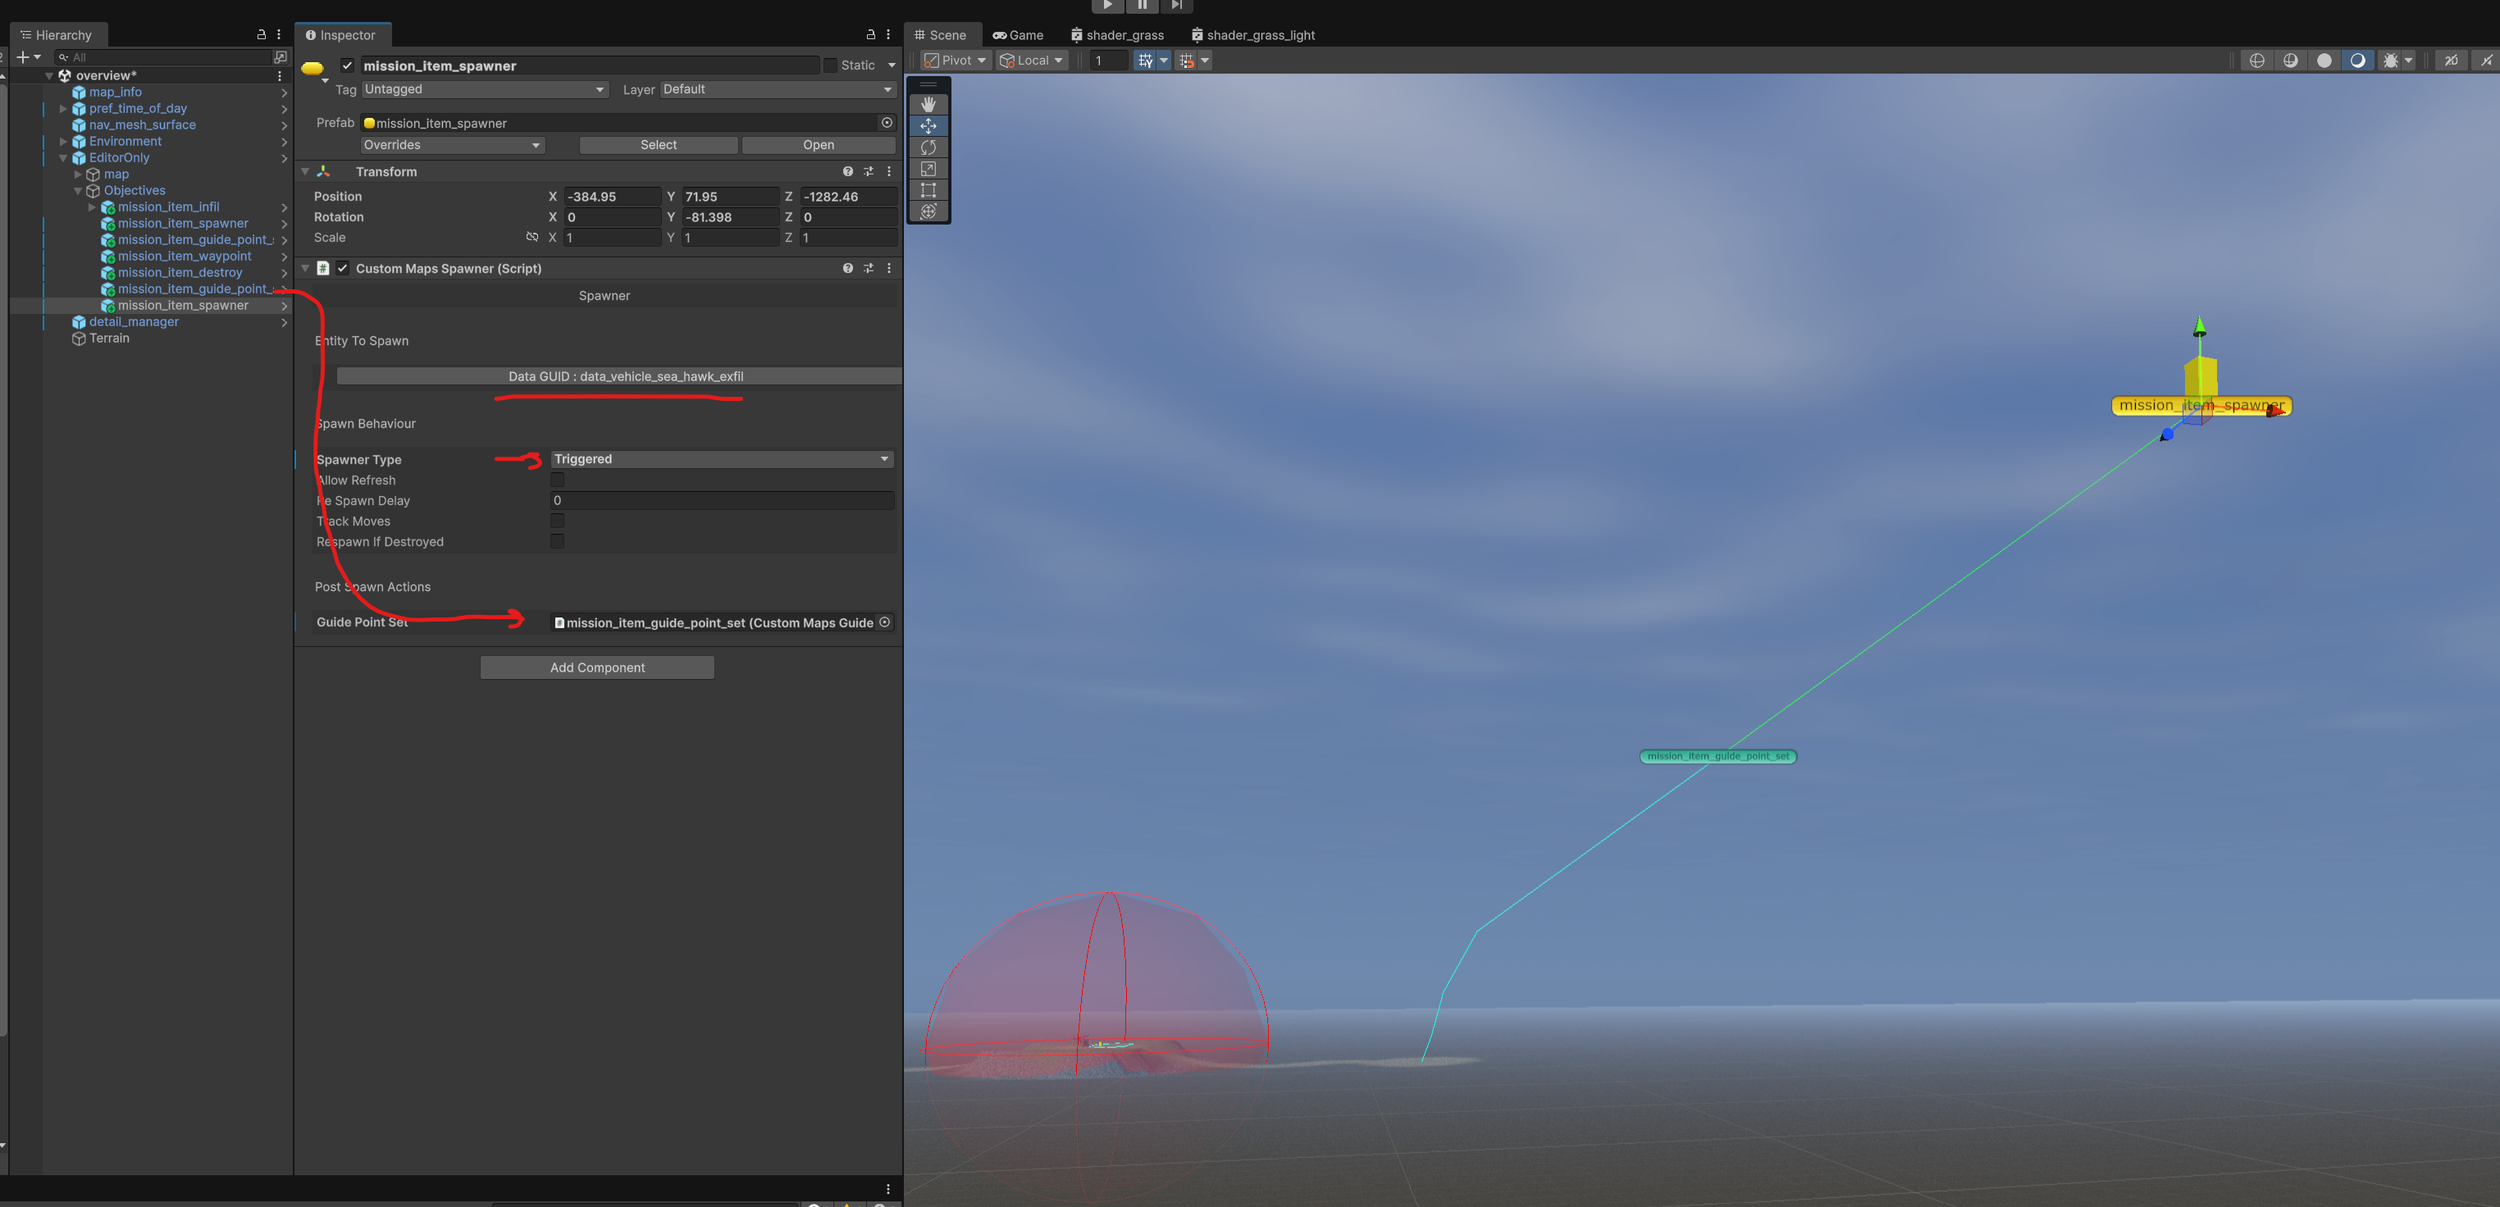
9: Now we need to add a helicopter spawn point. Place a new spawner near the start of the guide points. Make sure it’s facing the guide points. Then connect the guide point set to the helicopter spawner. You can tell a spawners facing direction by looking at the blue arrow.
Set Spawner Type - Triggered
Entity To Spawn - data_vehicle_sea_hawk_exfil
Guide Point Set - the guide points we just created
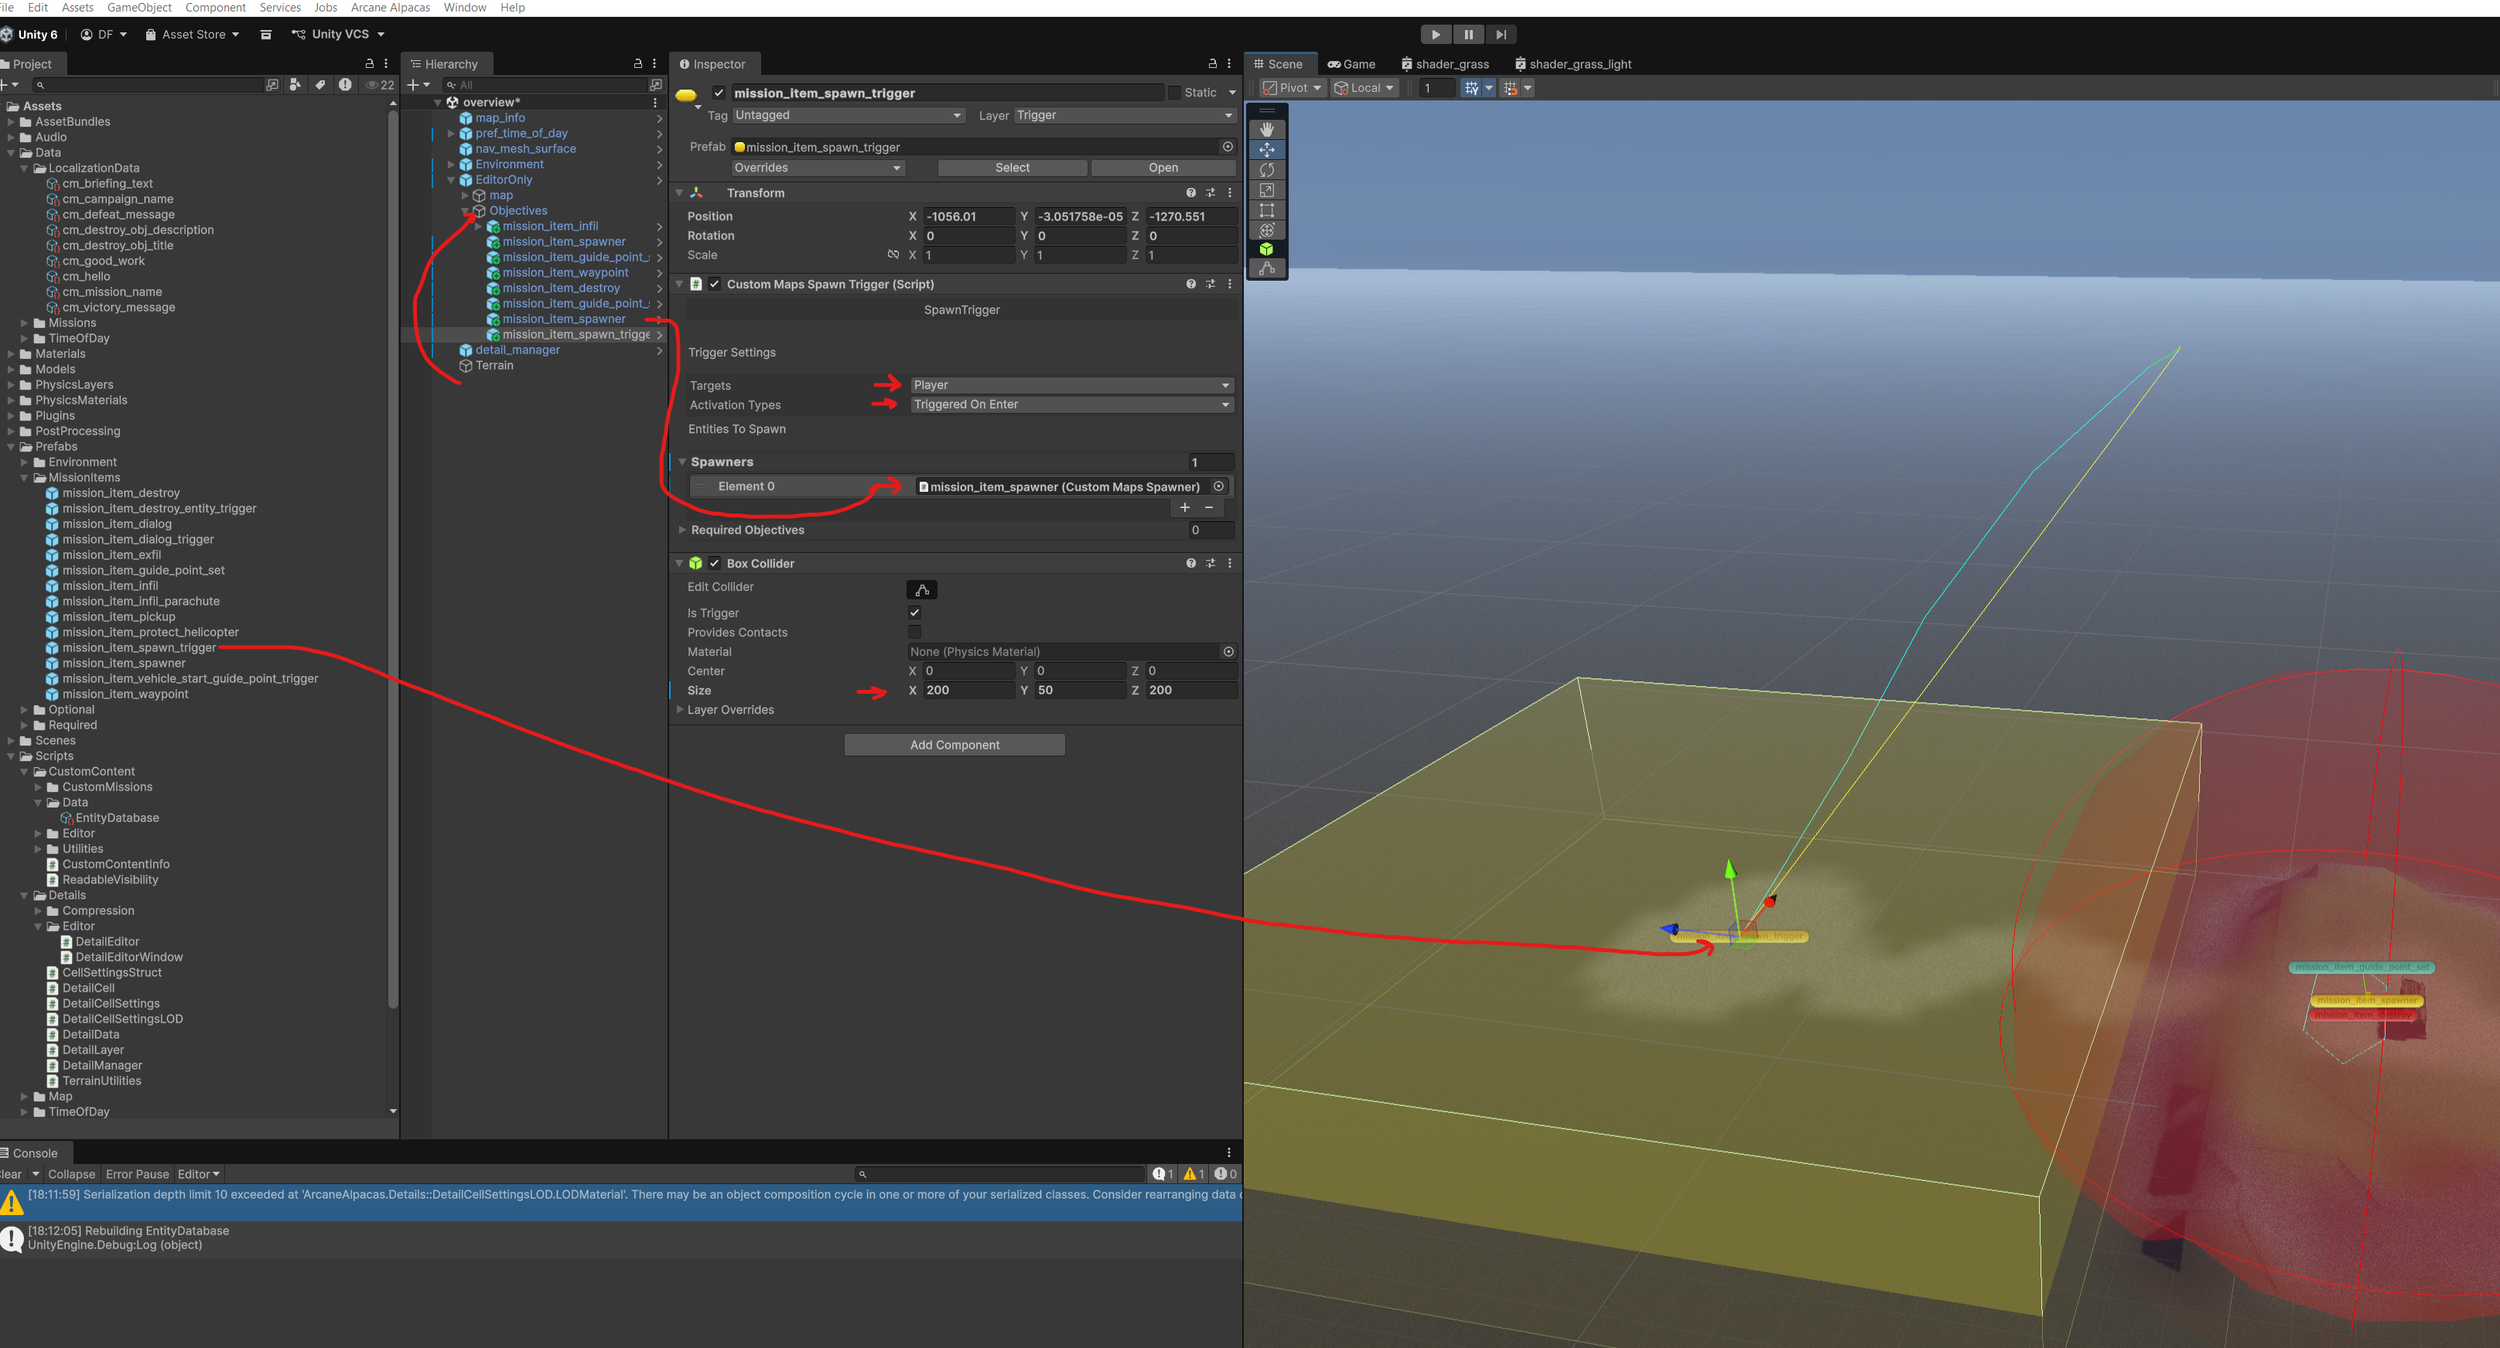
10: We set the helicopter spawner to Spawn Type - Triggered. This means we need to create a spawn trigger.
Drag in a “mission_item_spawn_trigger” near the exfil point and set the following settings:
Targets - Player
Activation Types - Triggered On Enter
Spawners - Add the helicopter spawner
Size - 200 × 50 × 200
* Note! Do not change the scale on the Transform. Only use the Colliders Size to change the size.
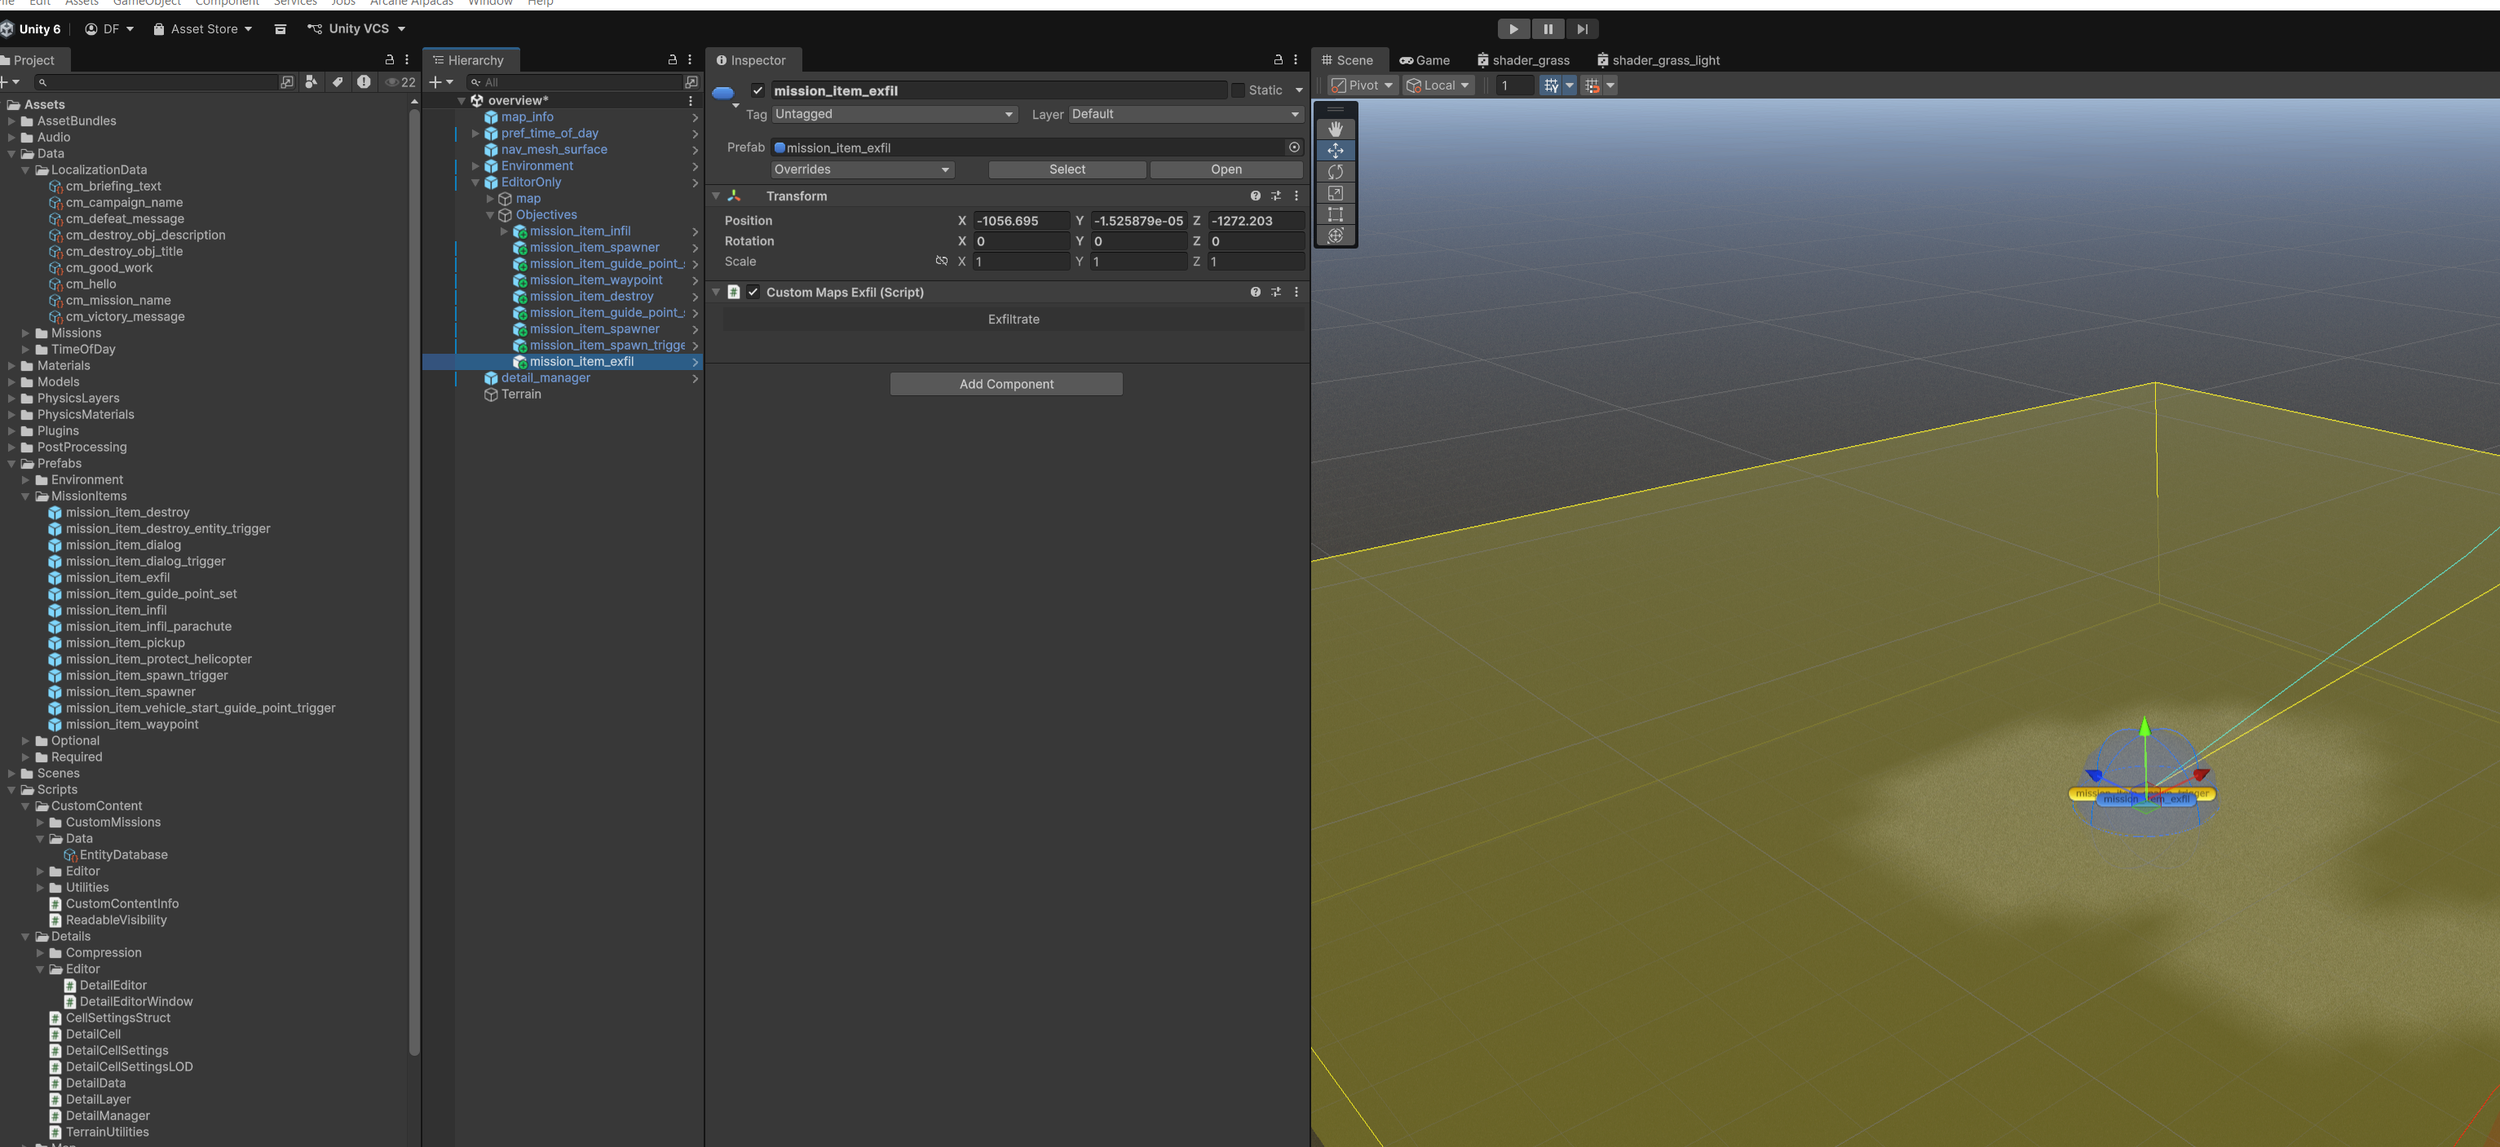
11: Next place a “mission_item_exfil” at the exfil position. This will simply display the exfil point on the map for the player.
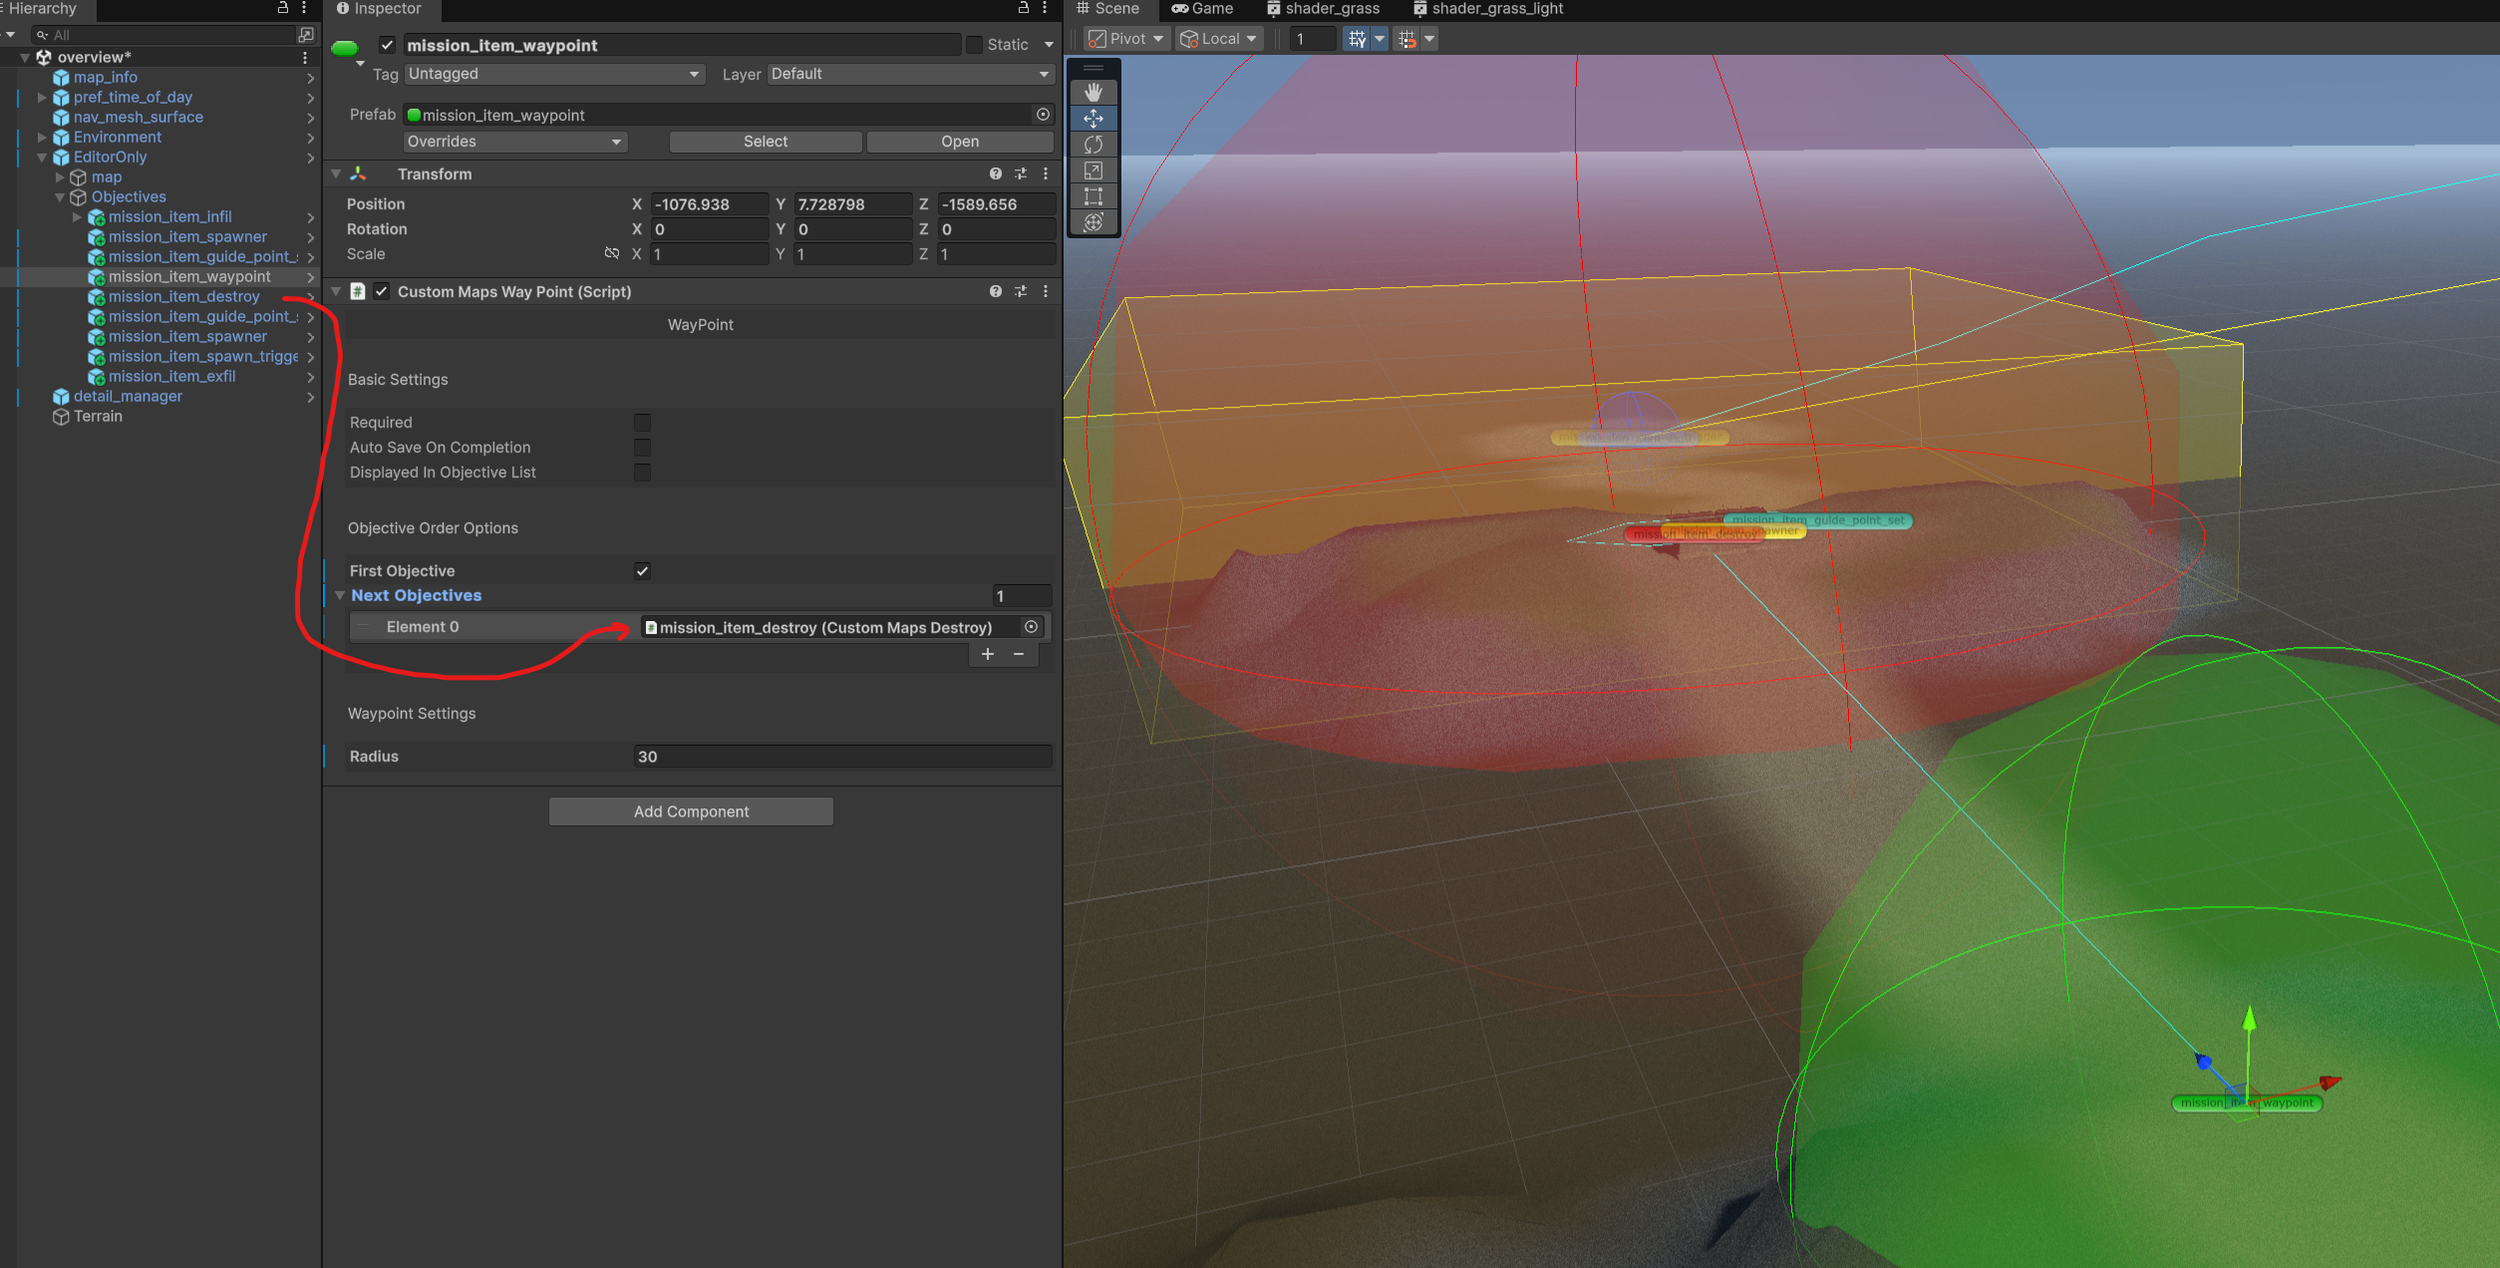
12: The final step is to hook up the objectives to each other.
Select the Waypoint and assign the Destroy objective as the next objective.
Then select the Destroy Objective and assign the Exfil Objective as the next objective.
Good work! Hopefully you can already start to see some fun ways to create some amazing missions! Next we’ll go over exporting and testing your mission locally.