6: Upload or Update
Upload
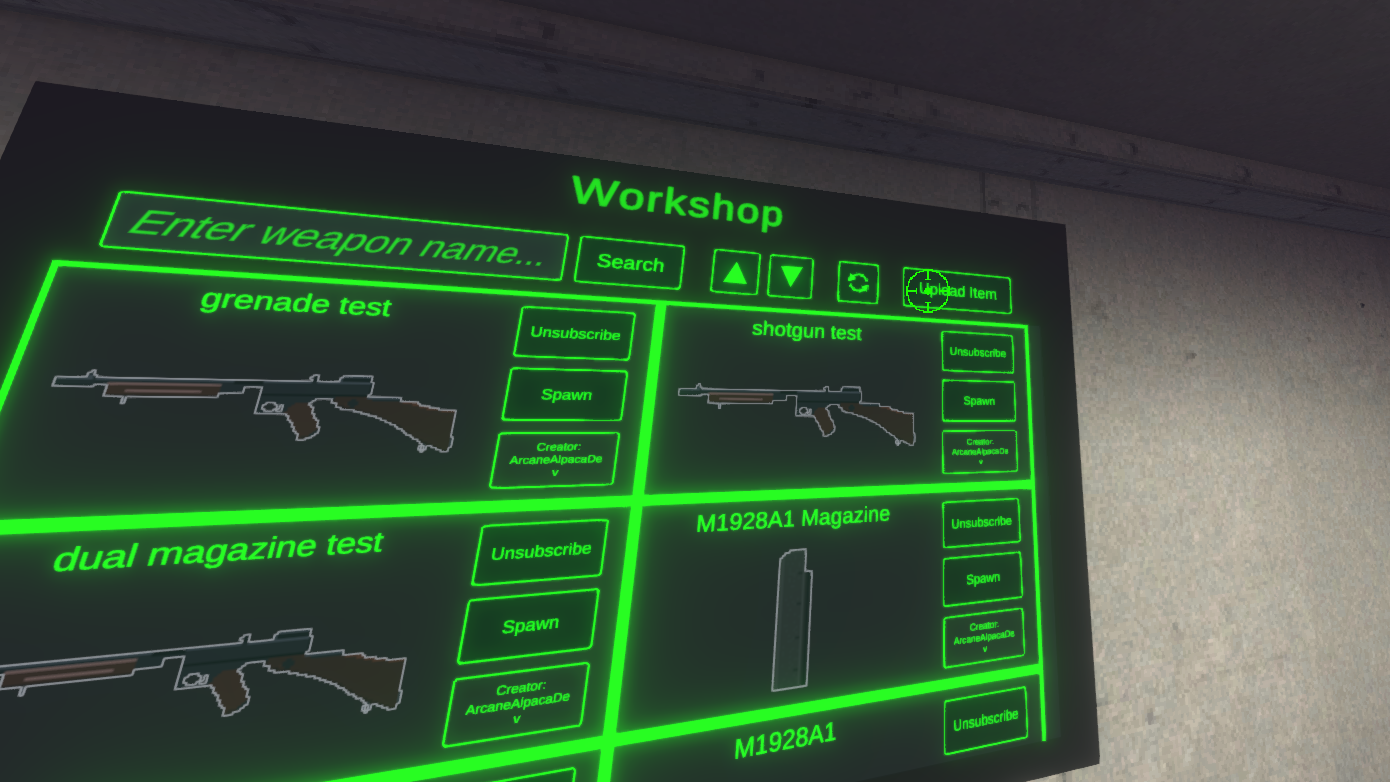
To upload a weapon, head back to the armory in the game. Go to the Custom Weapon Table. Select “Upload Item” and make sure you have the “Weapon” type selected.
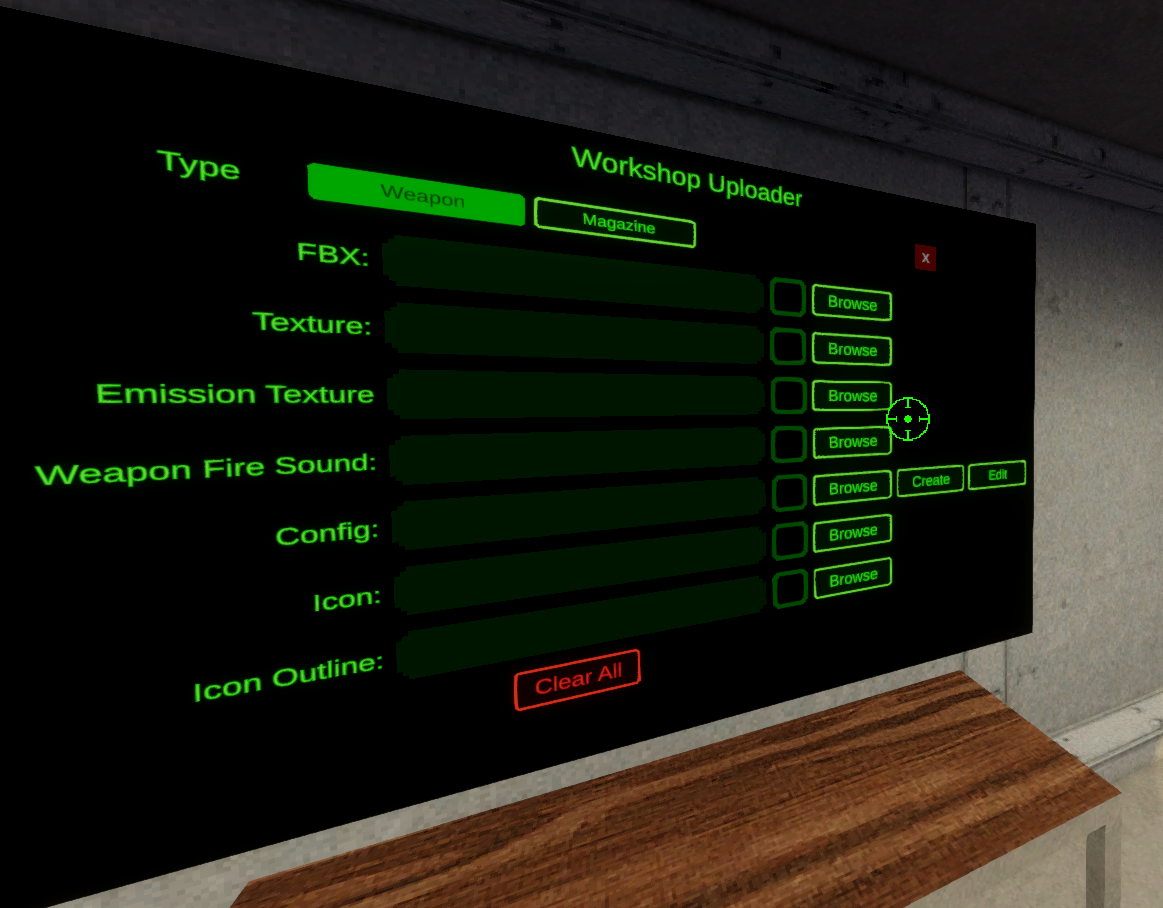
Go down the list of assets and click “Browse” next to each one. Select the appropriate file for each.
FBX - Select the .fbx model file.
Texture - Select the weapon models texture.
Emission Texture - Select the weapon models emission texture. This is optional. Only upload an emission texture if you are using one.
Weapon Fire Sound - Select the .wav file.
Config - Select the config file you just created in the previous step.
Icon - Select the inventory icon .png file.
Icon Outline - Select the inventory outline image .png file.
If everything is done correctly and the validator did not find any issues, you should now see the upload button!
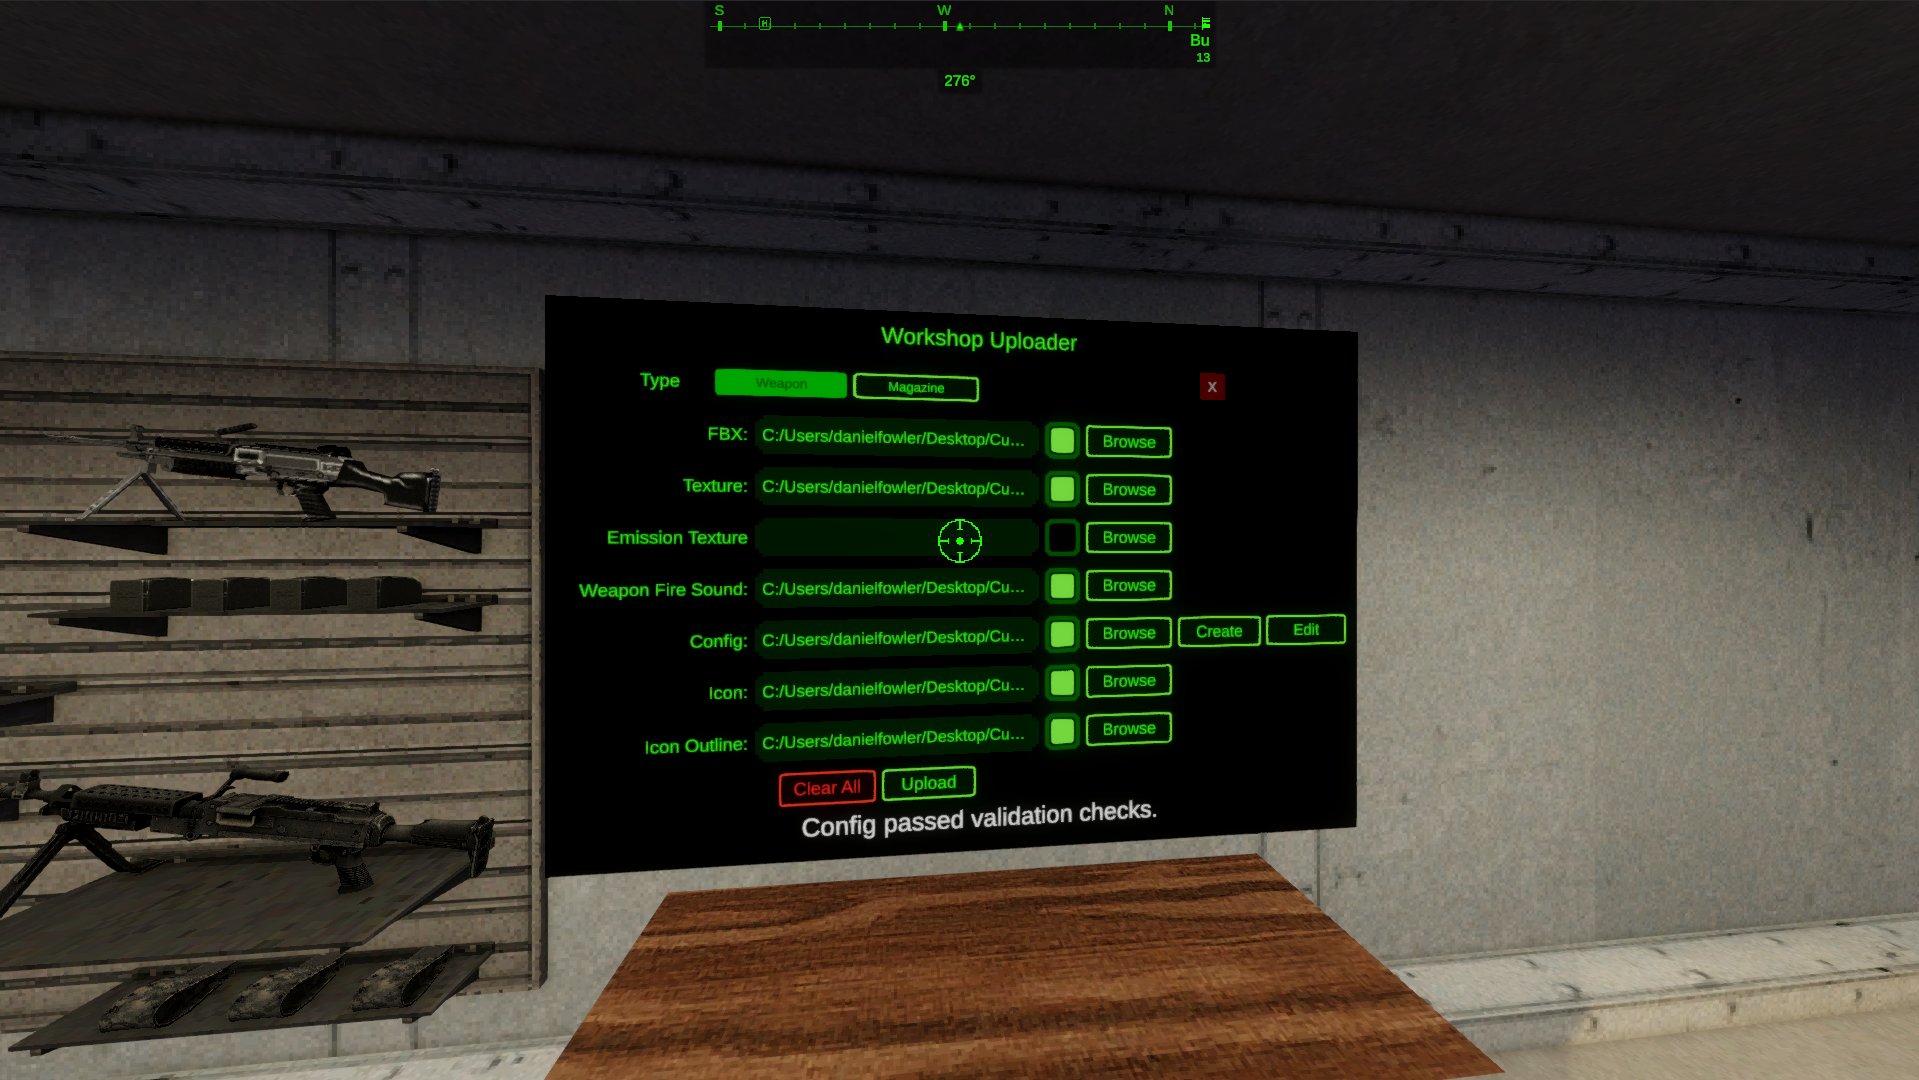
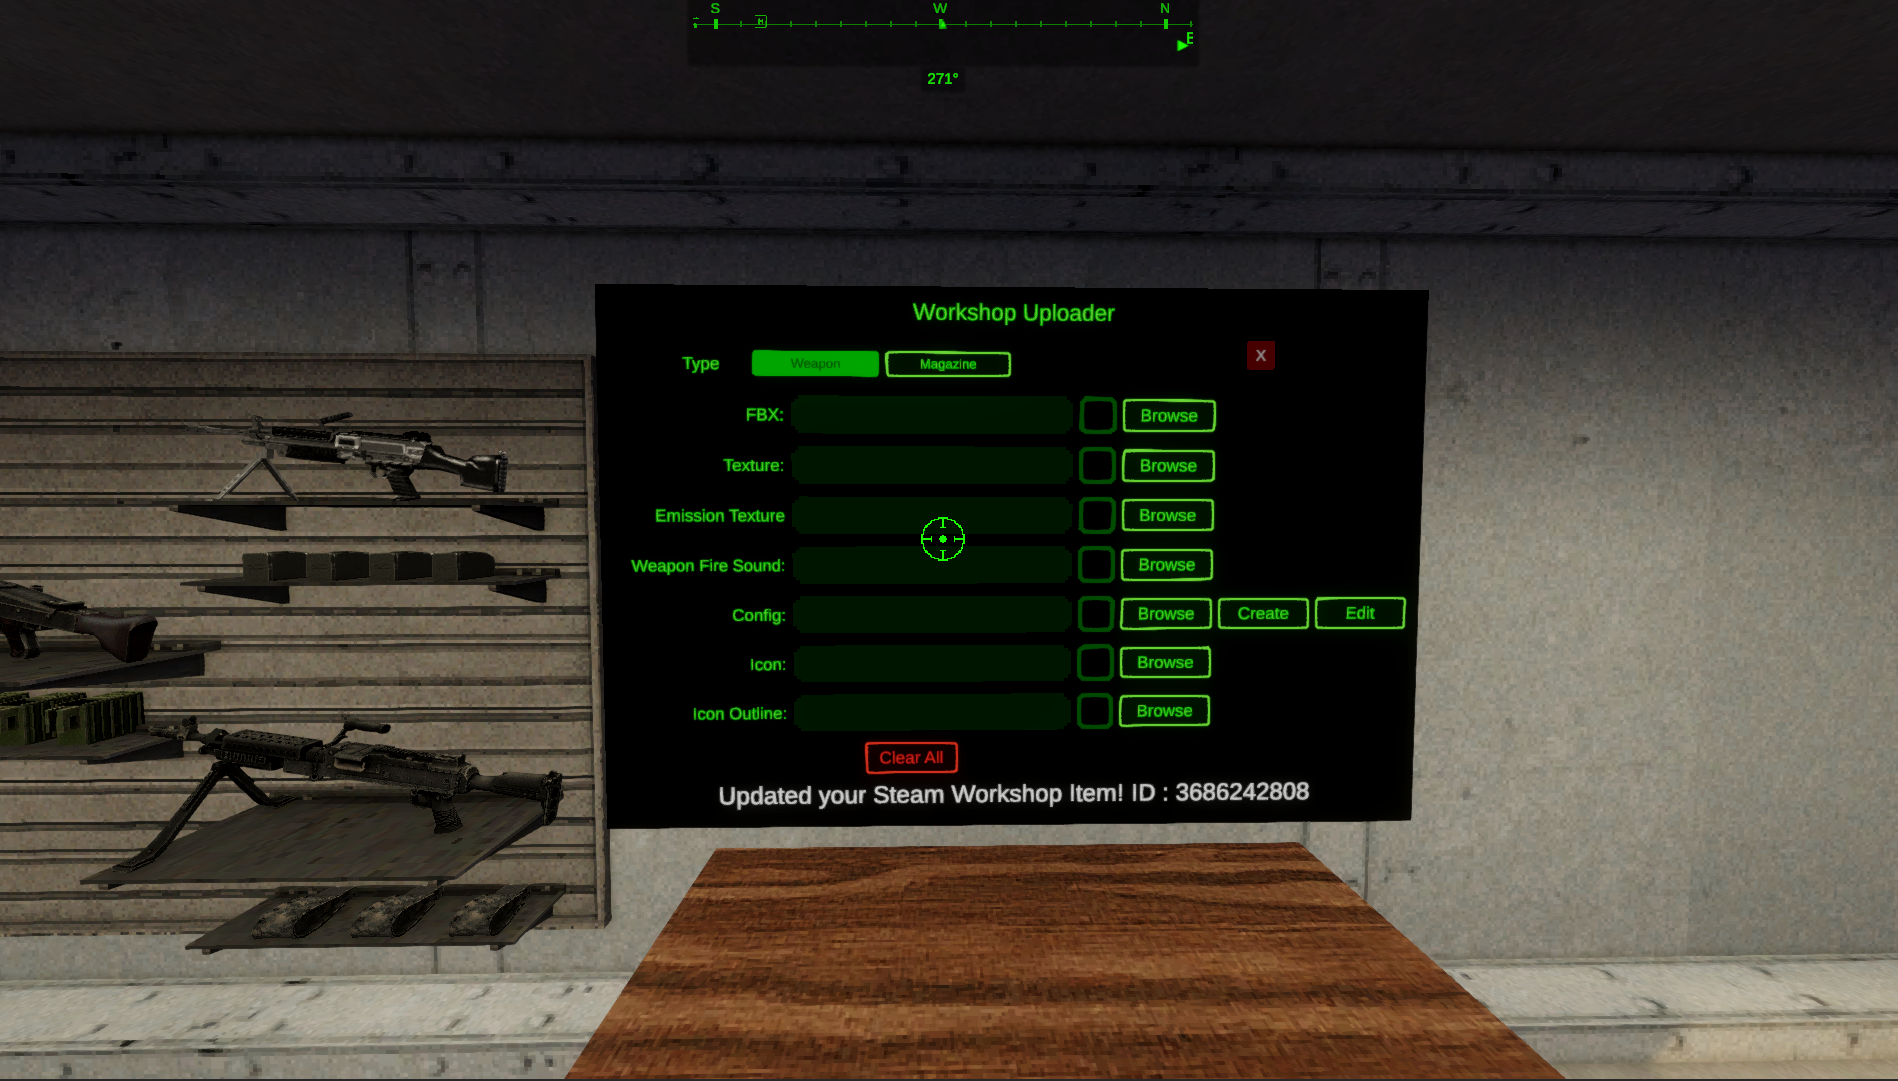
Now click the “Upload” button. Once the upload is complete you should see the “submitted” message and that the ID has been saved to the config file. If there are any issues it should display an error with what went wrong.
I’ve seen it take up to 15 minutes for a weapon uploaded to show up in the custom weapon browser so give it some time.
Update a Custom Weapon
The steps are almost exactly the same. The only difference is that you need to make sure that your ID in the config file matches your previously uploaded Weapon.
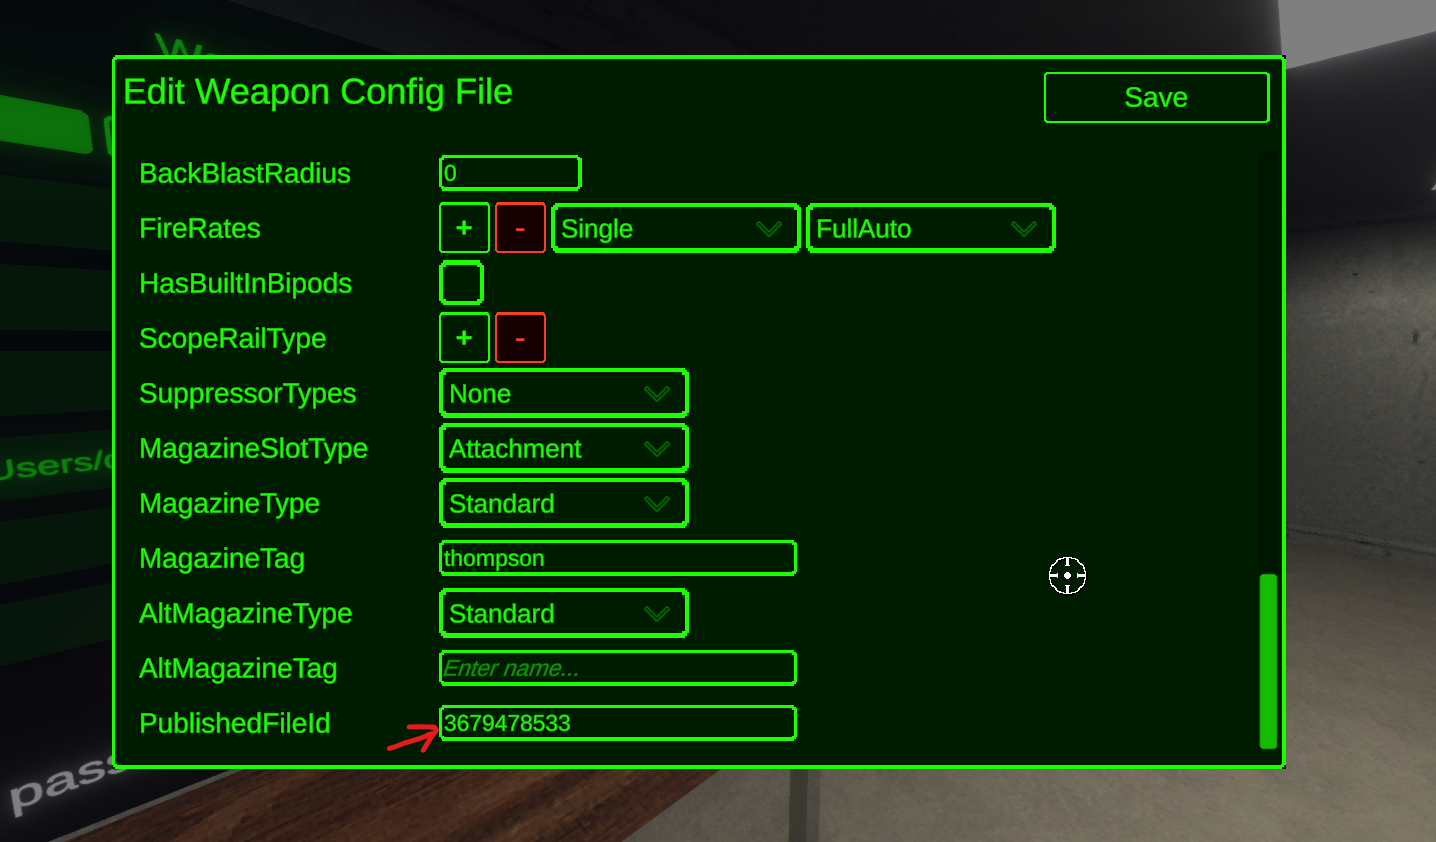
The ID is saved to the config file when you initially uploaded it. If you’ve lost that file, don’t worry you can find it by looking at the Steam Workshop page for your weapon. The ID is in the path.
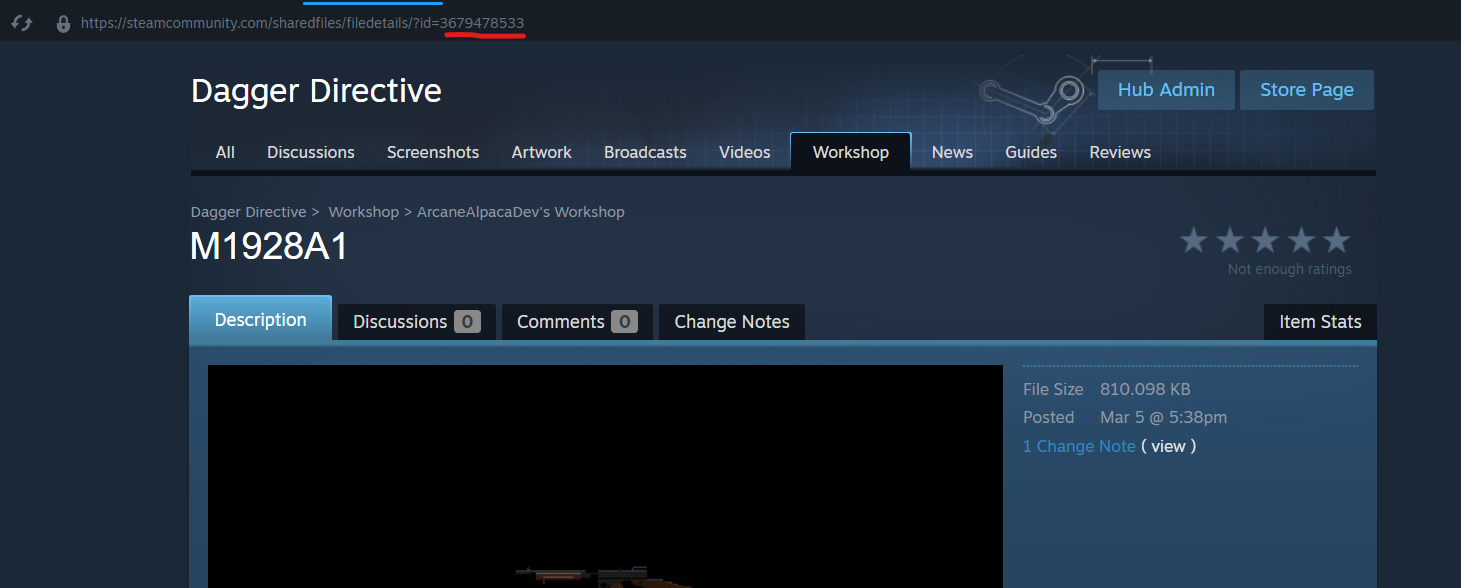
Next enter that ID into your Config File in the “PublishedFileID” Field.
From here the steps to update the weapon are exactly the same as the Upload. Make sure you assign all of the files. Click “Upload”. You should then see the “Weapon Updated” message!