Mission Item Information
Basic Settings
These settings are shared by most mission items.
Required - Marks an objective as needing to be completed for the mission to be considered complete. Not all objectives need to be required. Waypoints for example should be skipable so not marked as Required.
Auto Save On Complete - Once the player completes this objective the game will create an auto save point.
Display in Objective List - Enable if you want this objective to show up in the map screens list of objectives. This should mainly be used for required objectives so players know what’s left to be done in a mission.
Display Settings
These will be enabled if you turn on “Display In Objective List”.
Title Localization Data - This will be the title displayed in the map screen for this objective.
Description Localization Data - This will be the description text displayed in the map screen for this objective.
Objective Order
These settings will help you manage the flow of the mission.
First Objective - Marks this objective as being the first one in the mission. This is import to set, but only set it on one objective.
Next Objectives - Sets what the next objective or objectives after this one are. This is used to control flow and display objective lines on the map screen. You can have multiple/branching objectives. You can also create dead ends. Check out the destroy objective in the sample scene. There’s a Dialogue item and all it does is play the dialouge when the Destroy objective is complete.
Individual Objectives Overview
Now we’ll go through the settings on each item.
Destroy Objective
“Assets/Prefabs/MissionItems/mission_item_destroy”
Marks an area on the map as a destroy objective that requires the players to eliminate all entities of a certain type or types within the area. These are used for most of the objectives in the game. Destroy weapon caches, eliminate all enemies, eliminate the commander, and destroy convoys are a few examples. Once it gets down to the last three targets they will show up on the map.
The area is marked by a red sphere in editor.
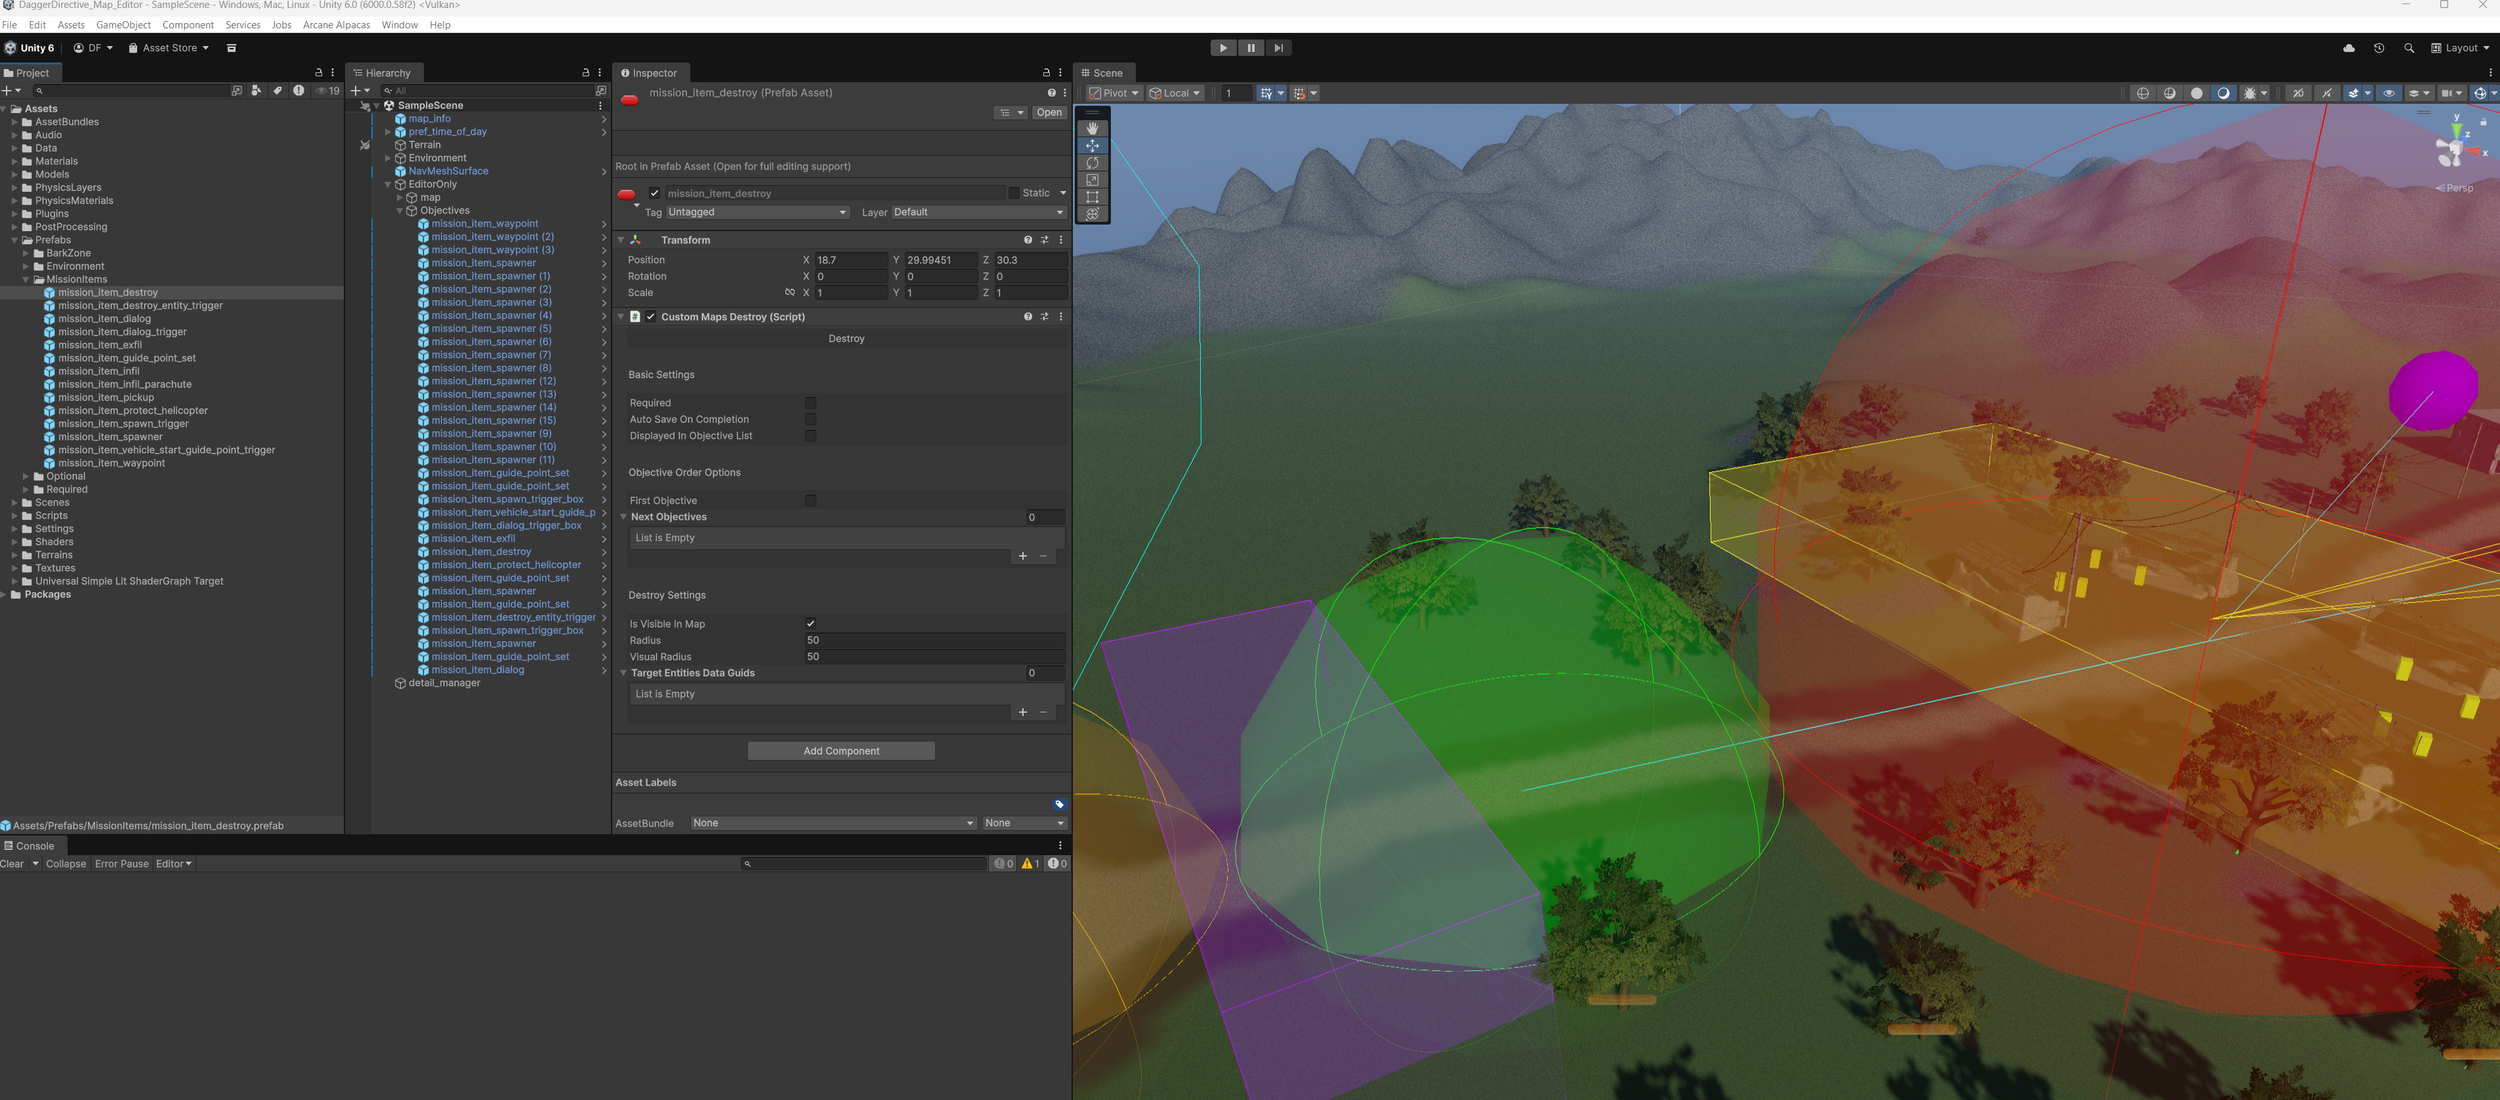
Is Visible In Map - Toggles the map circle on and off. This is useful for targets that may move over a large area.
Radius - The target radius.
Visual Radius - The radius that is displayed on the map. This will only show if “Is Visible In Map” is on.
Target Entities Data Guids - What entities in the are need to be destroyed for the objective to be considered complete.
Destroy Entity Trigger
“Assets/Prefabs/MissionItems/mission_item_destroy_entity_trigger”
Any entity of a given type will be destroyed if it enters this area. Usually used to destroy the helicopter after it drops off the player and flies off. Check out the SampleScene to see how it’s used there.
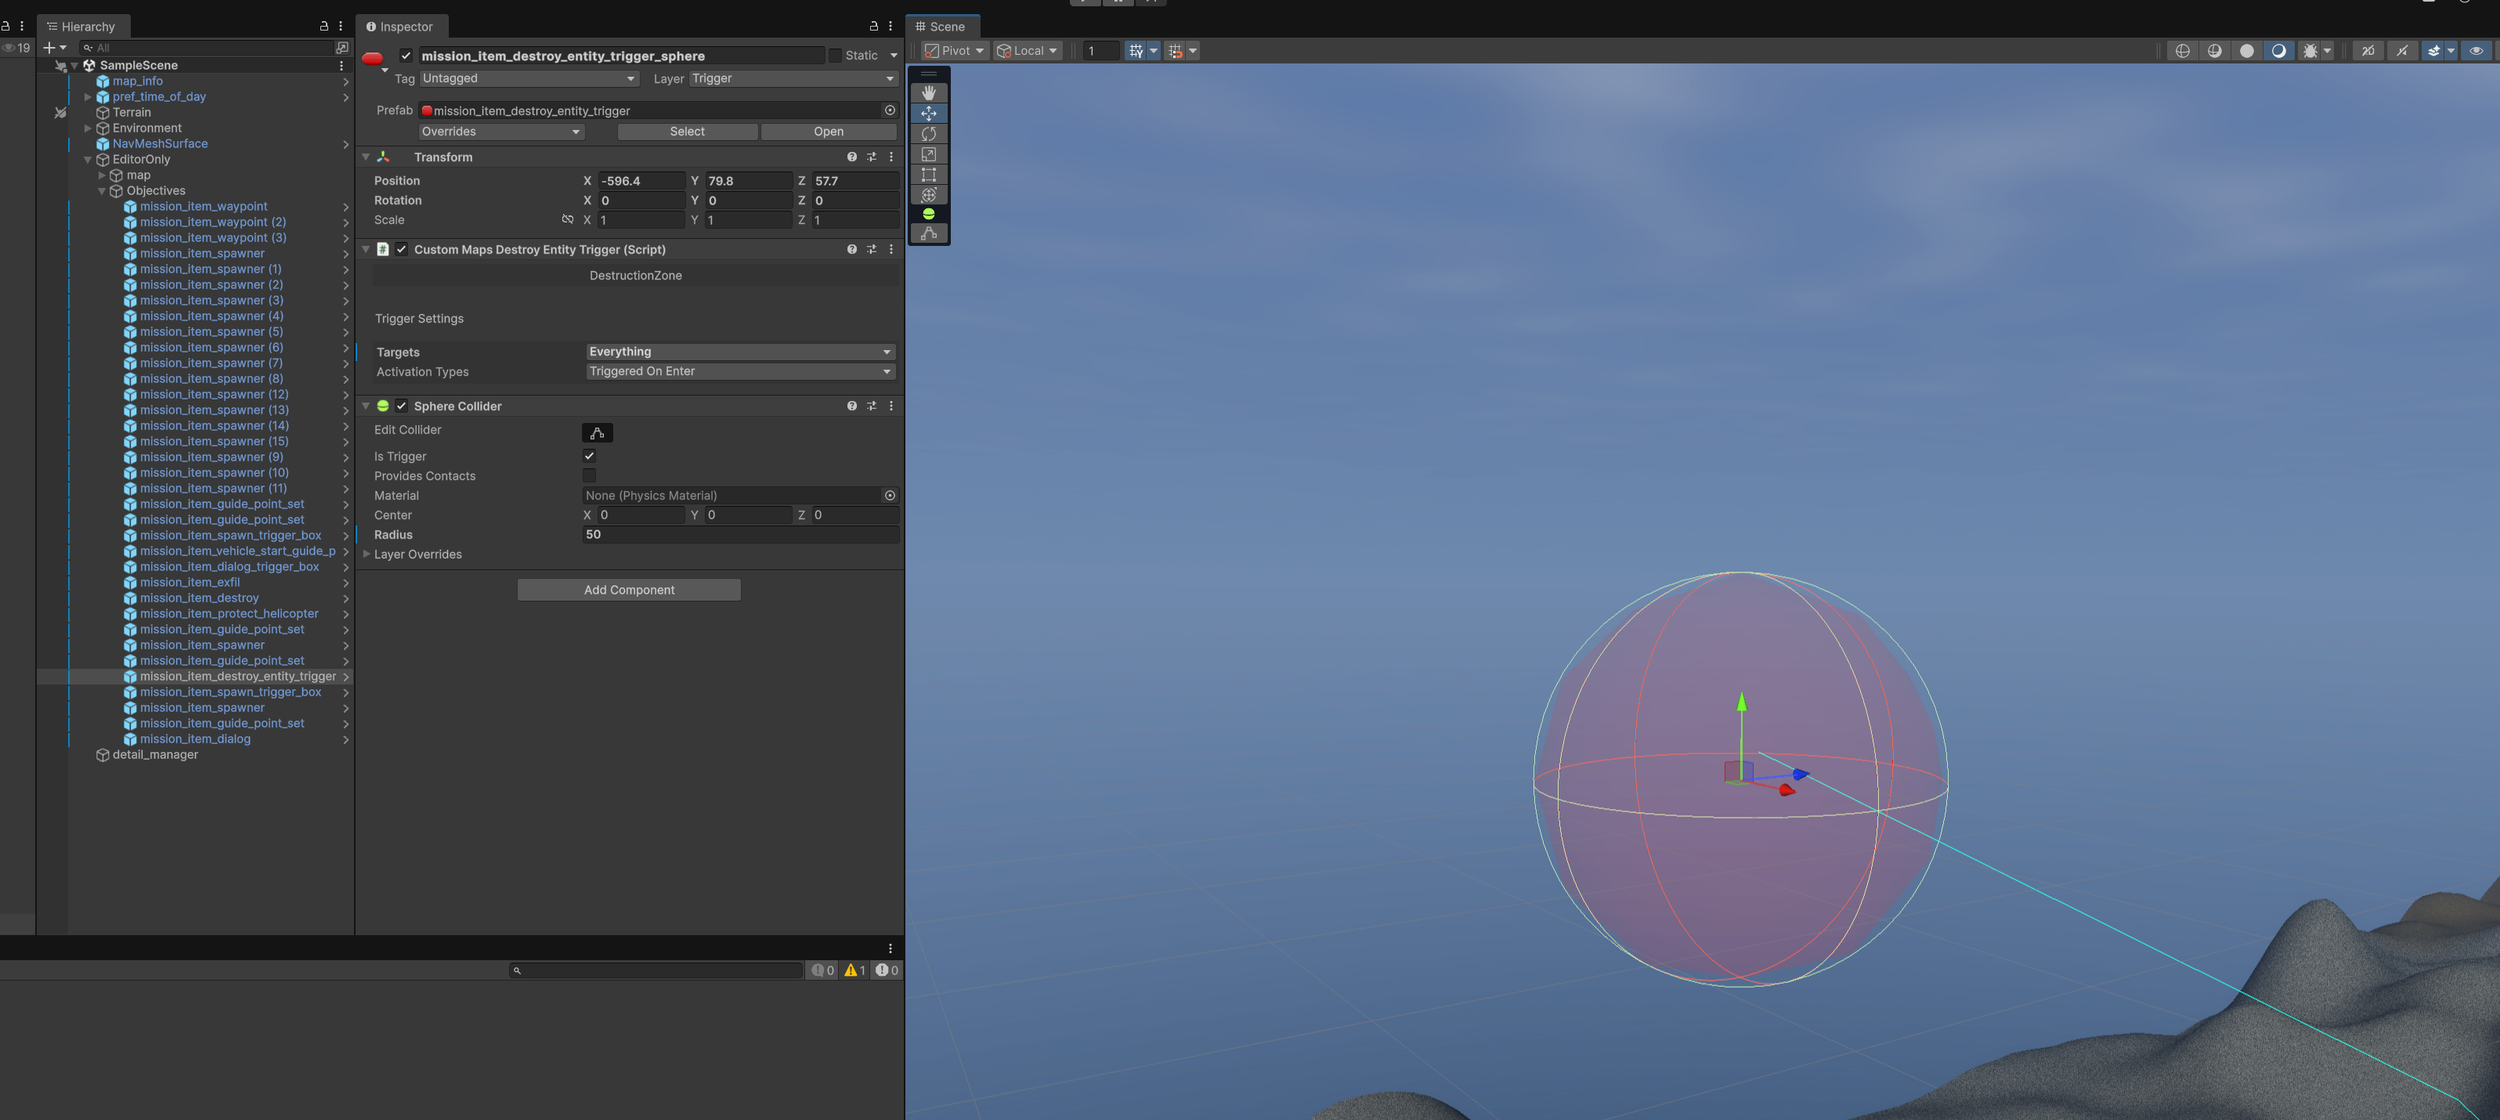
Targets - What type of entity should be destroyed
Activation Type - When should the entity be destroyed.
Triggered On Enter - Destroys the entity when it enters the trigger.
Triggered On Exit - Destroys the entity when it leaves the trigger.
Radius (in the sphere collider) - Sets the size of the trigger.
Dialogue + Dialogue Trigger
“Assets/Prefabs/MissionItems/mission_item_dialog”
“Assets/Prefabs/MissionItems/mission_item_dialog_trigger”
Plays a single or a series of dialogue text messages and audio. “mission_item_dialog” plays the messages when the objective is activated by a previous objective getting completed. The Destroy objective in the Sample scene has an example of this.
“Assets/Prefabs/MissionItems/mission_item_dialog_trigger” will play a message when the player enters the trigger. This is used along with spawn triggers to warn the player or to play messages as a player approaches an objective.
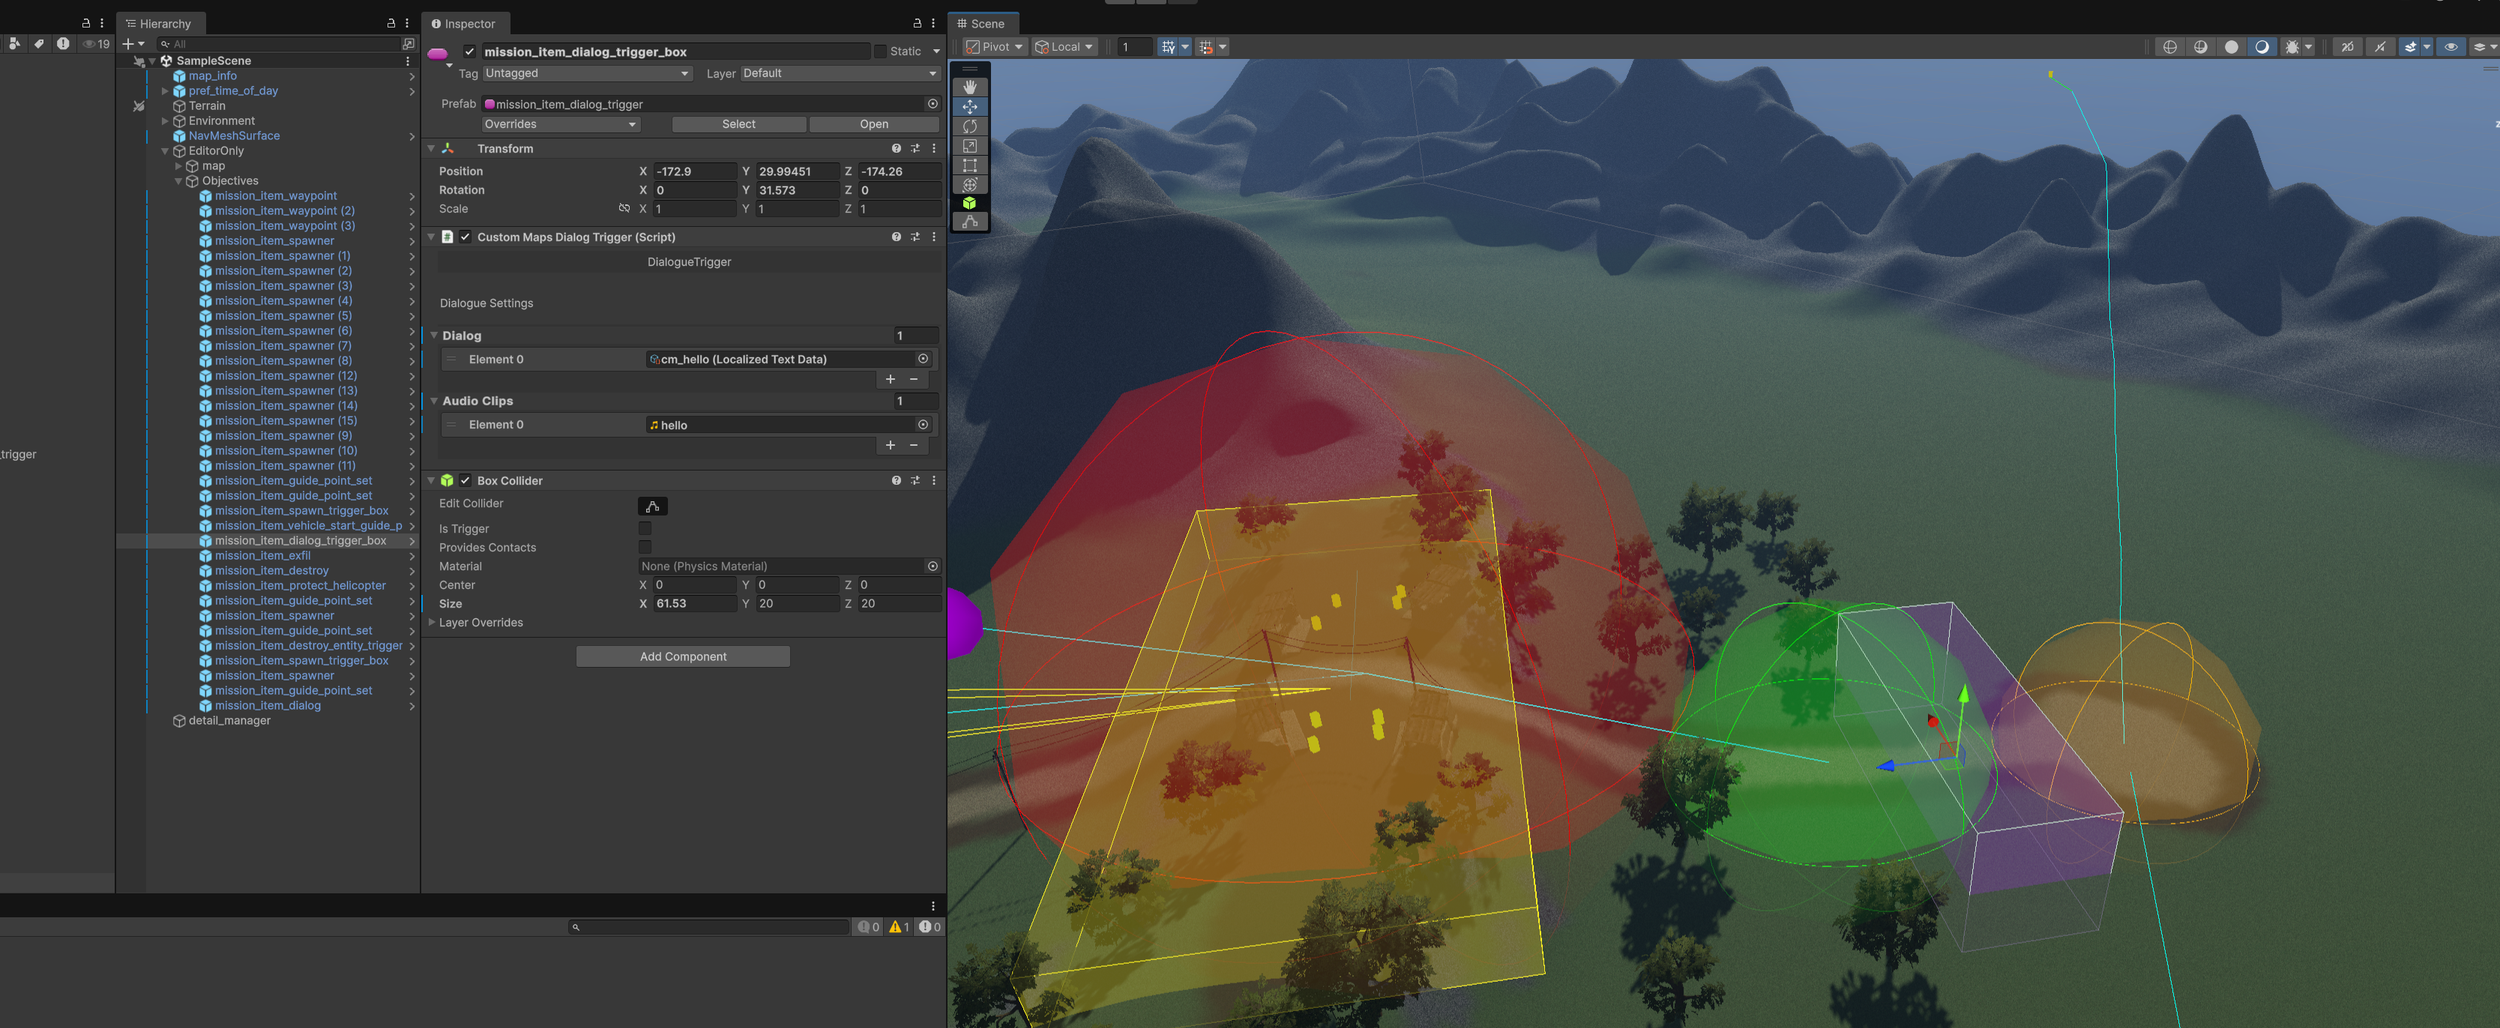
Dialog - Place the localized text assets that you want displayed here. You can play multiple messages in a row so use as many as you need.
Audio Clips - Audio that plays along with the message. These are not required.
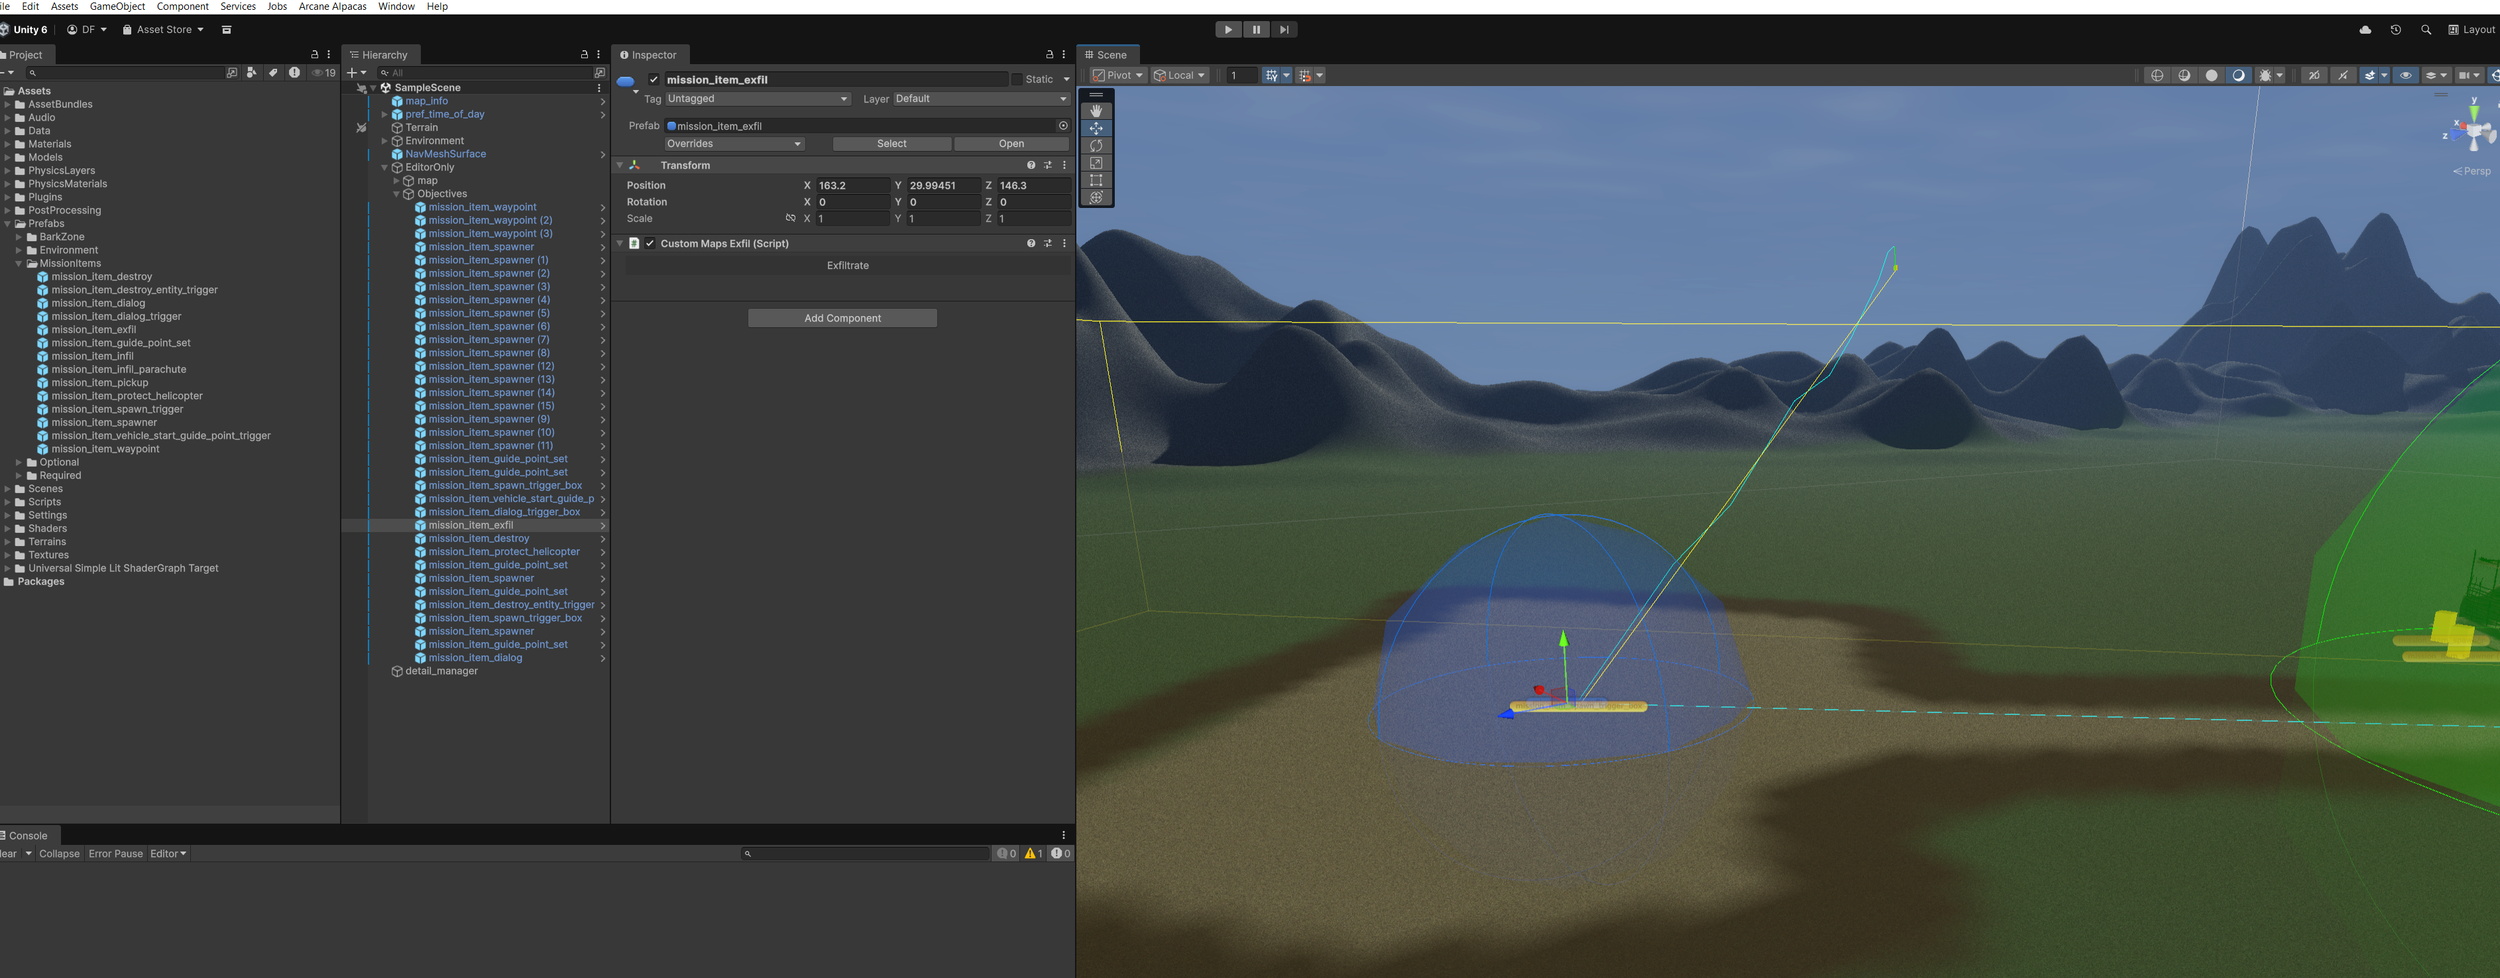
Exfil
“Assets/Prefabs/MissionItems/mission_item_exfil”
This is a simple map marker that is displayed on the map to let the players know where the helicopter will land. Just place it at the evac helicopters landing zone. Players will still need to board the helicopter to complete the mission.
Guide Point Set
“Assets/Prefabs/MissionItems/mission_item_guide_point_set”
Used to move vehicles around or set up enemy patrols. A visual editor will appear in the scene view to make it easier to place and edit the waypoints.
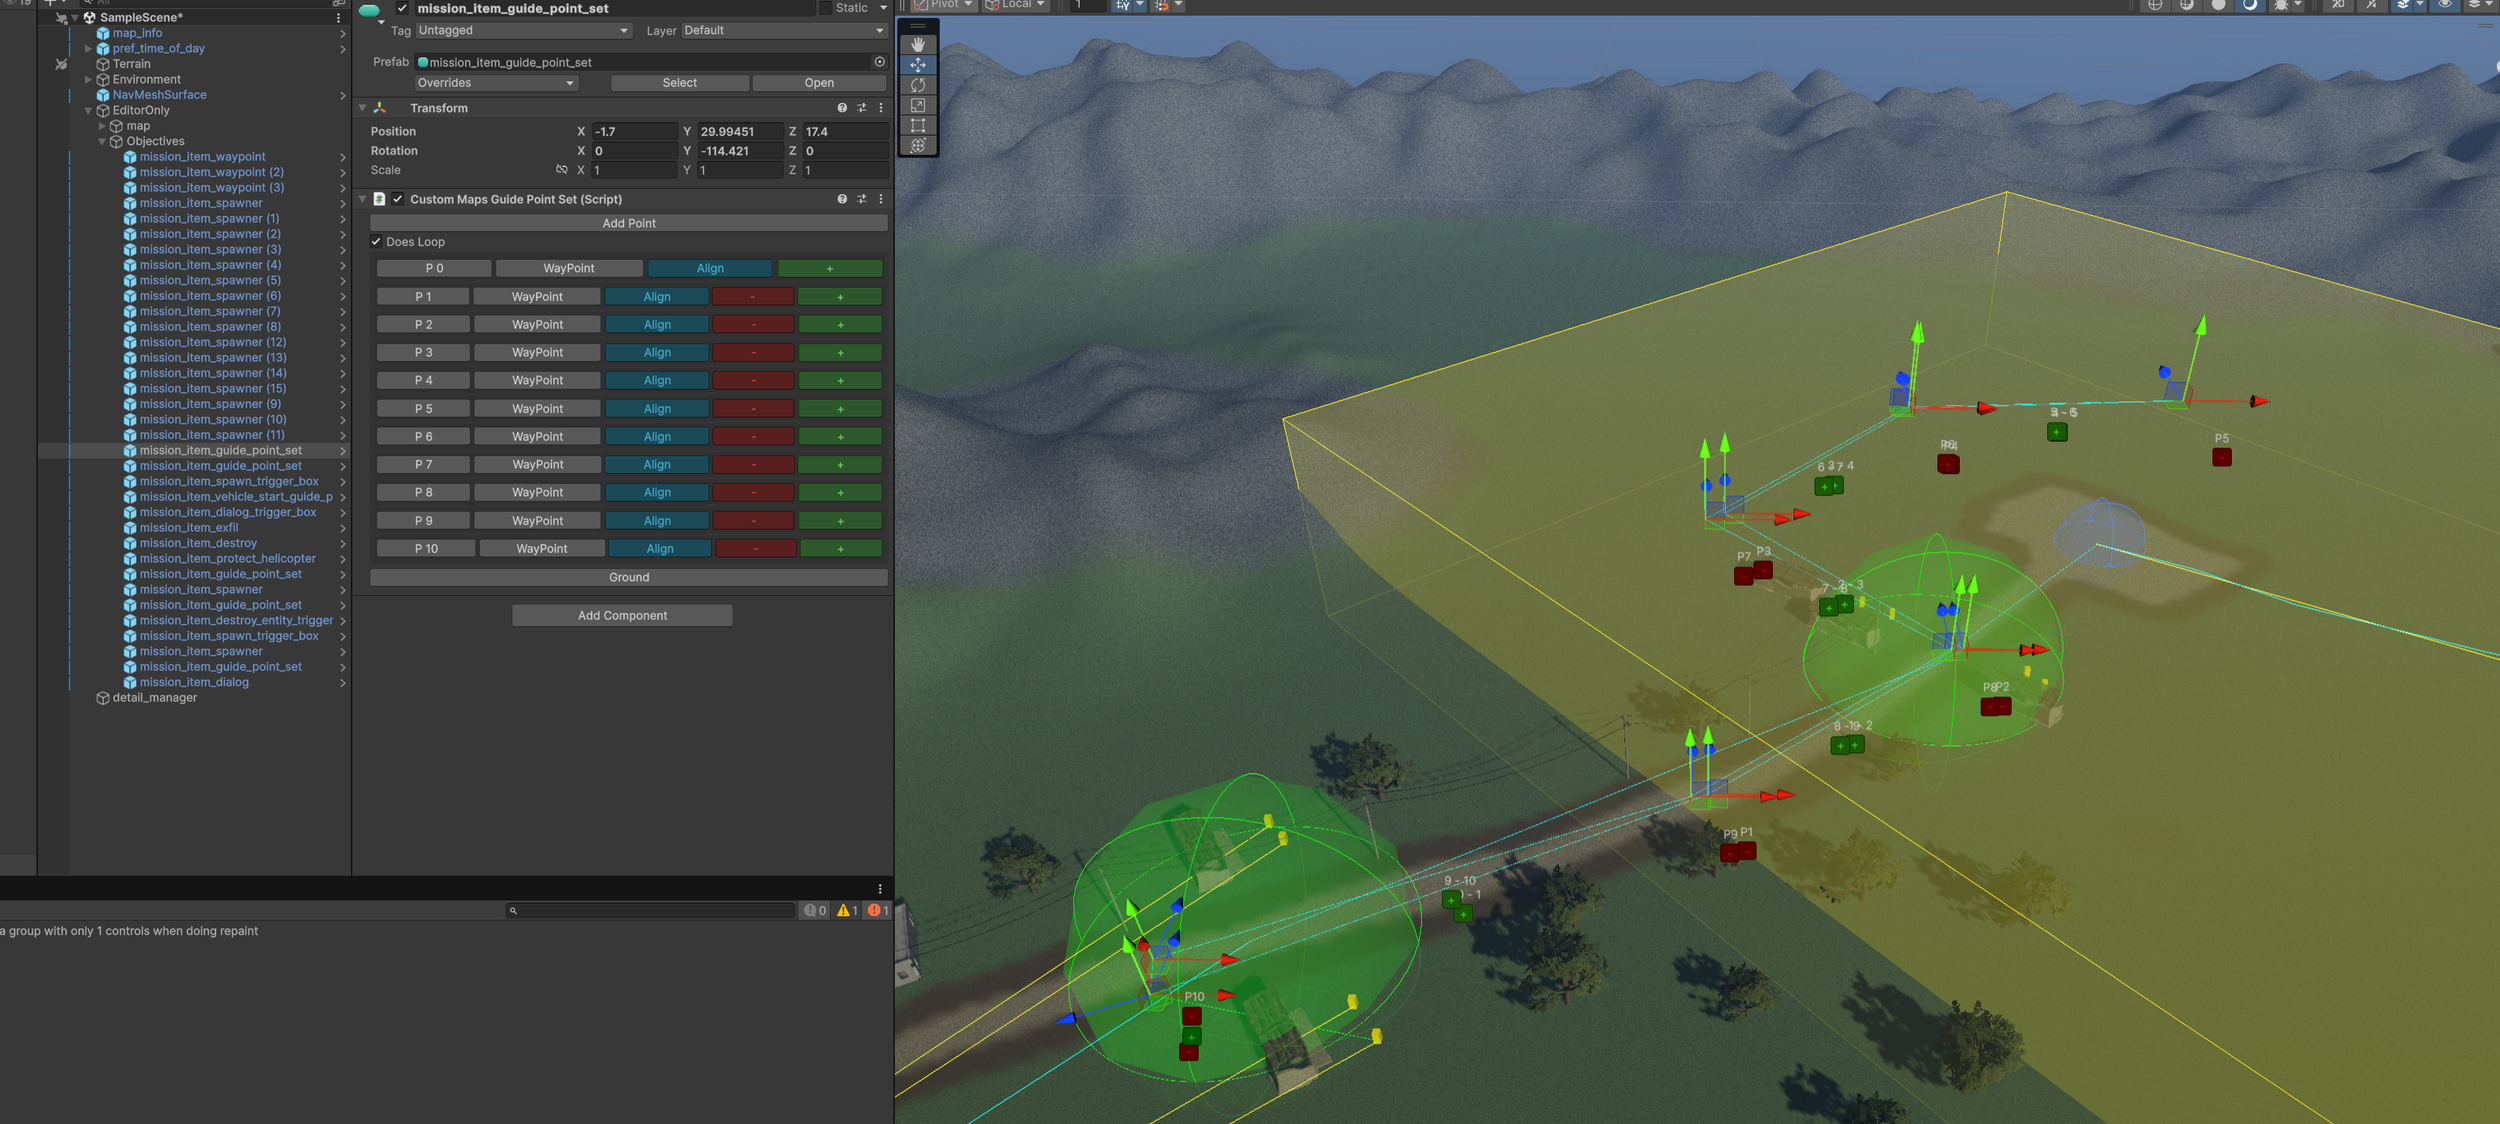
Add Point - Adds a new point at the end of the current list.
Ground - Attempts to snap all the points to the ground. This is useful in uneven terrain.
Does Loop - If enable the entity will move back to the first point after reaching the end. If it’s not checked the entity will just stop and start to wander around the final point.
Controls
“+” - Adds a point after the selected point. In the scene view it will add an in between point.
“-” - Deletes a point.
Gizmo - Lets you move individual points around.
Point Types
Waypoint - Simple waypoint used for AI characters.
Waypoint_speed - Used for helicopters and ground vehicles. Tells the vehicle how fast it should be moving when reaching the point. In Meters per second.
Start Land - Used for helicopters. When it reaches this point the helicopter will slow down as it moves towards the last Land point.
Land - Used for helicopters. Tells the helicopter where it needs to stop.
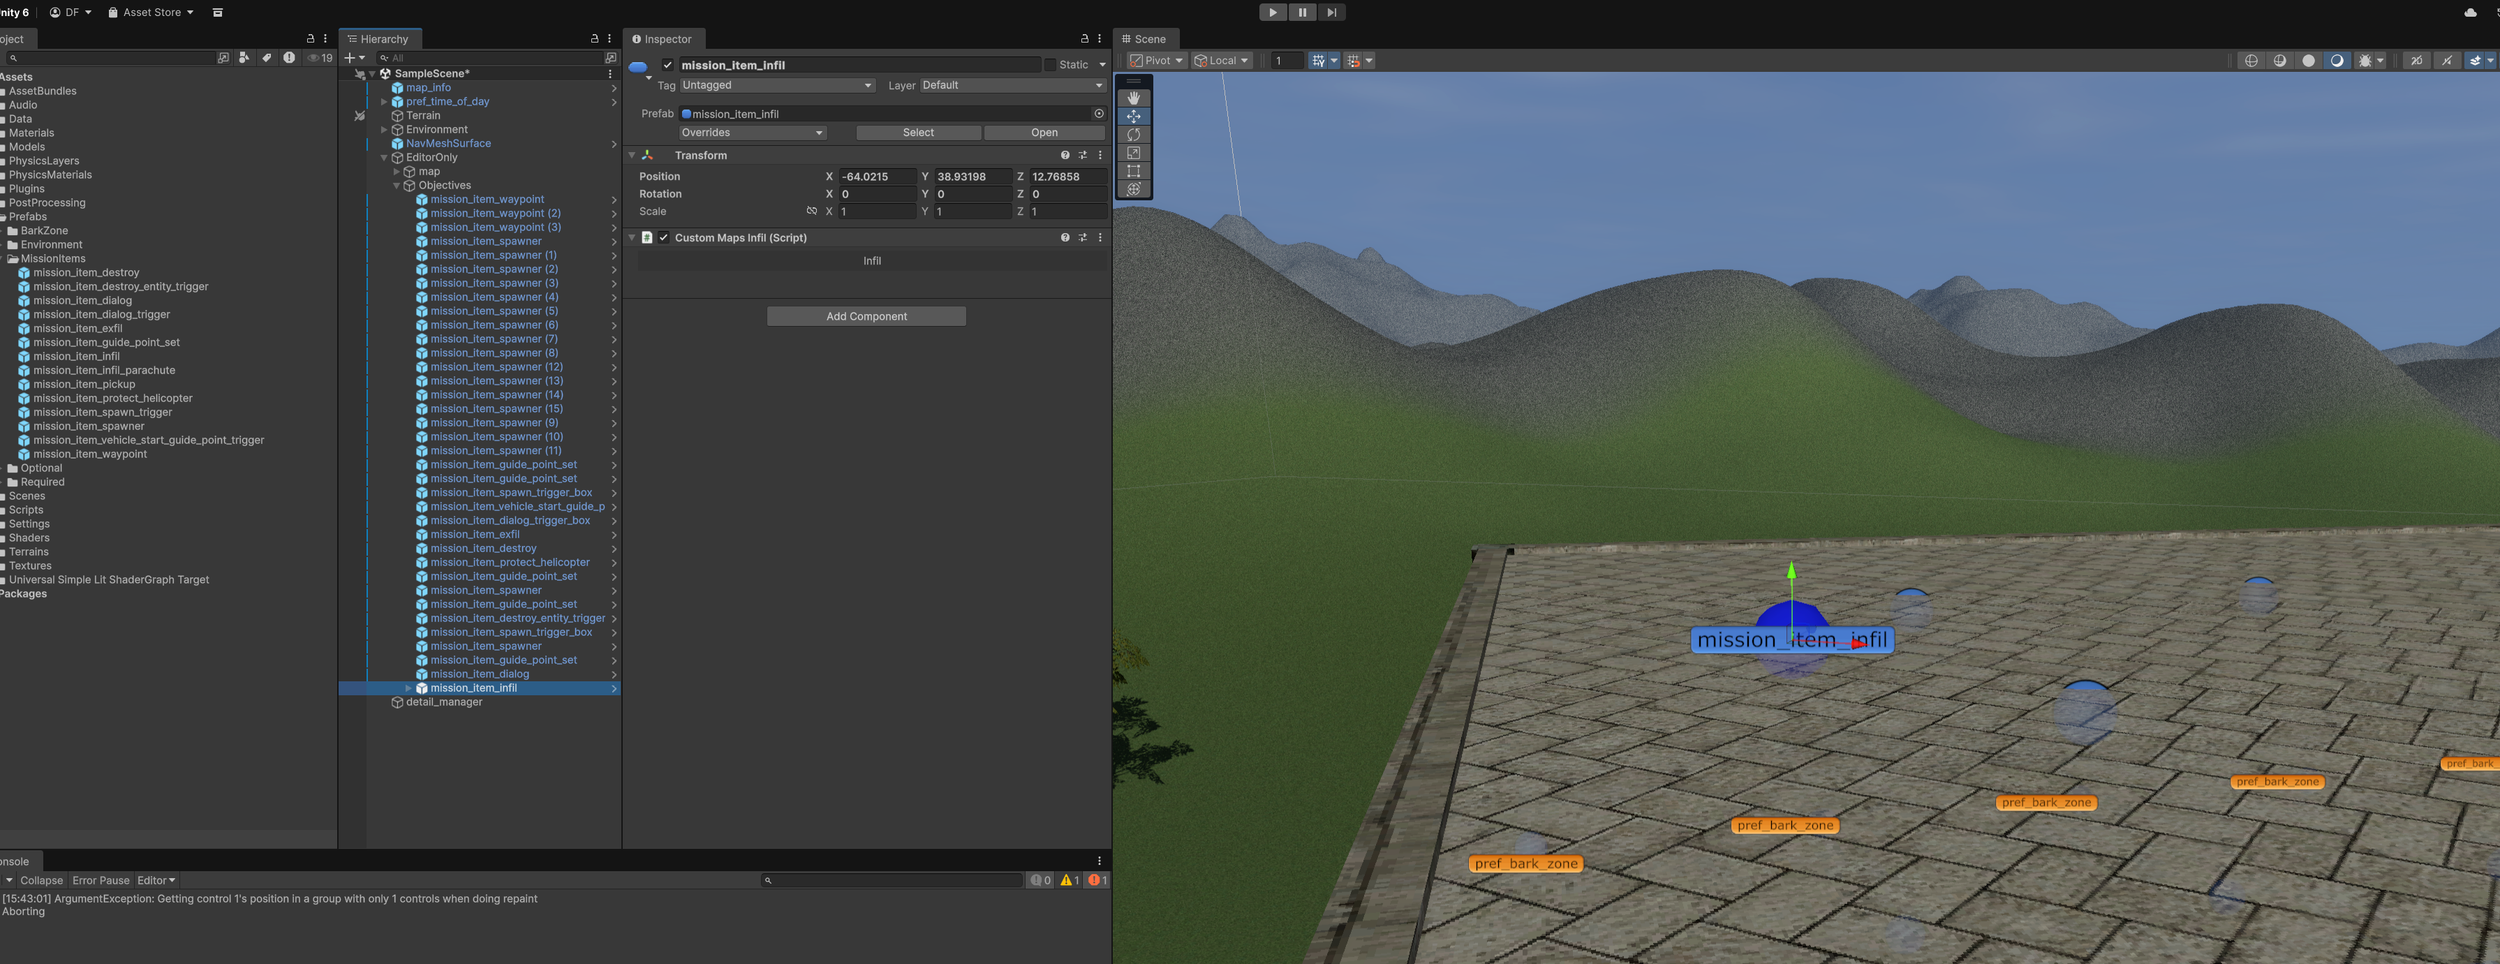
Infil and Infil Parachute
“Assets/Prefabs/MissionItems/mission_item_infil”
“Assets/Prefabs/MissionItems/mission_item_infil_parachute”
Marks where players will spawn into the mission. If you want them riding in on a helicopter then these are not needed. Infil will just spawn the player at the point. Infil Parachute will spawn the player and enable their parachute. Place it high off the ground but keep in mind the players move when parachuting in.
Pickup Objective
“Assets/Prefabs/MissionItems/mission_item_pickup”
This objective requires the player to pickup and hold onto a pickup to complete it. This is used in the tutorial and in the missions to find laptops.
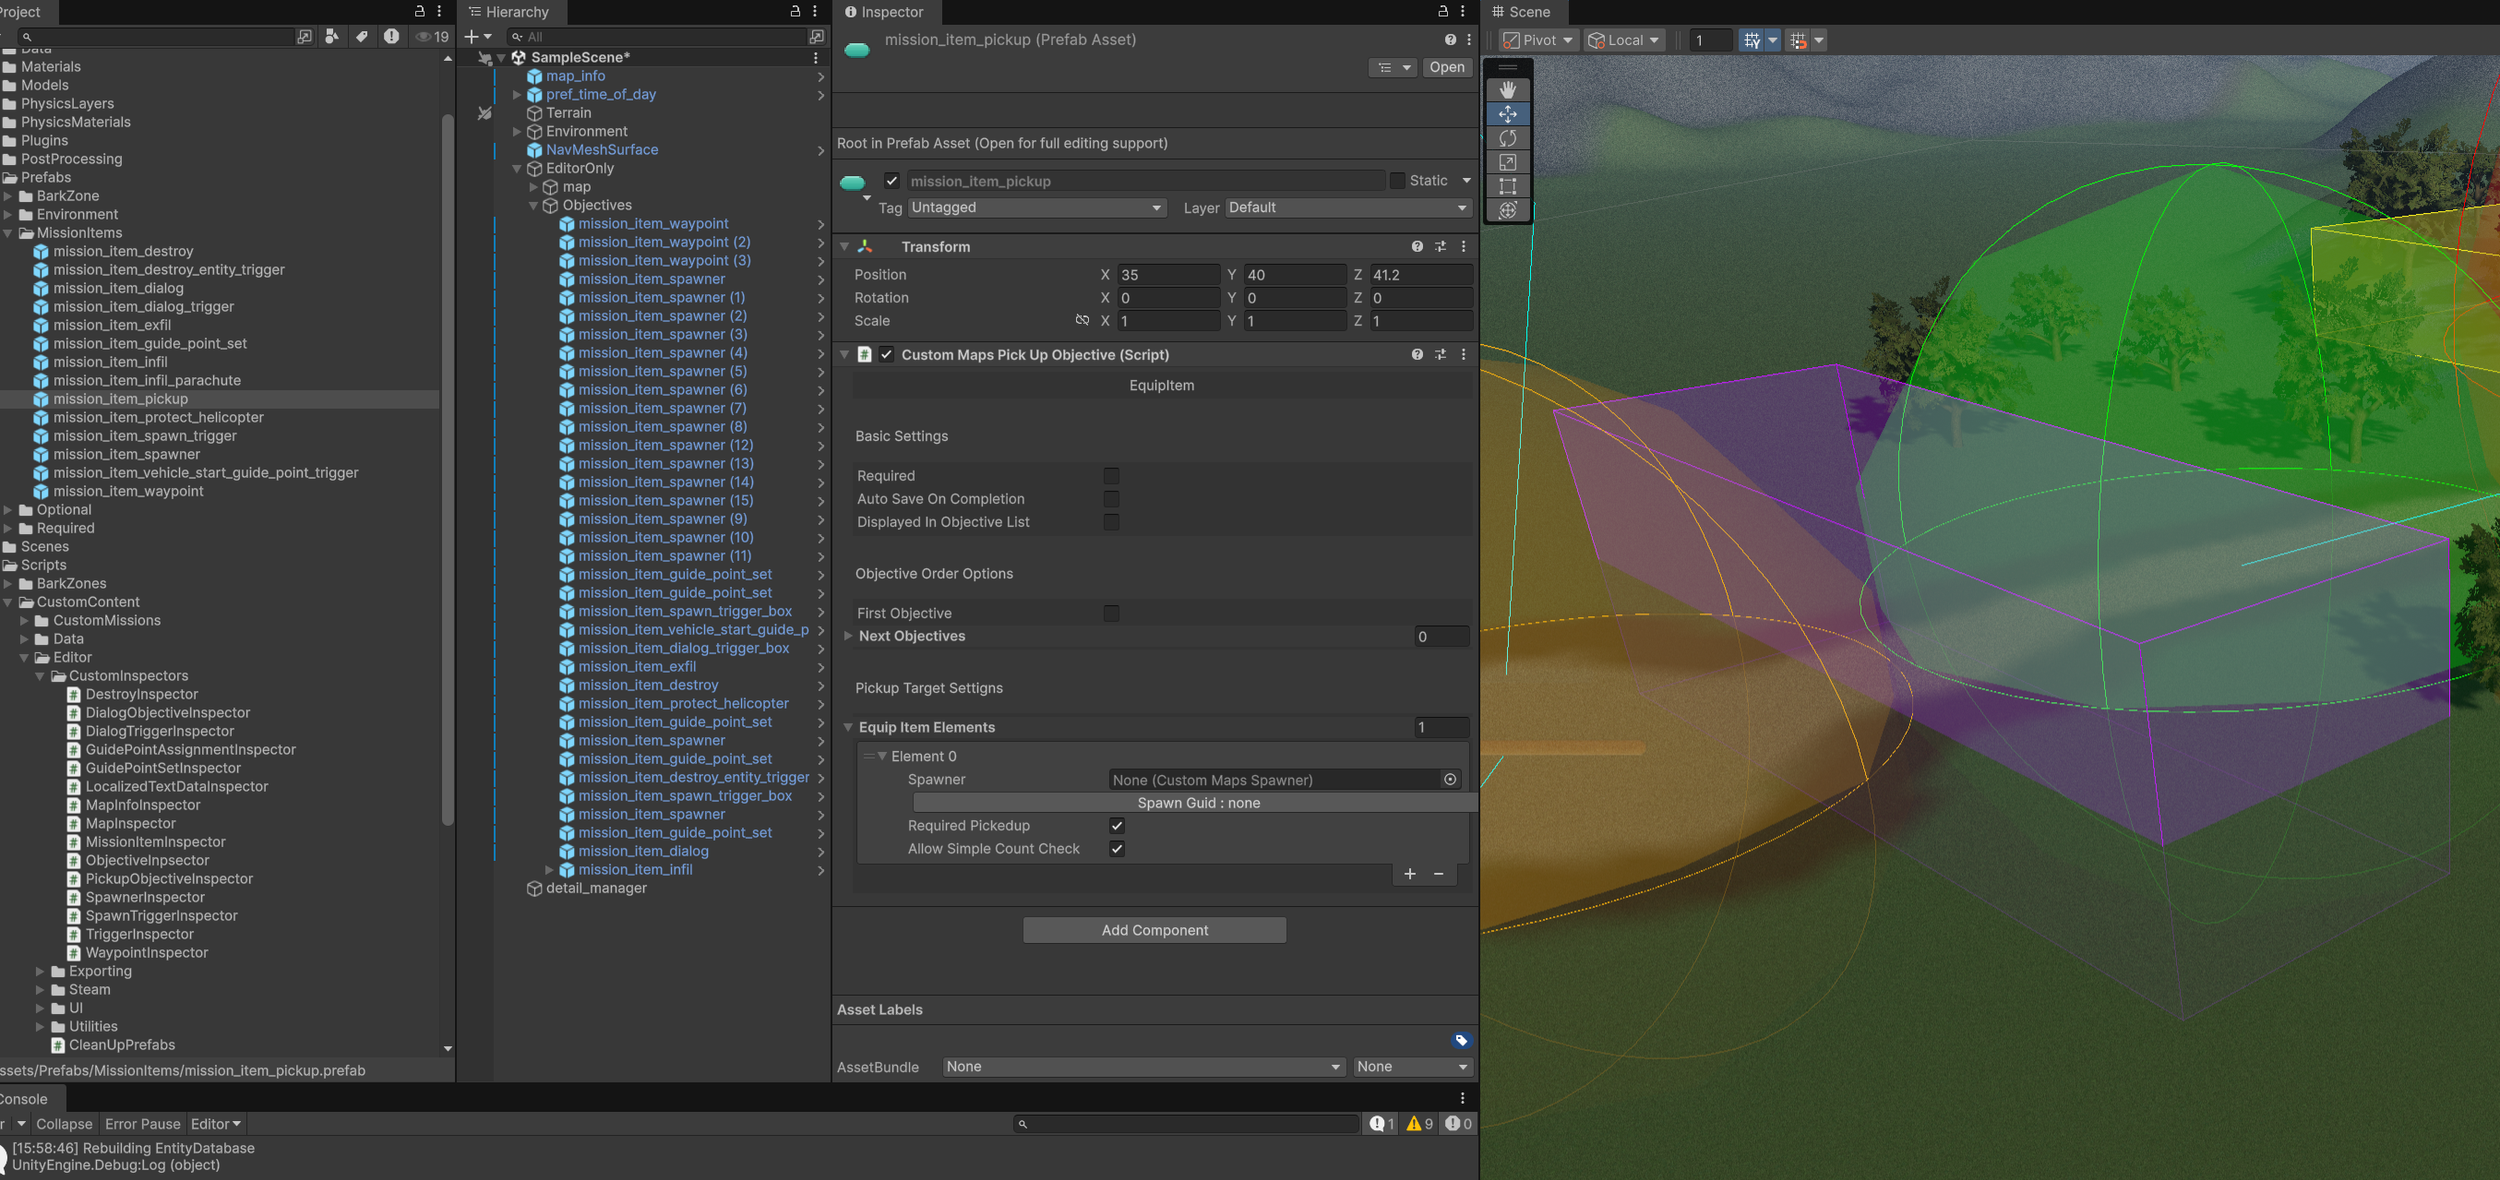
Equipment Elements - Sets what needs to be picked up.
Spawner - Ties the pickup to a specific spawner. Whatever spawns is what the player will need to pickup. Make sure it’s something that can be picked up.
Spawn Guid - Ignore this, it’s only used to save a link to the spawner.
Required Pickup - Setting true means this pickup must be picked up to complete the objective. Usually leave this true. The only place it’s optional is in the tutorial for some magazines.
Allow Simple Count Check - If true then any pickup of this type from any spawner will compete the objective. Set to false to require players to pickup the specific item from the spawner.
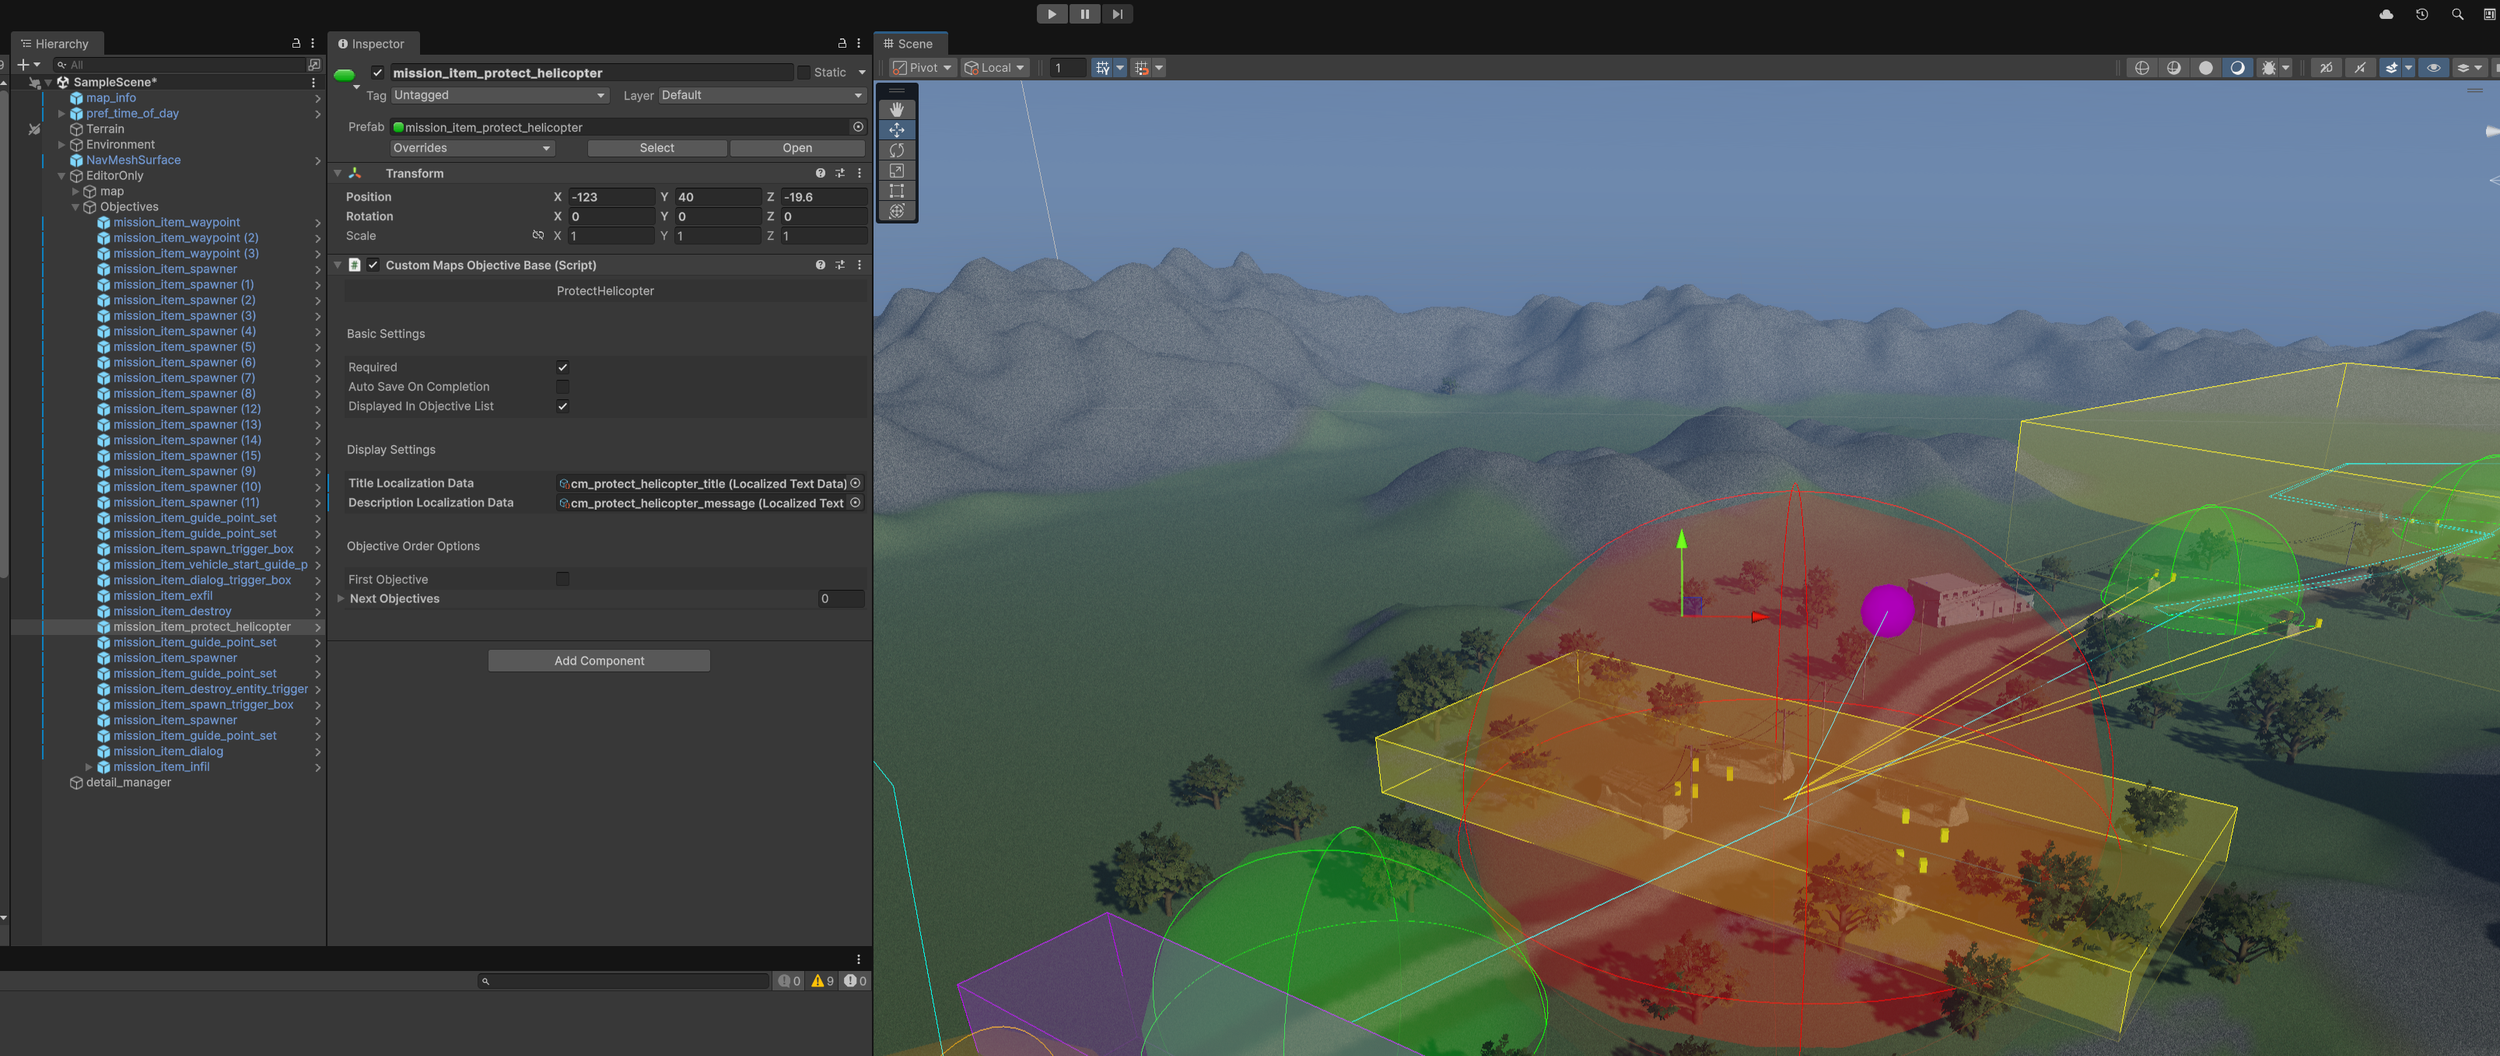
Protect Helicopter
“Assets/Prefabs/MissionItems/mission_item_protect_helicopter”
This objective doesn’t need to be hooked up to anything. Simply place it in the scene. It only tracks any friendly helicopter that is destroyed and causes the player to fail the mission. It’s optional so you don’t need to add it if you don’t want to.
Spawn Trigger
“Assets/Prefabs/MissionItems/mission_item_spawn_trigger”
Allows you to set up spawners to spawn when a player enters a trigger. Good for setting up triggered events when a player gets to a specific point. It’s used in the Sample Scene to spawn additional enemies and to spawn the evac helicopter.
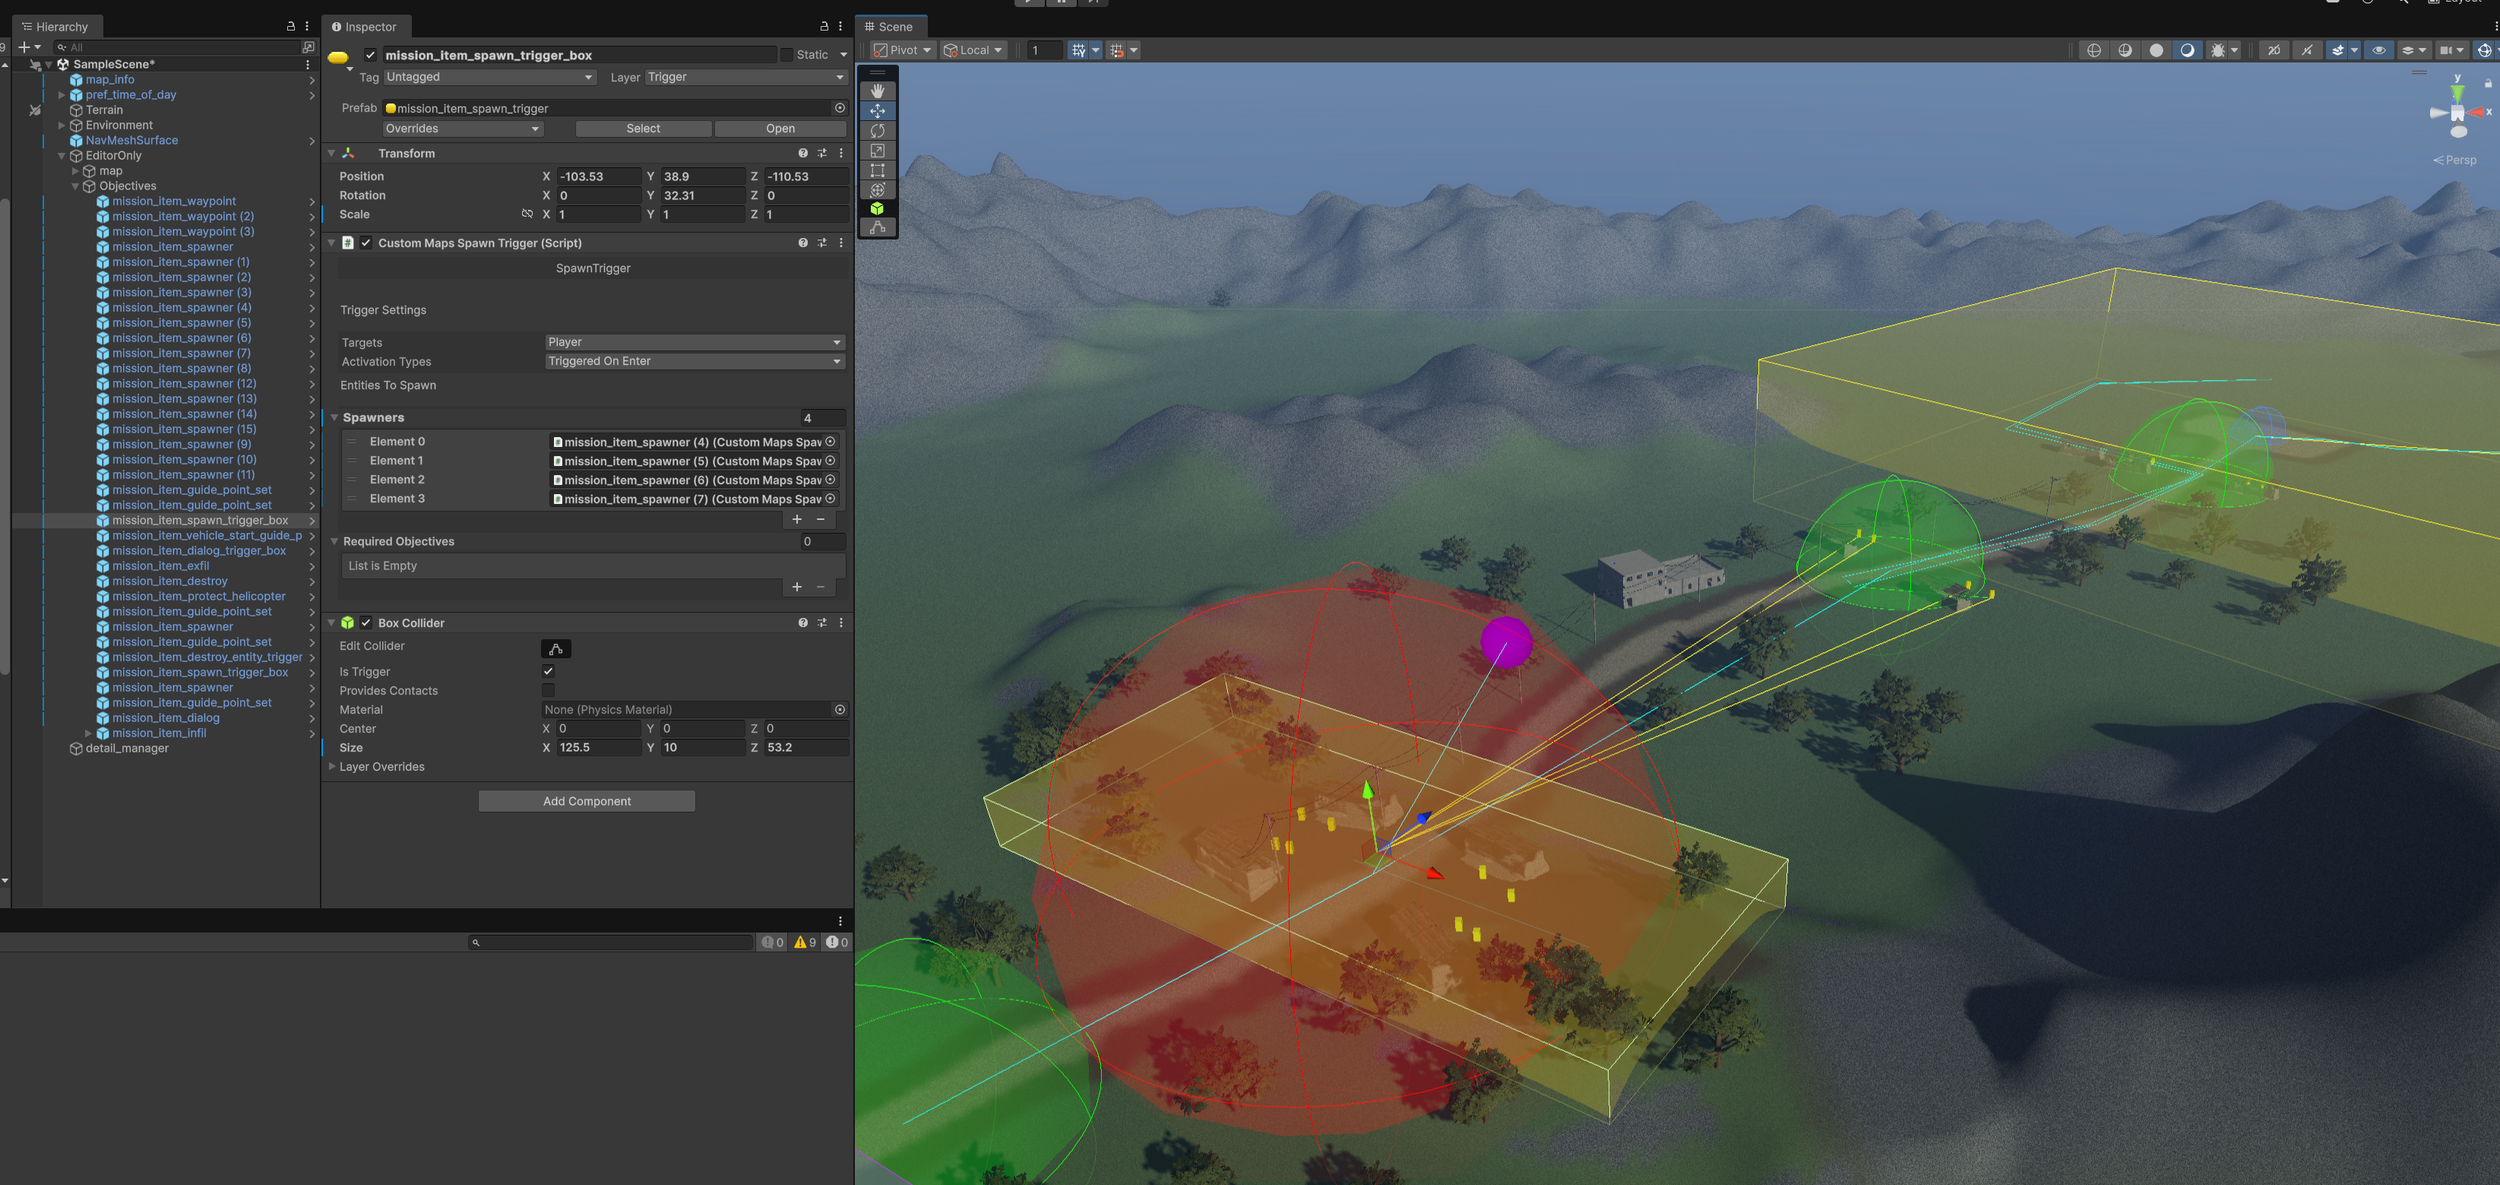
Targets - Who triggers the spawners.
Activation Types
Triggered on Enter - Activates when the target enters the trigger.
Triggered On Exit - Activates when the target leaves the trigger.
Spawners - Which spawners will spawn when the item is triggered.
Required Objectives - Will not activate unless the objectives in this list have been completed. This is optional.
Spawner
“Assets/Prefabs/MissionItems/mission_item_spawner”
Spawns an entity at the location of the spawner. There are various settings you can apply to change the spawners behaviour. These are used everywhere to spawn enemies, weapons, and even mortar strikes.
Entity To Spawn - What will spawn here.
Spawner Type
Start - Spawns at the start of the mission
Triggered - Waits until a connected spawn trigger activates
Allow refresh - Respawns when the item is moves, picked up, or destroyed. This is tied in with the “Tracks Moves” and “Respawn if Destroyed” settings.
Re-spawn Delay - How long from the refresh getting triggered will a new entity spawn. In seconds.
Track Moves - If true moving the item counts towards the refresh.
Respawn if Destroyed - If true and the entity dies or gets destroyed it will start the refresh.
Guide Point Set - Sets the guide point set to the entity when spawned. This is used for vehicles and characters to start patrols. Check out the sample scene for an example of this.
Vehicle Start Guide Point Trigger
“Assets/Prefabs/MissionItems/mission_item_vehicle_start_guide_point_trigger”
This just transfers a vehicle from one guide point set to another. This is mainly used to have the helicopter take off again after dropping off players. Take a look at the sample scene to see how it’s used there.
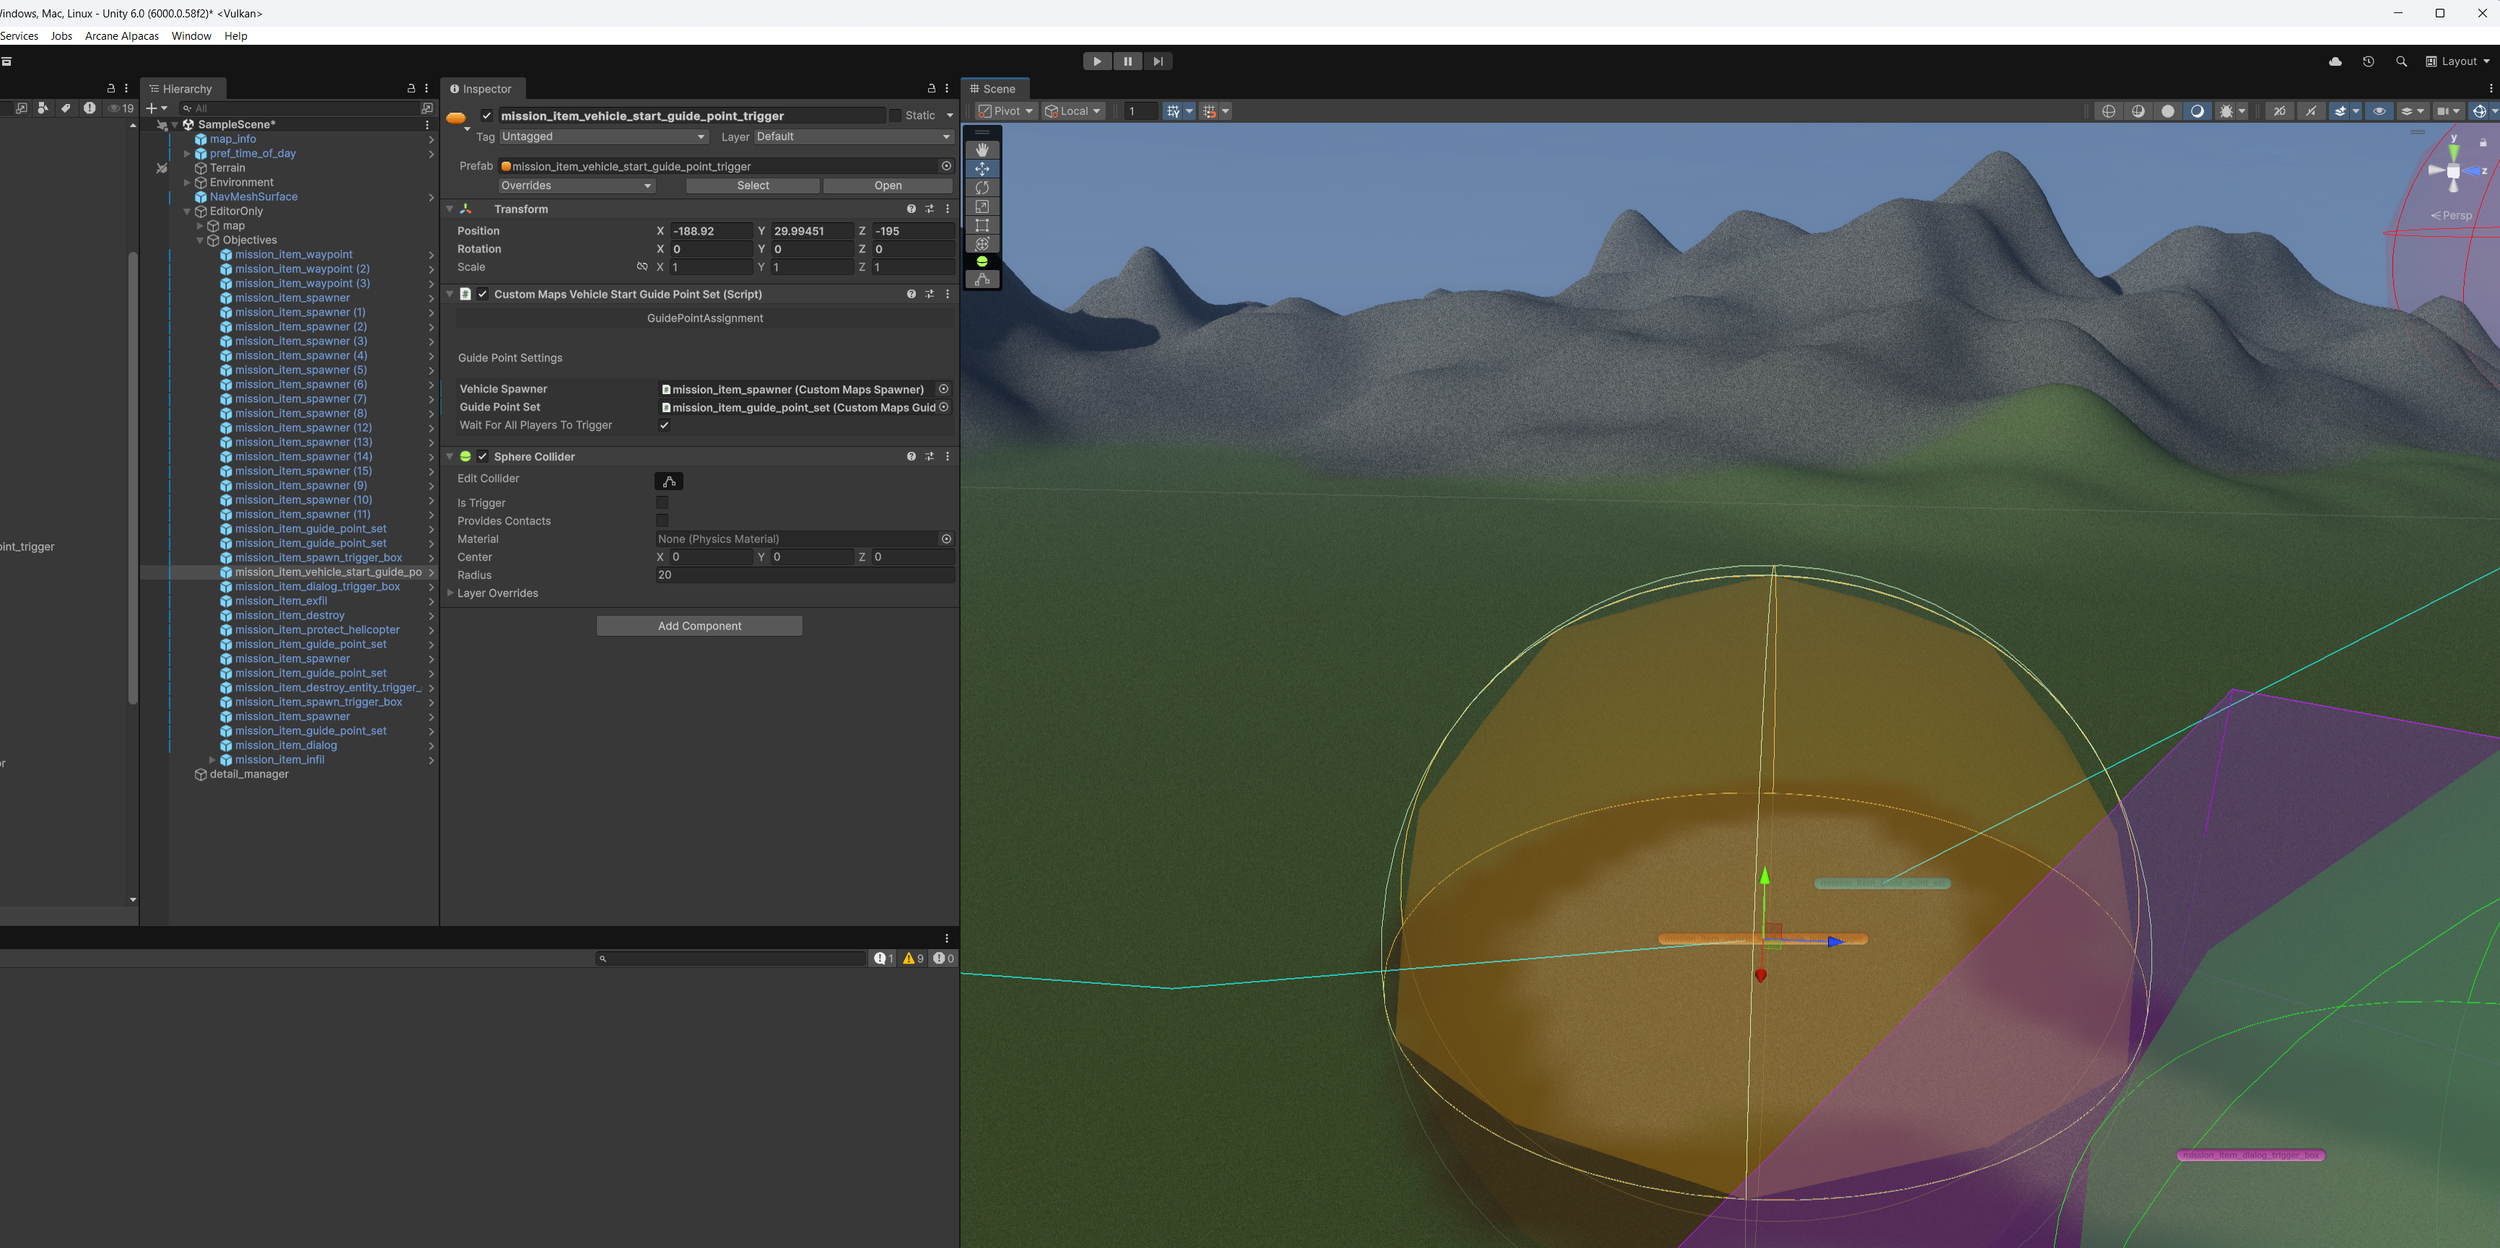
Vehicle Spawner - The spawner of the vehicle that you want to be redirected to the new guide point set.
Guide Point Set - The new guide point set for the vehicle to start following.
Wait for All Players To Trigger - This is useful for the initial spawning area. It keeps the helicopter from leaving before all the players leave the area.
Radius (in the sphere collider component) - The area for the trigger. It triggers on exit so make sure the area is sized properly.
Waypoint
“Assets/Prefabs/MissionItems/mission_item_waypoint”
A simple check point that is useful for showing the intended, but not required, path for players to follow. These are normally not marked as Required.
Radius - The size of the waypoint. It will complete as soon as a player is within this range.